

If you've never made ghee at home, you're in for a delicious surprise-it's easier than you think, more affordable than store-bought, and the flavor is unbeatable. Ghee is shelf-stable, lactose-free, and perfect for high-heat cooking, making it a go-to for everything from sautéing to spreading to baking. Whether you're following an Ayurvedic lifestyle, cutting dairy, or just want to elevate your cooking with something rich and nutty, this homemade ghee checks all the boxes.
Ghee is clarified butter that has been gently simmered to remove water and milk solids, resulting in a golden, nutty, deeply aromatic fat.
Popular in Indian and Middle Eastern cuisines, ghee has a higher smoke point than regular butter and a longer shelf life-plus it's naturally free of lactose and casein, making it ideal for those with sensitivities. Think of it as butter, but upgraded.
Ghee is considered a superfood in Ayurveda-it's believed to promote digestion, lubricate joints, support mental clarity, and even nourish ojas (vital energy). However this is not traditional desi ghee, which is usually made using the bilona method, where curd (dahi) is churned to extract butter, and that butter is then slow-cooked into ghee.
Jump to:
- Why You'll love this Recipe
- Ingredients - Notes and Substitutions
- How to make Homemade Ghee from Unsalted Butter
- Variations
- Expert Tips and Tricks
- How to Use Ghee
- Storage Instructions
- 🧈 What's the Difference Between Butter, Clarified Butter, Ghee, and Brown Butter?
- When Can You Substitute Butter and Ghee?
- FAQ
- More Basic Indian Recipes to try
- Recipe
Why You'll love this Recipe
This recipe comes from decades of experience making authentic ghee at home as a South Asian family. The experience is evident. Unlike other recipes, there's no need for extra effort such as skimming the foam off the top as it simmers because we know it's done when all of it sinks to the bottom. We know what the best butter is to use after years of buying whatever is on sale, and then settling on the butter with the best results.
Other than that, you'll love it because this post is:
- Perfect every time: Step-by-step method with photos at every stage ensures you won't burn it or pull it off the burner too early.
- Budget-friendly: Much cheaper than store-bought jars.
- Customizable: Infuse it with herbs or spices to suit your cooking style.
- Lactose- and casein-free: Gentle on digestion and great for Paleo, Whole30, or Ayurvedic diets.
- One-ingredient recipe: No additives, preservatives, or mystery ingredients.
- Informative: Delves into the differences between ghee, butter, clarified butter, and browned butter as well as how to make swaps.
Ingredients - Notes and Substitutions
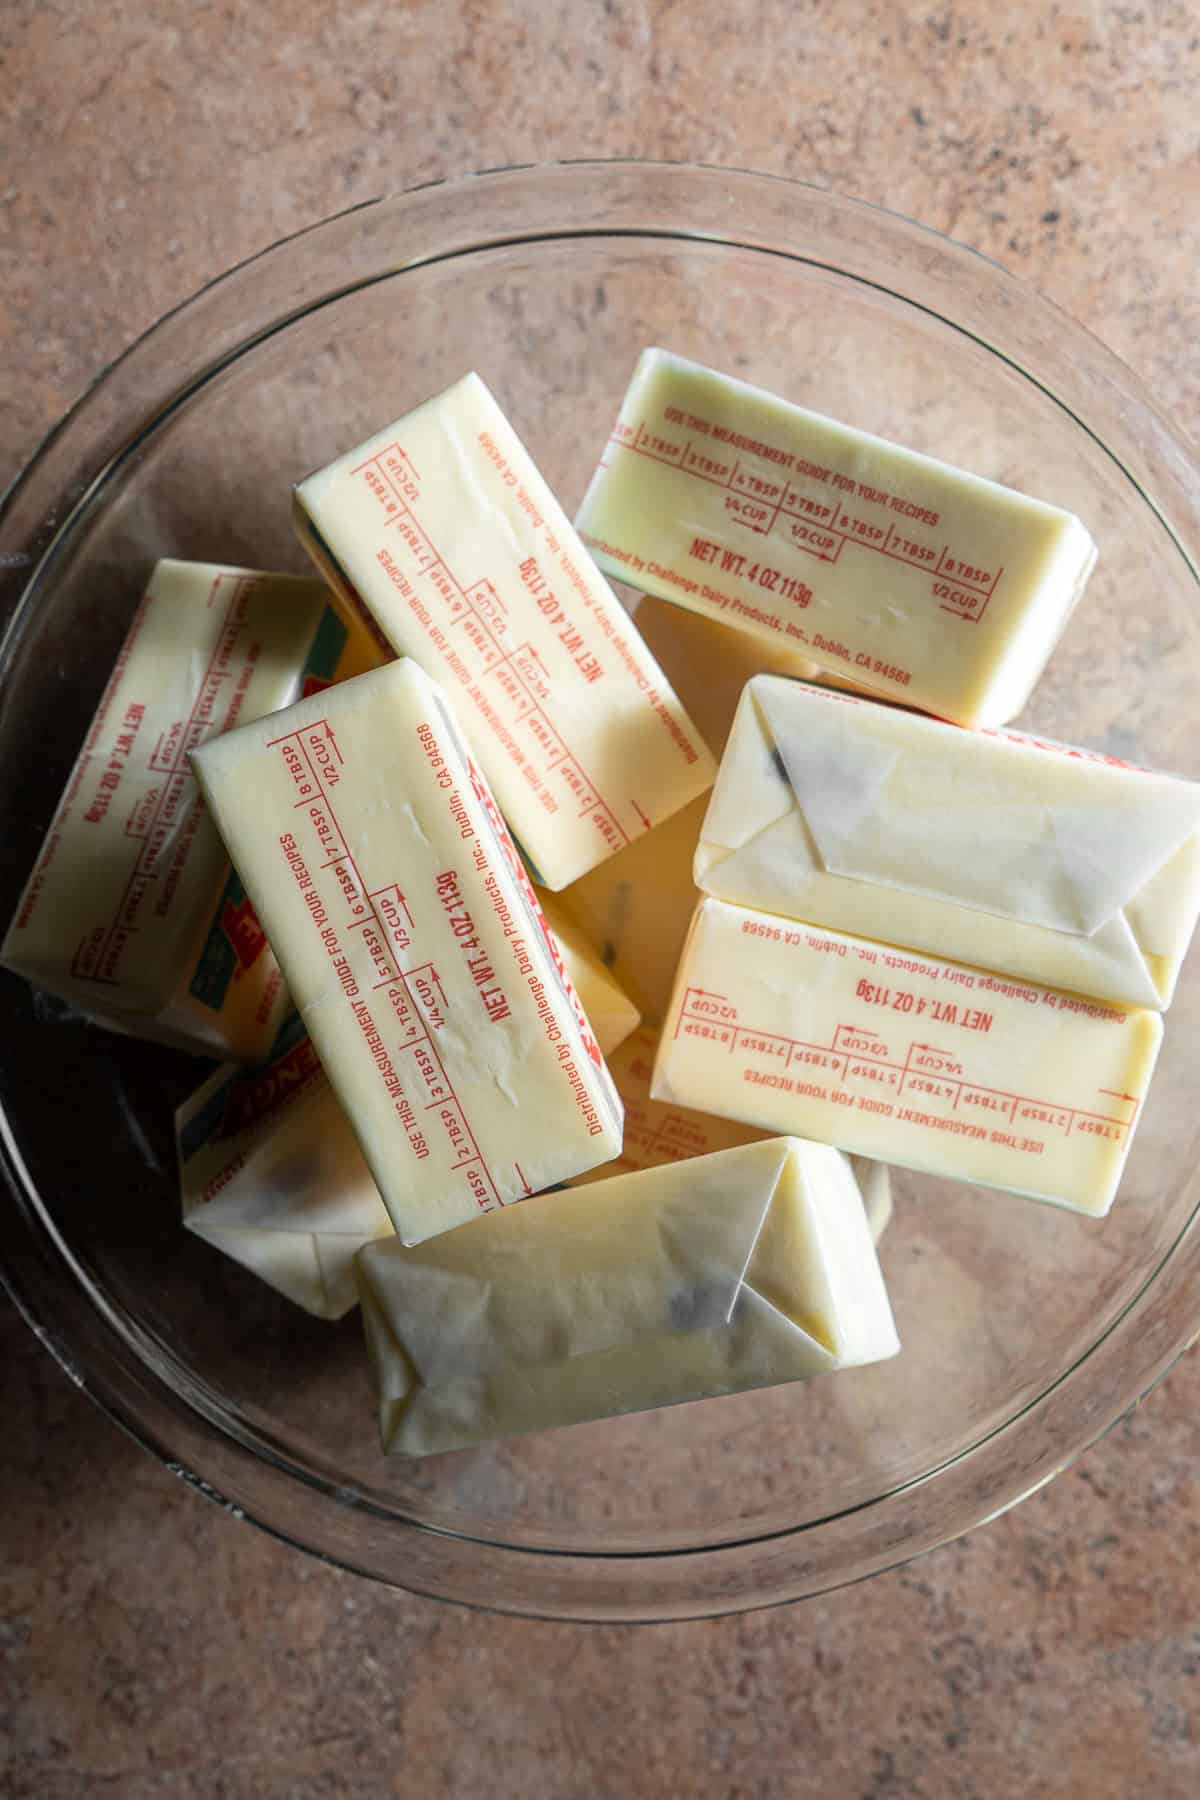
- Butter - Unsalted, high-quality butter (preferably grass-fed). You must use unsalted butter-salted will cloud the ghee and interfere with the cooking process.
- Optional upgrade: Use cultured or European-style butter for richer flavor similar to desi ghee.
Butter is composed of fat, water, and milk solids. The goal in making ghee is to separate the fat and evaporate the water content while slowly browning the milk solids which results in a rich, nutty ghee with a high smoke point.
You can use an Instant Pot on a low temperature mode, a heavy bottom pot, or anything else where you can easily control the temperature to keep the butter at a very low simmer around 200-250℉.
How to make Homemade Ghee from Unsalted Butter

- Step 1: Melt the sticks of butter on a medium to low heat.
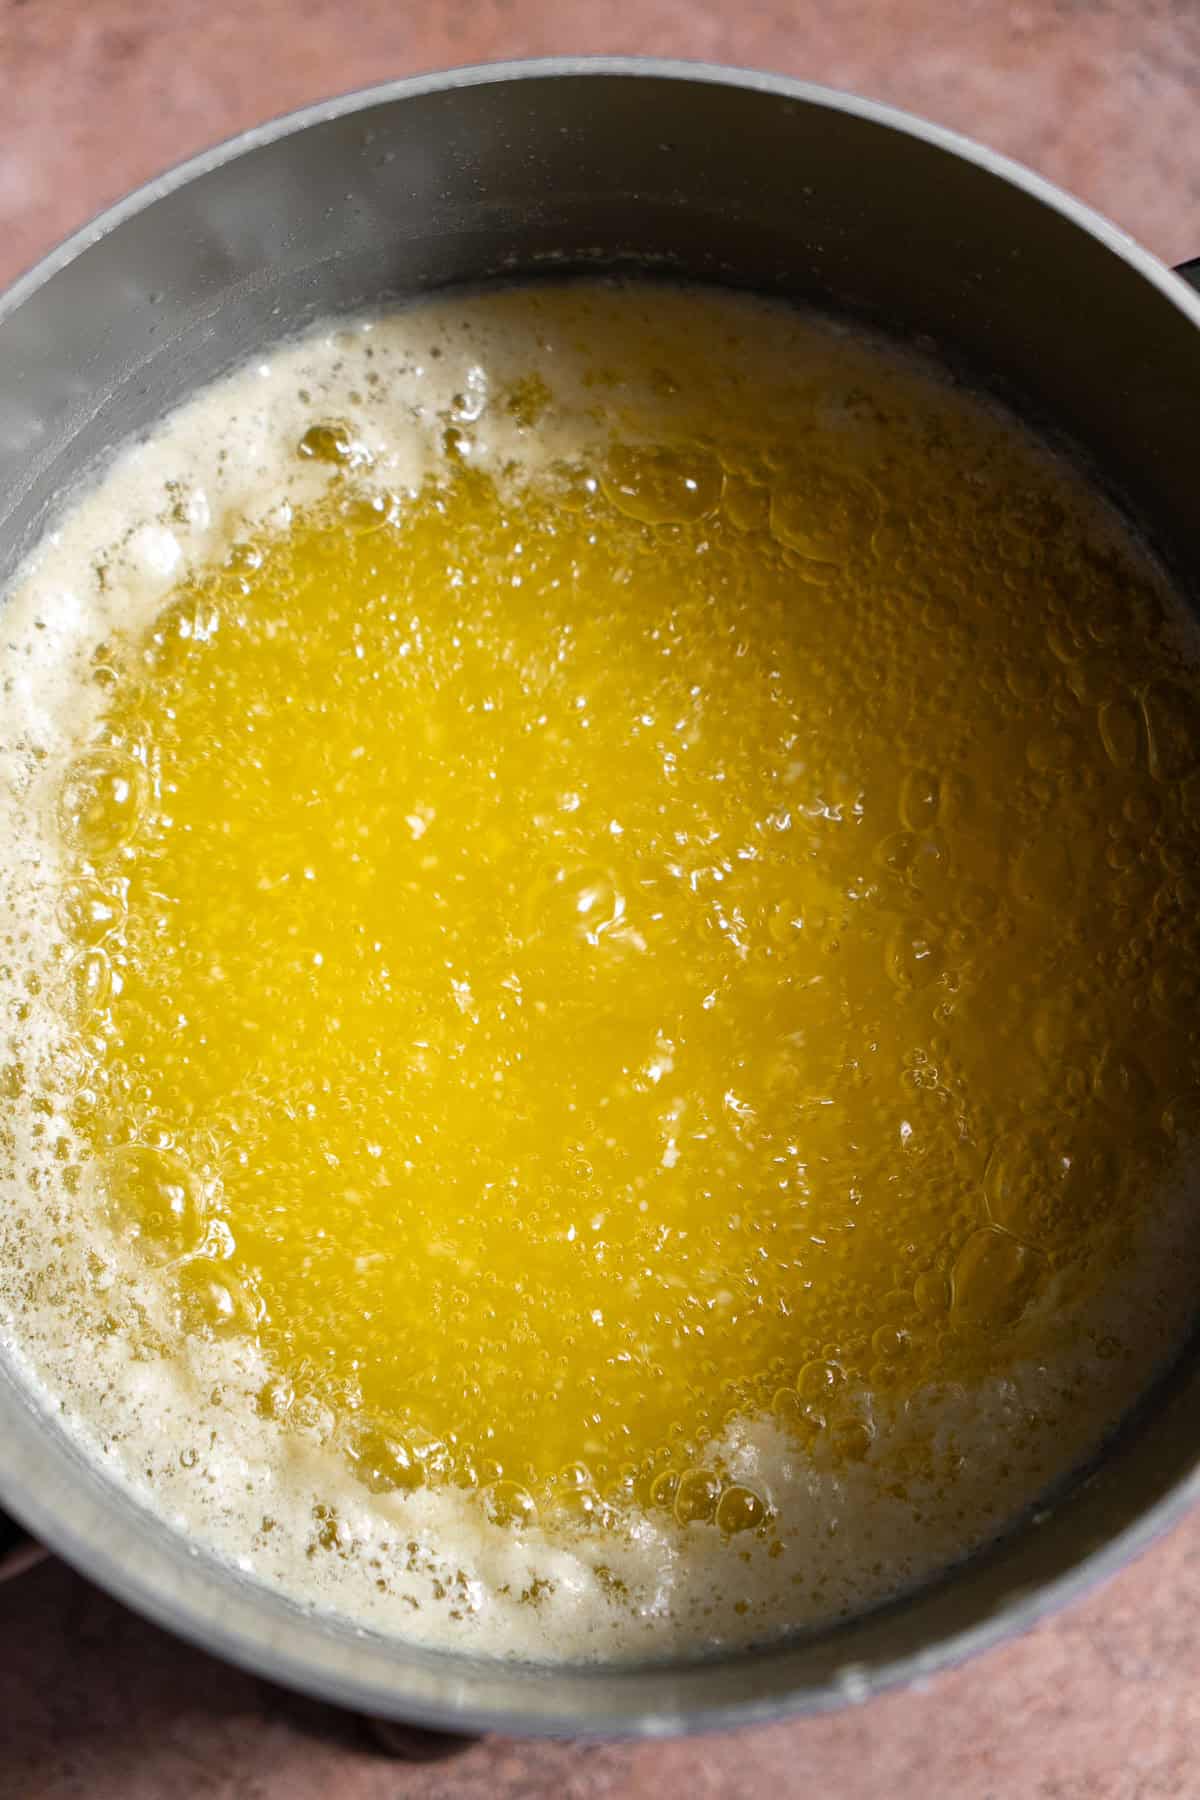
- Step 2: Keep the butter at a very low simmer so that the moisture evaporates without browning too fast. Specks of milk solids will start to appear. Give it a stir at intervals with a wooden spoon to help release the trapped moisture.
At the beginning, keep an eye on it so that it doesn't bubble over. It will bubble less and less as the water content evaporates. Once the moisture has completely evaporated, there will be little to no bubbling.
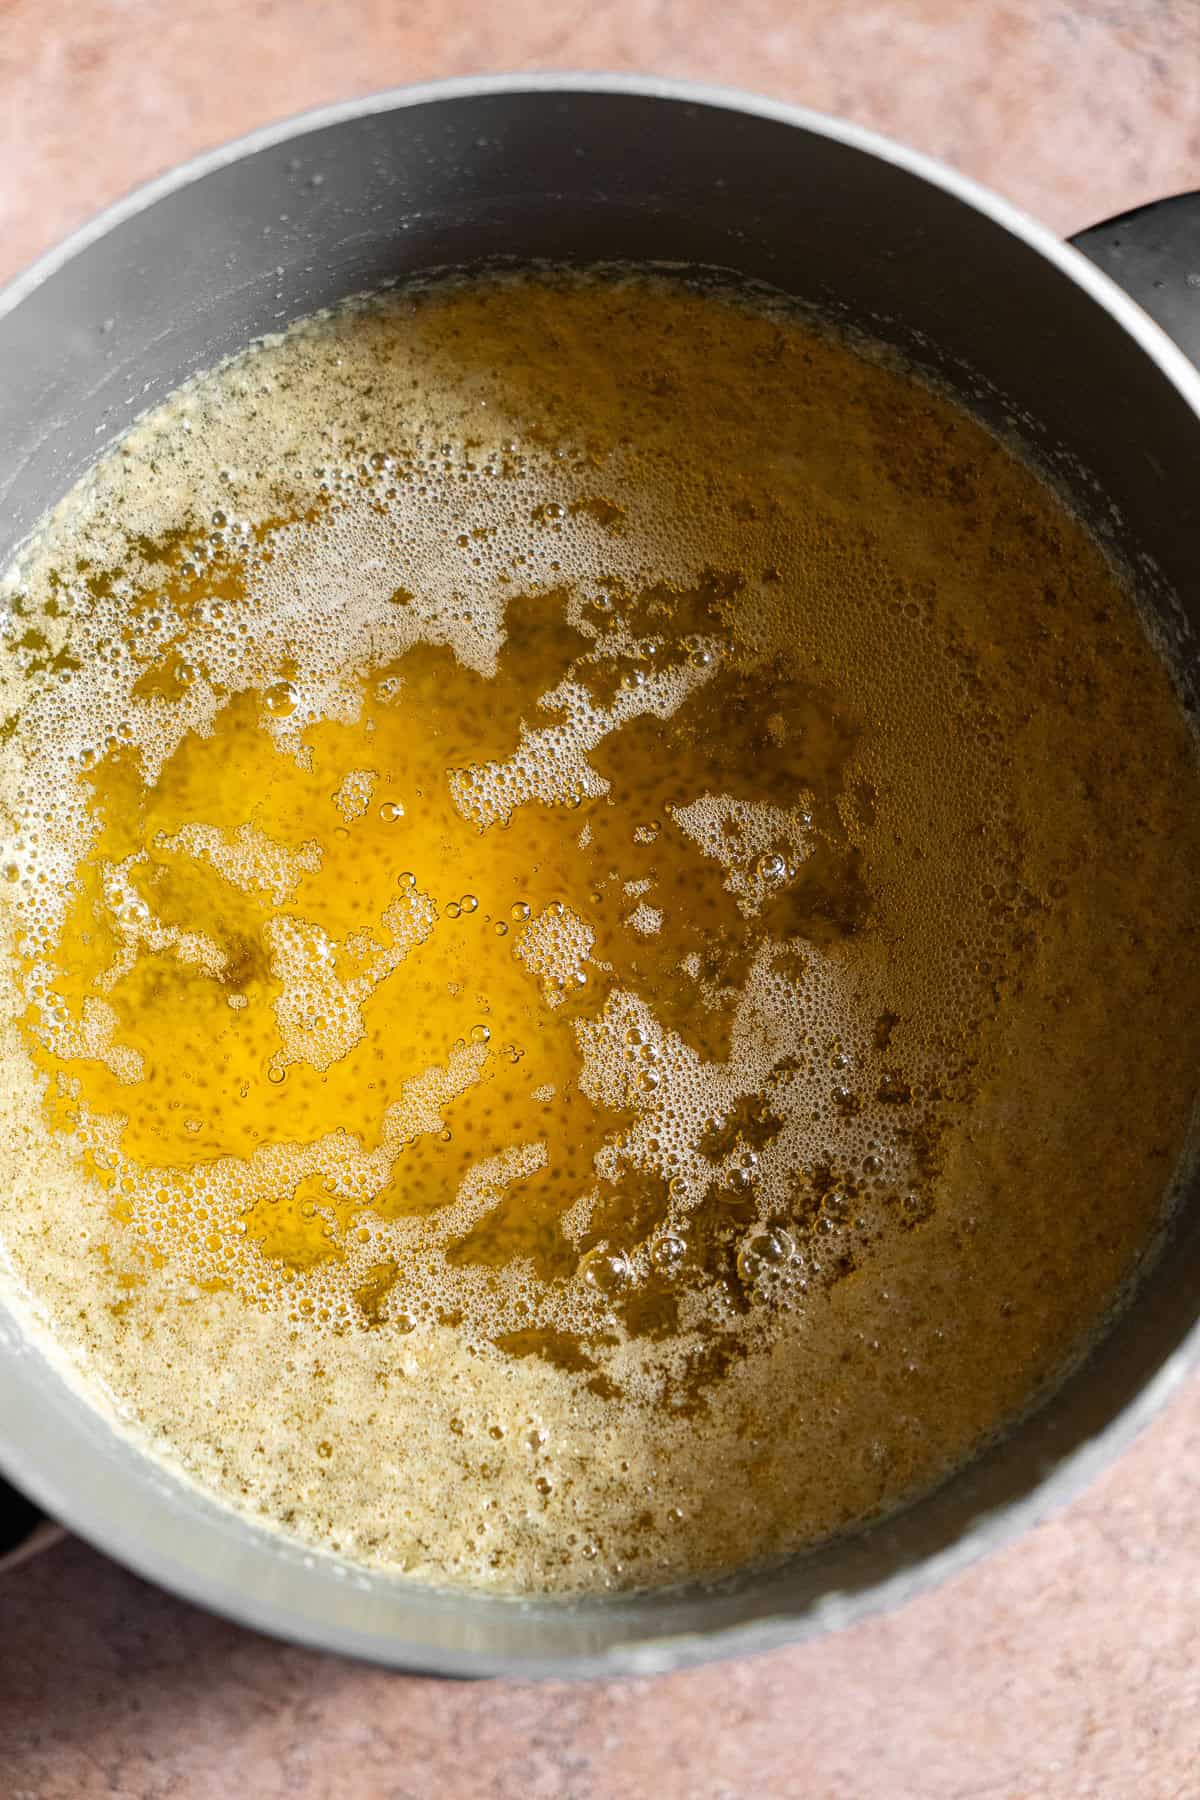
- Step 3: The milk solids will start settle at the bottom and the liquid will be completely clear. It won't bubble anymore due to no moisture. The top will still be a bit foamy.
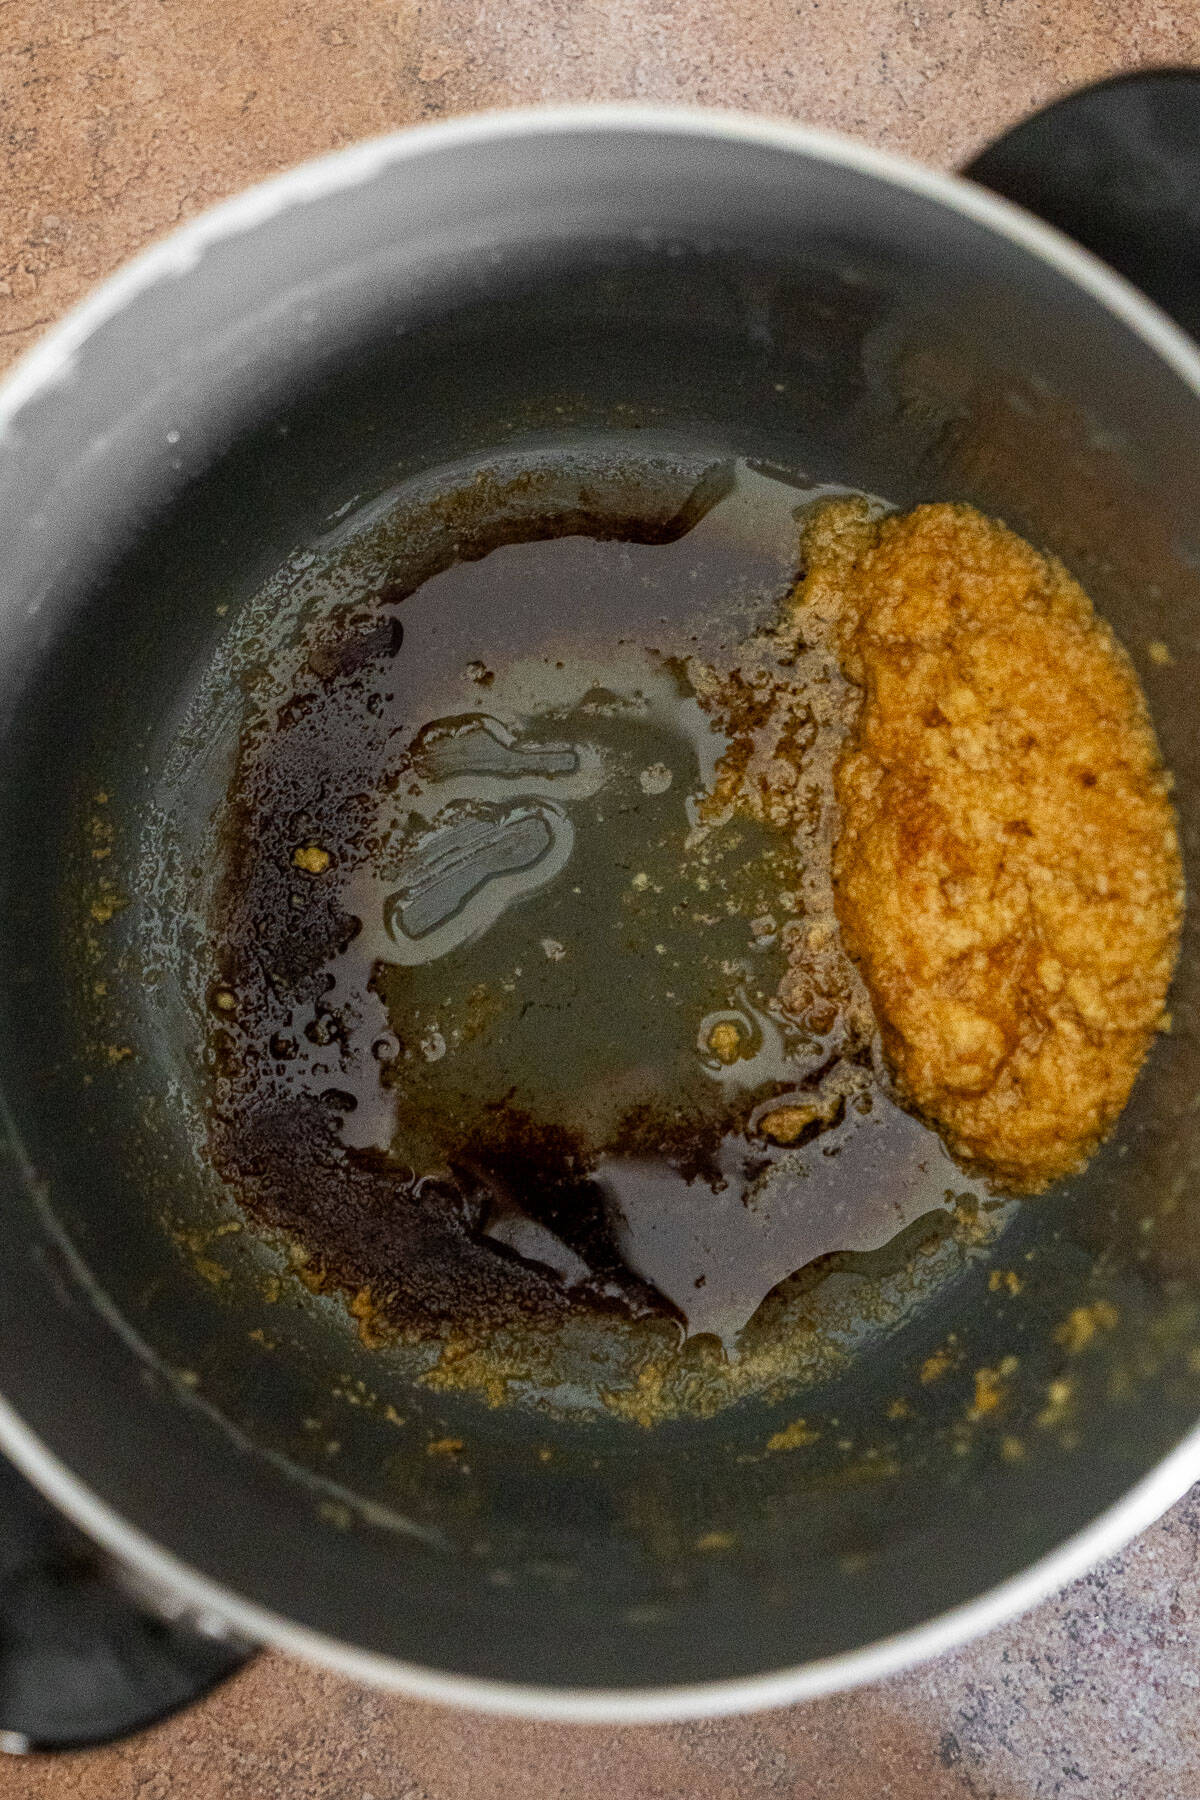
- Step 4: Keep the heat on a very low setting. All the foam at the top will fall to the bottom. The ghee will be completely done once the milk solids turn a golden brown.
The timing will depend on the rate of evaporation and how large your pot is. Mine took 1 hour in a pot with dimensions 16 x 12.25 x 8.25 inches.
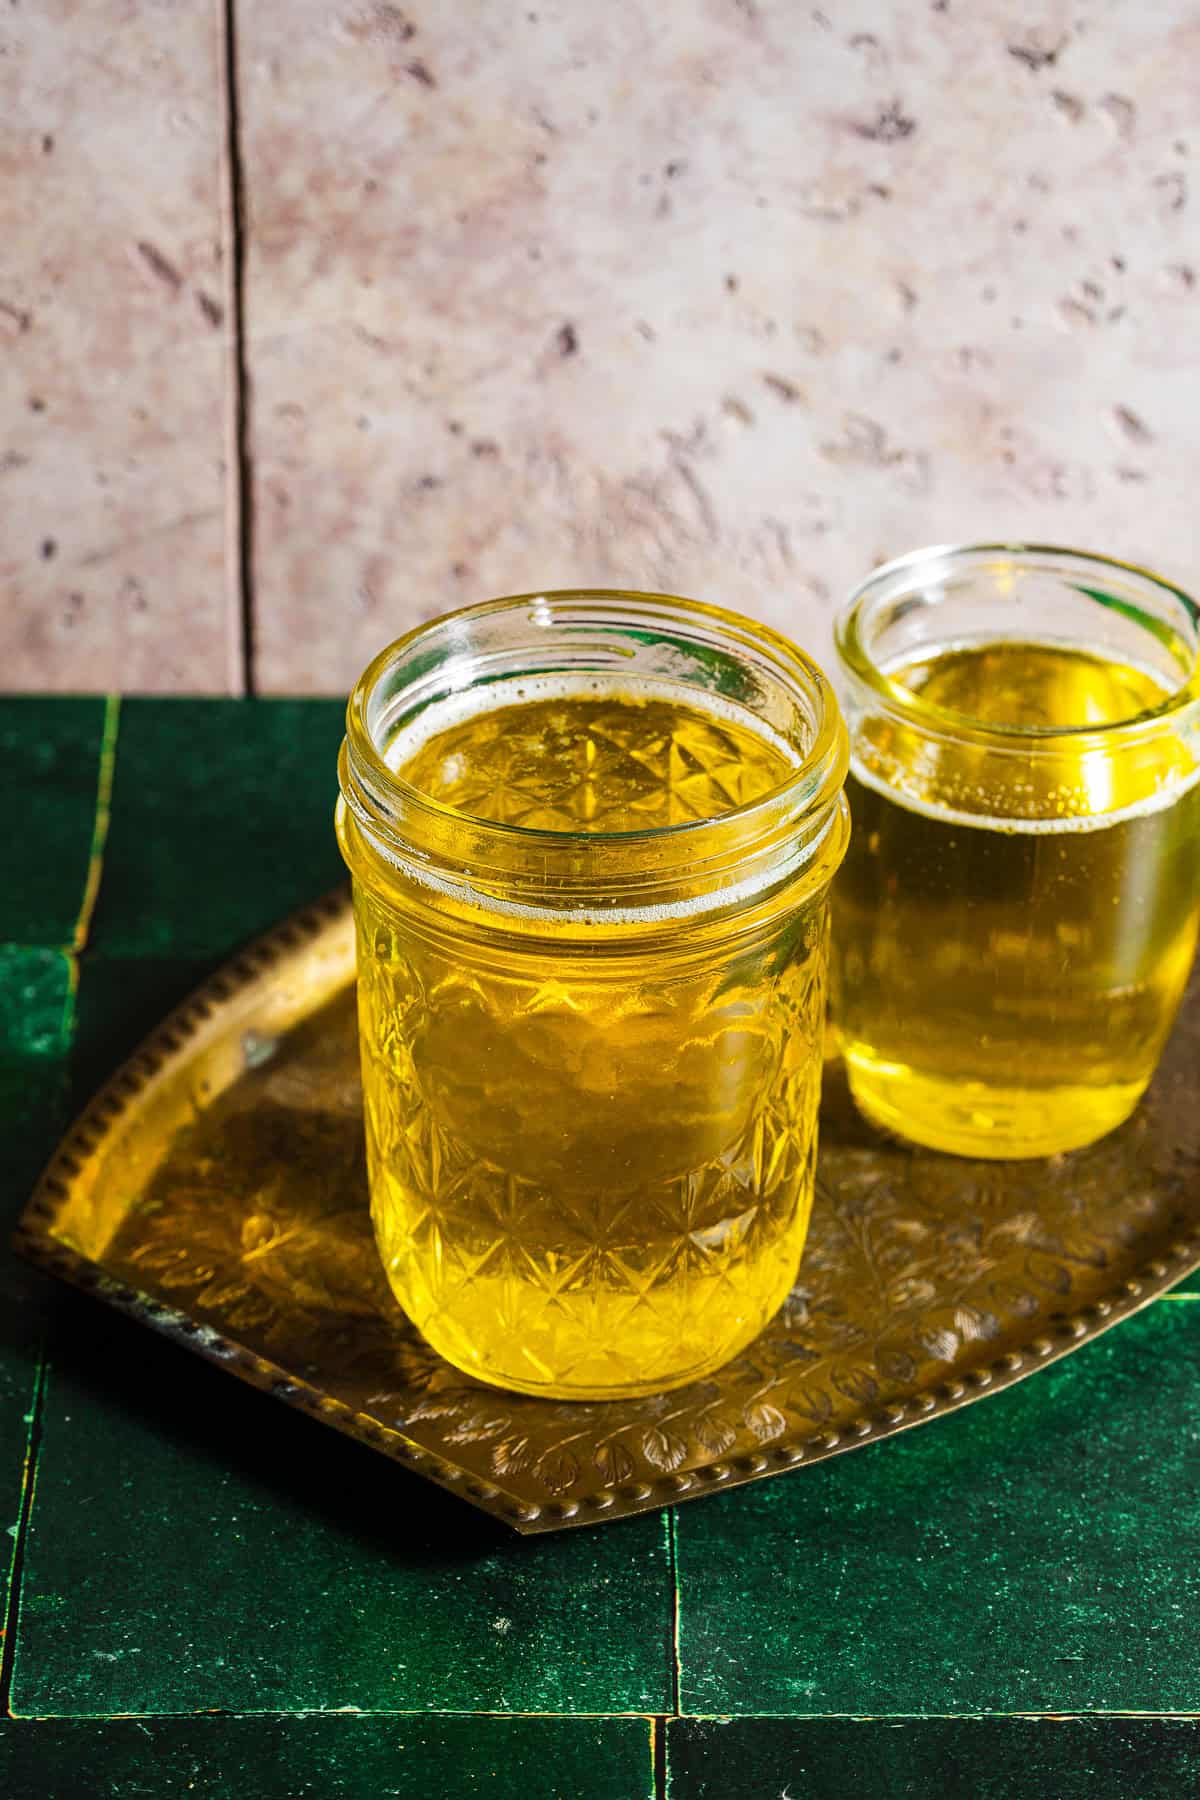
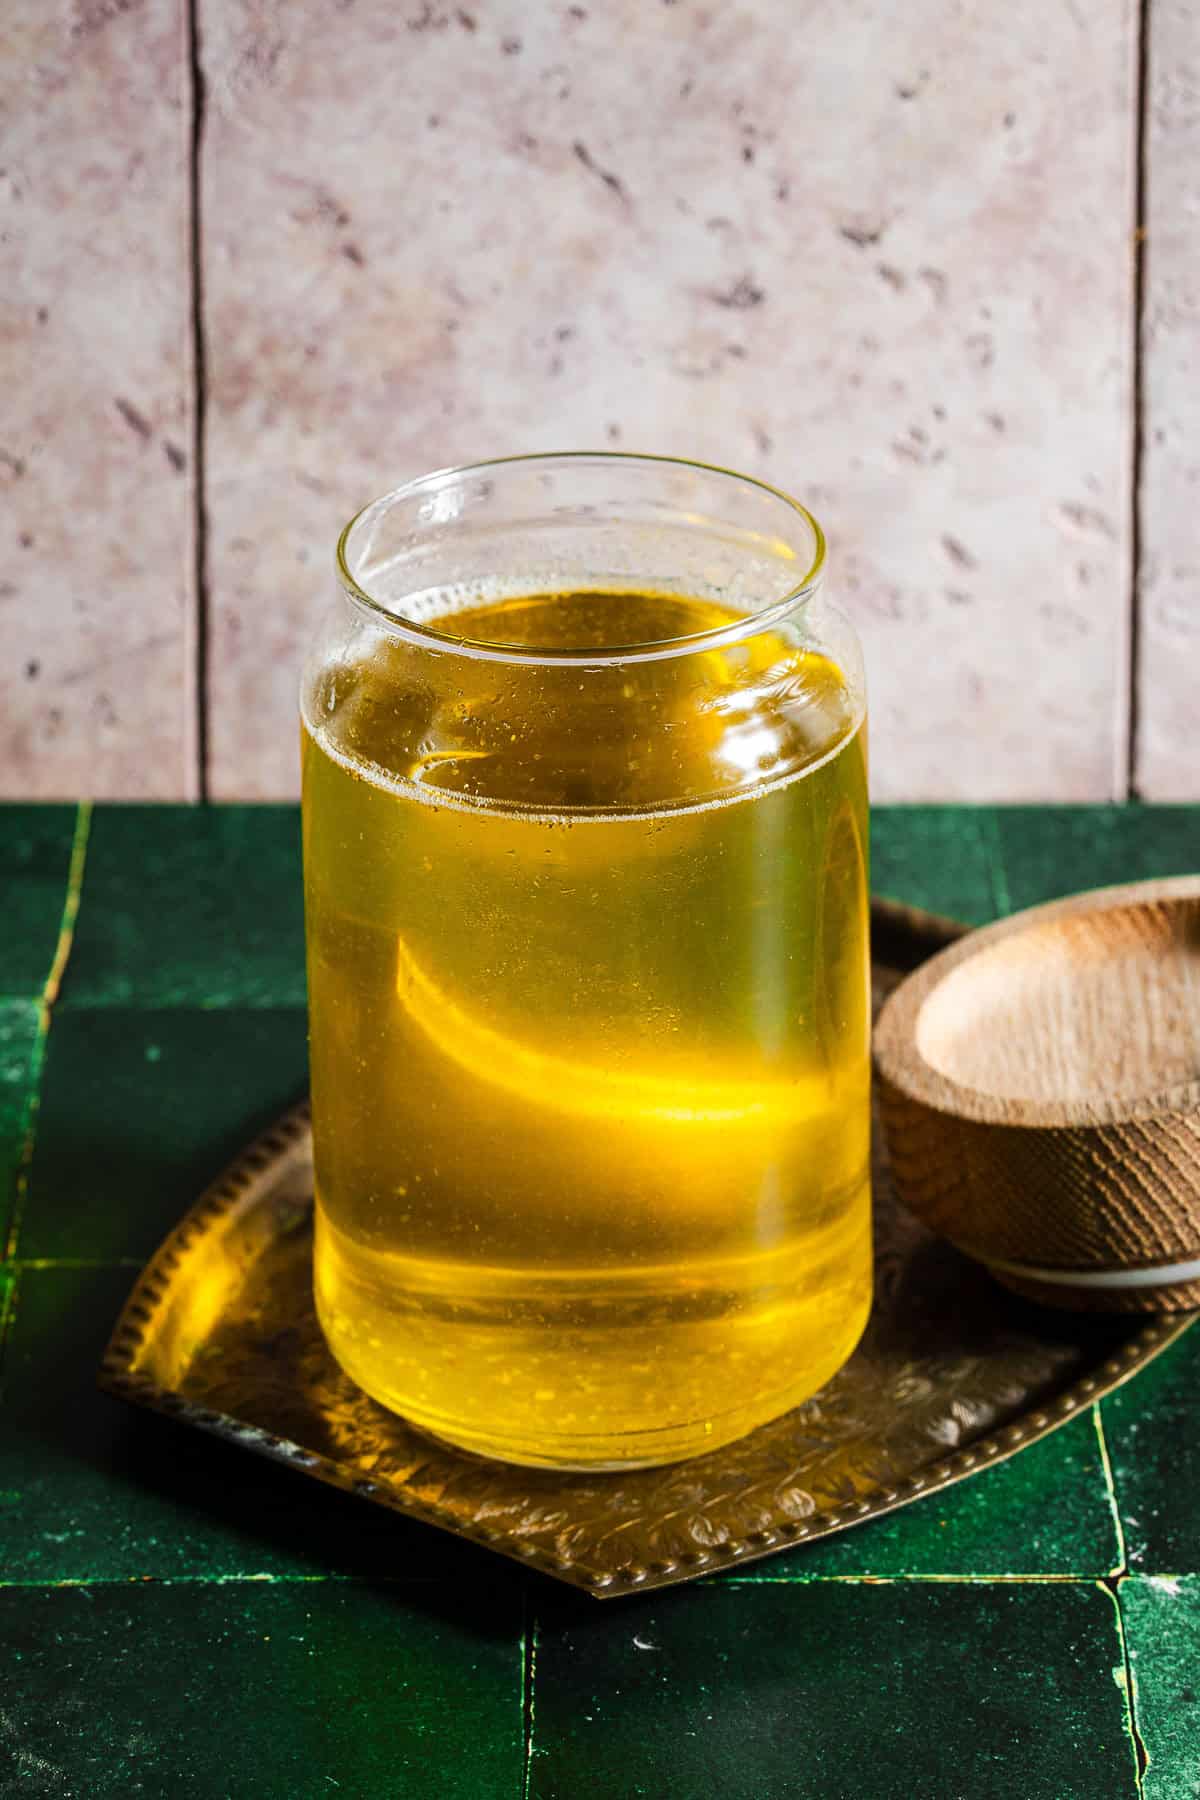
- Step 5: Strain the ghee into a large 40 ounce jar or several jars. Allow it to cool completely without the lid on before sealing and storing to avoid any steam that will build up moisture.
If the ghee is truly ready, AKA there is no foam left and the milk solids are browned and stuck to the bottom, you won't even need to strain it.
And there you have it-your very own jar of liquid gold.
Variations
Though not common, you can absolutely infuse the ghee with flavor using spices, herbs, or anything else you would enjoy. Unlike compound butter, the infusions should be strained out before storing if they are not shelf-stable like whole spices unless it will be used within a week.
- Herb-Infused Ghee: Add sprigs of rosemary, thyme, curry leaves, bay leaf, or sage once the milk solids start to brown. Strain them out with the solids.
- Garlic Ghee: Sauté a few crushed garlic cloves in the ghee during the last few minutes. Strain before storing.
- Spiced Ghee (Ayurvedic-style): Add whole spices like cumin seeds, dried chilis, coriander, or turmeric while simmering.
Expert Tips and Tricks
- Use a light-colored pot.
This helps you see when the milk solids turn golden brown-critical to avoid burning. - Don't walk away.
It goes from "almost ready" to "burnt" very quickly. Keep an eye on the bubbling and smell-nutty and toasty is good, acrid is not. - Always strain.
Straining removes the milk solids that can cause spoilage and cloudiness. - Store in a dry jar.
Even a little water can introduce bacteria. Make sure your jar is bone-dry and sanitized before pouring in the ghee. Be sure to let the ghee cool completely before sealing the jar with a lid. - Save the browned milk solids!
They're delicious stirred into fluffy basmati rice or garlicky mashed potatoes topped with a tadka for a savory umami punch.
How to Use Ghee
- Use it for high-heat cooking: roasting veggies, deep frying, or searing and browning meat.
- Stir into warm rice, soups, or stews for richness.
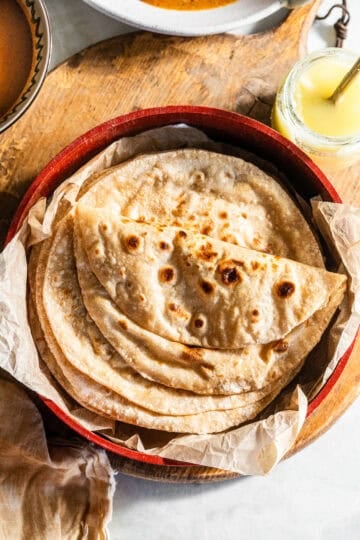
- Spread on toast, soft roti, naan with a sprinkle of sea salt.
- Use in place of butter in coffee, as the fat to make a potent Haldi Doodh, or baking recipes.
- Use it in Indian desserts like Milk Barfi, Date Nut Ladoos, and Suji ka Halwa
- Massage into dry skin or lips (yes, really-it's an ancient remedy!)
- Melt over popcorn with a little chaat masala for seasoning
- Use it to light lamps or diyas with a thinly rolled piece of cotton as a wick.
Storage Instructions
- Room temperature: Store in a tightly sealed jar in a cool, dark place for up to 3 months.
- Refrigerator: Lasts up to 1 year. It will solidify when cold but soften again at room temperature. To liquify, place a heat-safe container with the ghee in a bowl of hot water.
- Freezer: For long-term storage, freeze in small portions (like ice cube trays).
During the summertime, it's best to keep the ghee in the refrigerator. During the winter, room temperature in a cool, dark place is okay.
🧈 What's the Difference Between Butter, Clarified Butter, Ghee, and Brown Butter?
If you've ever wondered how ghee compares to other forms of butter-like clarified butter or brown butter-you're not alone! Each type has its own unique flavor, texture, and culinary purpose. Here's a side-by-side breakdown to help you know exactly what you're working with in the kitchen:
🧾 Butter vs. Clarified Butter vs. Ghee vs. Brown Butter
| 🧈 Type | 💡 What It Is | 🔥 Smoke Point | 🎨 Color | 🍽️ Flavor Profile | ✅ Best Uses |
|---|---|---|---|---|---|
| Butter | Churned cream, contains water and milk solids | ~350°F (175°C) | Pale yellow | Creamy, mild, slightly sweet | Spreading, baking, low-heat cooking |
| Clarified Butter | Butter melted to remove milk solids and water | ~450°F (232°C) | Golden yellow | Clean, neutral butter flavor | Searing, hollandaise, sautéing |
| Ghee | Clarified butter simmered longer until solids brown slightly | ~485°F (250°C) | Deep golden to amber | Nutty, rich, slightly caramelized | Roasting, frying, Ayurvedic cooking |
| Brown Butter | Butter cooked until milk solids brown, then strained | ~350°F (175°C) | Brown-golden with specks | Toasted, nutty, intense | Baking, sauces, desserts |
Quick Takeaways
- Ghee = Clarified Butter 2.0 → It's clarified butter that's been taken a step further for deeper flavor and longer shelf life.
- Brown Butter = Flavor Bomb → Think of it as butter's gourmet cousin-rich and toasty, perfect in cookies and sauces.
- Clarified Butter = Clean & Lean → Great for sautéing when you want butter flavor without the risk of burning.
- Butter = The Classic → Delicious and familiar, but not ideal for high-heat cooking.
When Can You Substitute Butter and Ghee?
Yes, you can swap ghee and butter in most recipes-but there are a few things to keep in mind. While they're both made from the same base (cream), their behavior in cooking and baking can be different due to how they're processed.
You Can Substitute Ghee for Butter When:
- Cooking at high heat (like frying, sautéing, roasting)
→ Ghee's high smoke point (~485°F) means it won't burn like butter can. - You want a richer, nuttier flavor
→ Ghee has a deep, toasty taste that enhances curries, veggies, and even popcorn. - Making dairy-free or low-lactose recipes
→ Ghee is almost completely free of lactose and casein, making it easier to digest. - In baking recipes that call for melted butter
→ Ghee can sub 1:1 for melted butter in cookies, brownies, and muffins. However, it can cause more spread in cookies.
⚠️ Use Caution or Adjust When:
- Recipes call for creamed butter (like cakes or frosting)
→ Ghee is liquid at room temp and won't trap air like solid butter. Try using part ghee, part solid fat (like coconut oil or shortening), or stick with butter for a fluffier texture. - You're looking for a light, mild butter flavor
→ Ghee has a stronger, more savory nuttyier taste-it's amazing in some dishes, but not always ideal in delicate baked goods. - You're making pastries or laminated doughs
→ Butter's water content helps create steam and flaky layers. Ghee lacks this moisture, so it's not ideal for croissants or puff pastry.
Quick Conversion Tip
- 1 tablespoon butter = 1 tablespoon ghee (in most stovetop recipes)
- For baking, use slightly less ghee if the recipe depends on butter's water content (start with 90% of the amount)
FAQ
Not exactly. Clarified butter is butter that's been melted and separated from milk solids, but ghee is cooked longer so those milk solids brown slightly, giving it a nutty flavor and longer shelf life.
Ghee is not dairy-free-it's made from butter. It is lactose- and casein-free, making it safe for most people with dairy sensitivities.
It's not recommended. Salted butter can foam excessively and make the ghee cloudy or overly salty. Stick with unsalted butter for the best result.
Nope! Ghee is shelf-stable and can be stored at room temperature for up to 3 months-just keep it in a santized, dry jar. You can refrigerate it to extend its life to a year.
Use high-quality unsalted butter, preferably grass-fed (like Kerrygold, Challenger, or Organic Valley). European-style butters with higher fat content make even richer ghee similar to desi ghee.
That's totally normal! Ghee can naturally form crystals as it cools. If you prefer a smoother texture, pour it into jars while still warm and stir occasionally as it cools.
Absolutely. Ghee has a high smoke point (~485°F / 250°C), making it ideal for frying, sautéing, and roasting without burning.
It was likely overcooked-once the milk solids go from golden to dark brown or black, the ghee takes on a bitter, burnt taste. Next time, remove it from heat as soon as the solids turn light brown and fragrant.

More Basic Indian Recipes to try


Recipe
Want to Save This Recipe?
Thinking about making this recipe? Enter your email and I'll send it straight to your inbox to save for later. Plus, get new recipe inspiration from me every week!
By submitting this form, you consent to receive emails from Masala and Chai.

How to make Homemade Ghee
Recipe Video
Equipment
- Fine Mesh Sieve
- 40-ounce glass jar
Ingredients
- 5 pounds unsalted butter, preferably grass-fed
Instructions
- Turn the heat on low and let the pot get slightly warm. Add the sticks of butter into the pot and allow it to slowly melt.
- Bring it to a low simmer between 200-250℉ for up to 1 hour (depending on the rate of evaporation and browning). Once melted, the butter will begin to bubble and separate into three layers-foam on top, golden liquid in the middle, and milk solids sinking to the bottom. Keep mixing in intervals to help release any trapped moisture. The foam will sink to the bottom with the rest of the milk solids.
- Skim foam off the top as needed. The ghee is ready when the milk solids at the bottom are golden brown and the liquid is clear and fragrant.
- Remove from heat and carefully strain through a fine mesh sieve into a large sanitized, dry jar (at least 40 ounces) or several smaller jars.
- Let the ghee cool completely before sealing with a lid. Store in a cool, dark place or the refrigerator.
Notes
- Room temperature: Store in a tightly sealed jar in a cool, dark place for up to 3 months.
- Refrigerator: Lasts up to 1 year. It will solidify when cold but soften again at room temperature. To liquify, place a heat-safe container with the ghee in a bowl of hot water.
Anonymous says