

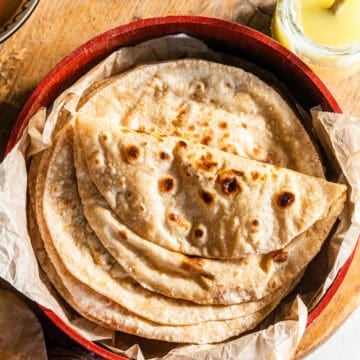
Soft, warm, and perfectly puffed - Roti is a staple in Indian households, served alongside flavorful curries, dals, and sabzis. This simple unleavened flatbread is made with just flour and water but carries deep cultural significance, representing comfort and tradition. Whether you're new to making roti or looking to perfect your technique, this guide will help you achieve soft, pillowy rotis every time.

In desi homes, eating roti is the equivalent to drinking milk for becoming big and strong adults. Going from half a roti, to one roti, to two rotis was basically an accomplishment as kids. Then, we cut back when we realized it was a lot of carbs to consume in one meal. Did every desi family go through this health cycle, or just us??
Making roti at home is a rewarding experience that connects you to tradition while offering a simple, wholesome addition to any meal alongside dal or sabzi. Once you master the technique, it becomes second nature-an essential skill for every home cook! Desi moms seriously kept the kitchen locked down with fresh vegetables, lentils or curries, side salads, and roti on a daily basis for every meal. Looking back, I'm not sure how my mom did it.
While we put this roti recipe together, my mom reminisced about how she would come home from school everyday in India to eat a snack of rolled up roti filled with butter and chili powder. It made this 10x more special capturing this recipe to share with you all.
Jump to:
Why You'll love this Recipe
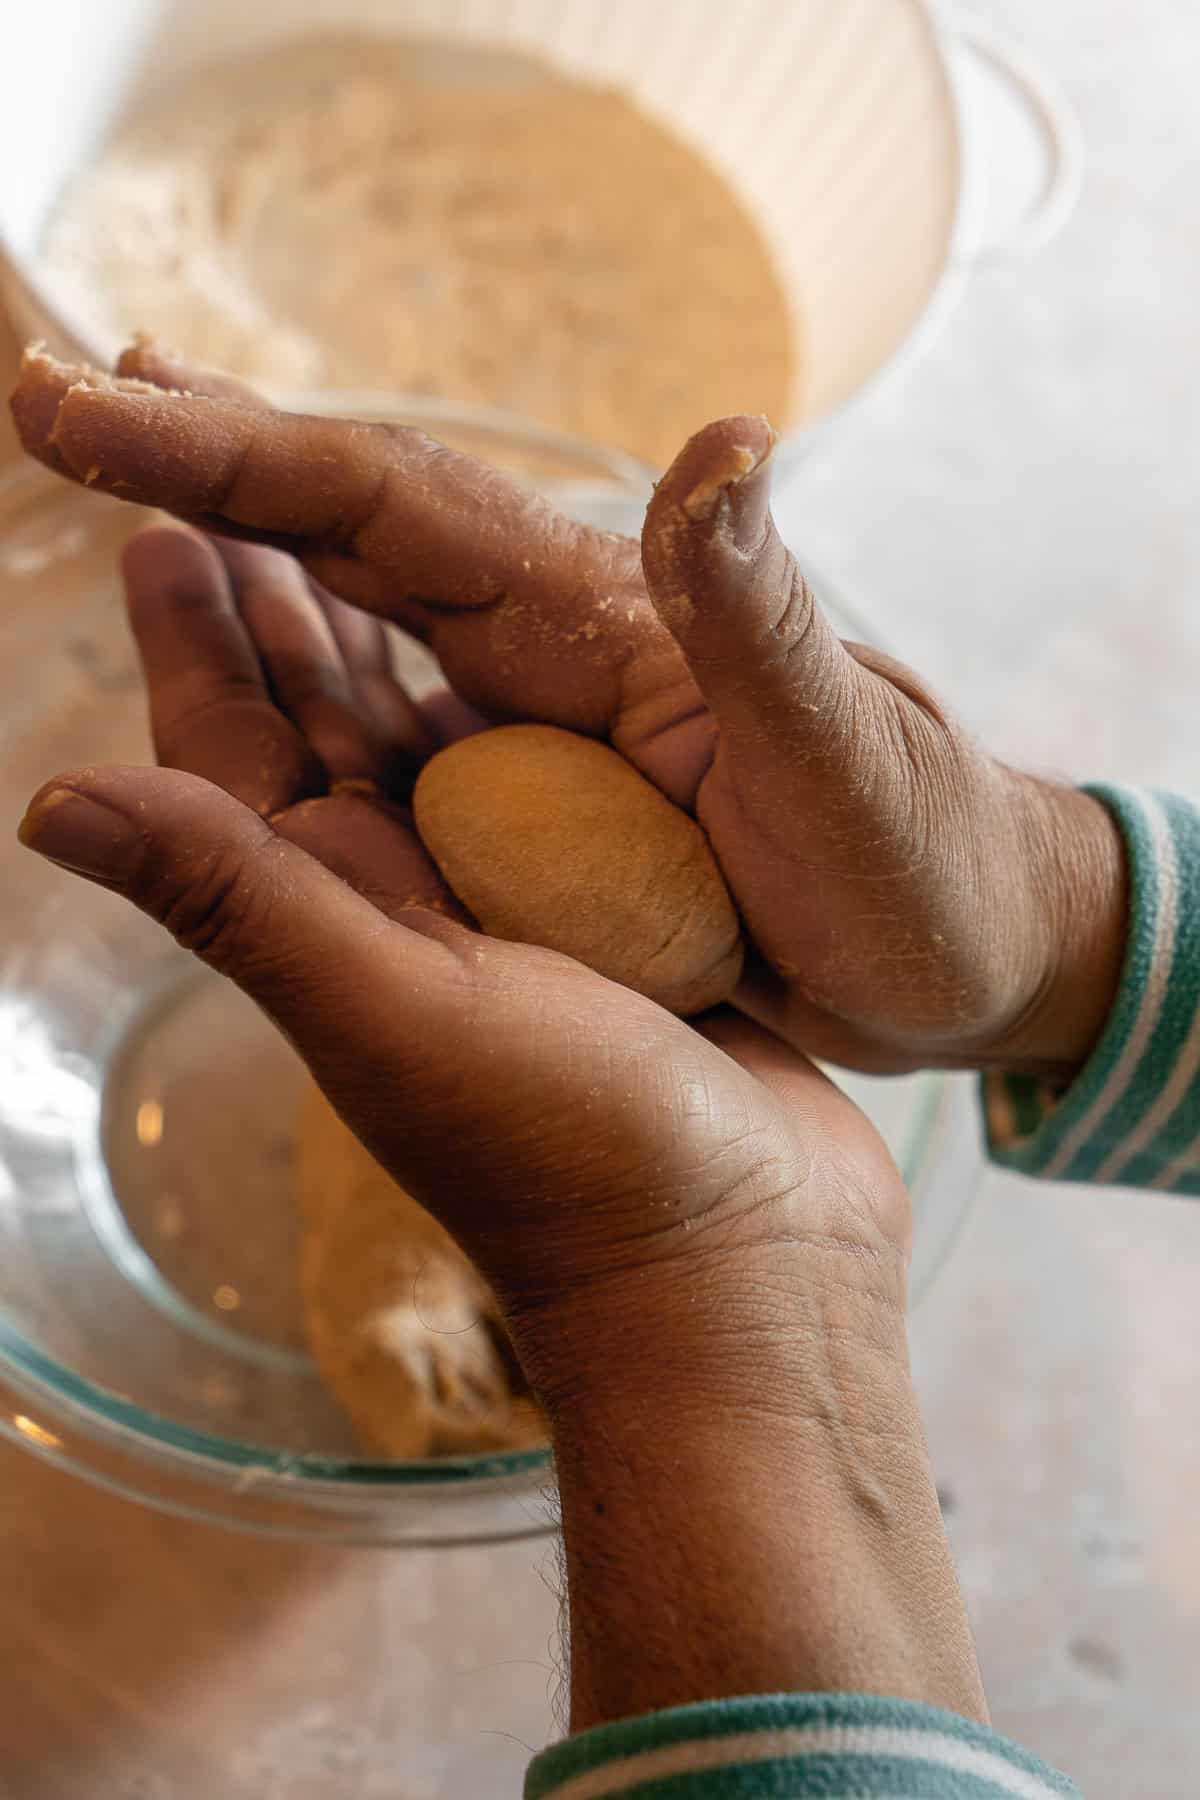
- This guide to the perfect roti is extremely detailed with photos of the process at each visual cue so you know exactly what you're looking for! Those hands you see are Mama Garg's as she expertly makes roti.
- The recipe only takes 2 ingredients with a 2 to 1 ratio of flour to water for soft dough that results in perfect rotis every time.
- This post compiles decades of experience and tips from Mama Garg making roti for our family on a nightly basis, as well as my own since I was her little helper in the kitchen making the dough since I was 5 years old.
Once you get some practice rolling out the dough while cooking the rotis under your belt, it will be incredibly easy to have them ready in an hour! Our desi moms did it on a nightly basis along with a freshly made dal and sabzi. Seriously, they are super women!
What is Roti?
Roti has a rich and ancient history rooted in South Asian cuisine and culture. Its origins date back over 5,000 years to the Indus Valley Civilization (circa 3000-1500 BCE), where early forms of flatbreads were made using locally grown grains like wheat and barley. (Source: Britannica)
The word "roti" is derived from the Sanskrit word rotika, meaning "bread". Its significance extends beyond India to regions influenced by Indian migration, such as the Caribbean, Africa, and Southeast Asia. Unlike leavened breads such as naan, roti is a wildly simple unleavened bread that is served with a variety of dishes, from dals to rich curries.
Over time, different variations of roti have emerged across cultures, including chapati, phulka, and more. As the Indian diaspora migrated worldwide, roti found its place in Caribbean cuisine (such as Trinidadian dhalpuri and buss-up-shut) and cuisines around the world. Despite the differences, traditional Indian roti remains a cherished, everyday comfort food in Indian households.
Ingredients - Notes and Substitutions
Traditional Roti only requires 2 ingredients - atta and water. But we'll also go over the benefits of adding oil, salt, and pureed vegetables to the dough.
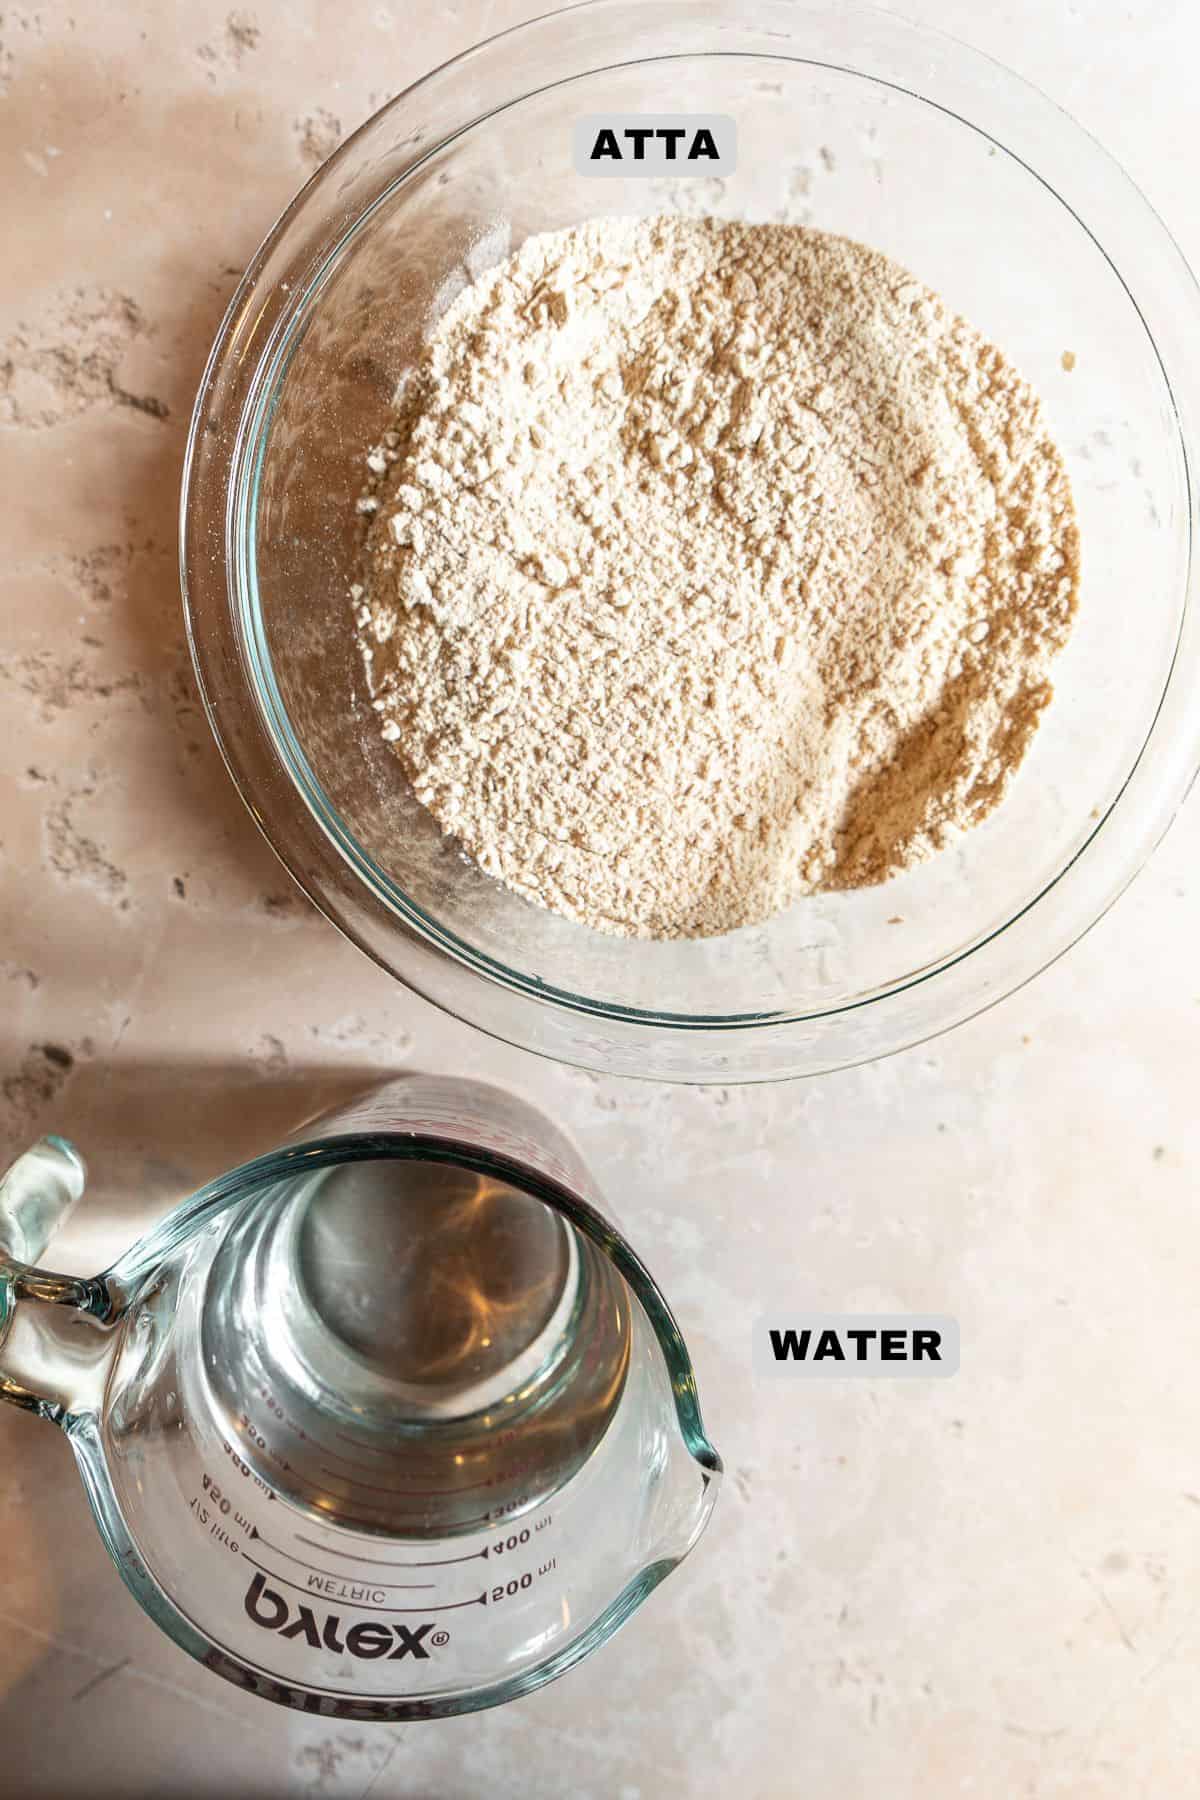
- Atta (flour) - Atta is a whole wheat flour commonly found in desi grocery stores. If whole wheat flour isn't available, a mix of all-purpose flour and wheat flour (1:1) can work.
- For gluten-free rotis, use millet flour or sorghum flour, though the texture will differ.
- Use another 30 grams of atta in a flat medium-sized container to dust on the dough to keep it from sticking.
- Water - Use room temperature or slightly warm water.
- Optional Ingredients -
- Oil or Ghee - Add a teaspoon of neutral oil or ghee to 2 cups of atta to make the dough especially soft. Some additional ghee or butter is slathered on the roti after cooking to keep it soft and pliable.
- Salt - Adding a pinch of salt to the flour is like using unsalted butter vs salted butter when cooking. It's not totally necessary, especially when eating roti with well-seasoned curries. You can also add a pinch of salt when buttering the roti after cooking, or use salted butter instead of ghee.
- Beet juice or spinach - For added health benefits, replace half the water with beet juice or a puree of steamed spinach. The coloring makes it fun for kids and my parents love the added nutritional benefits as they get older.
How to make Roti
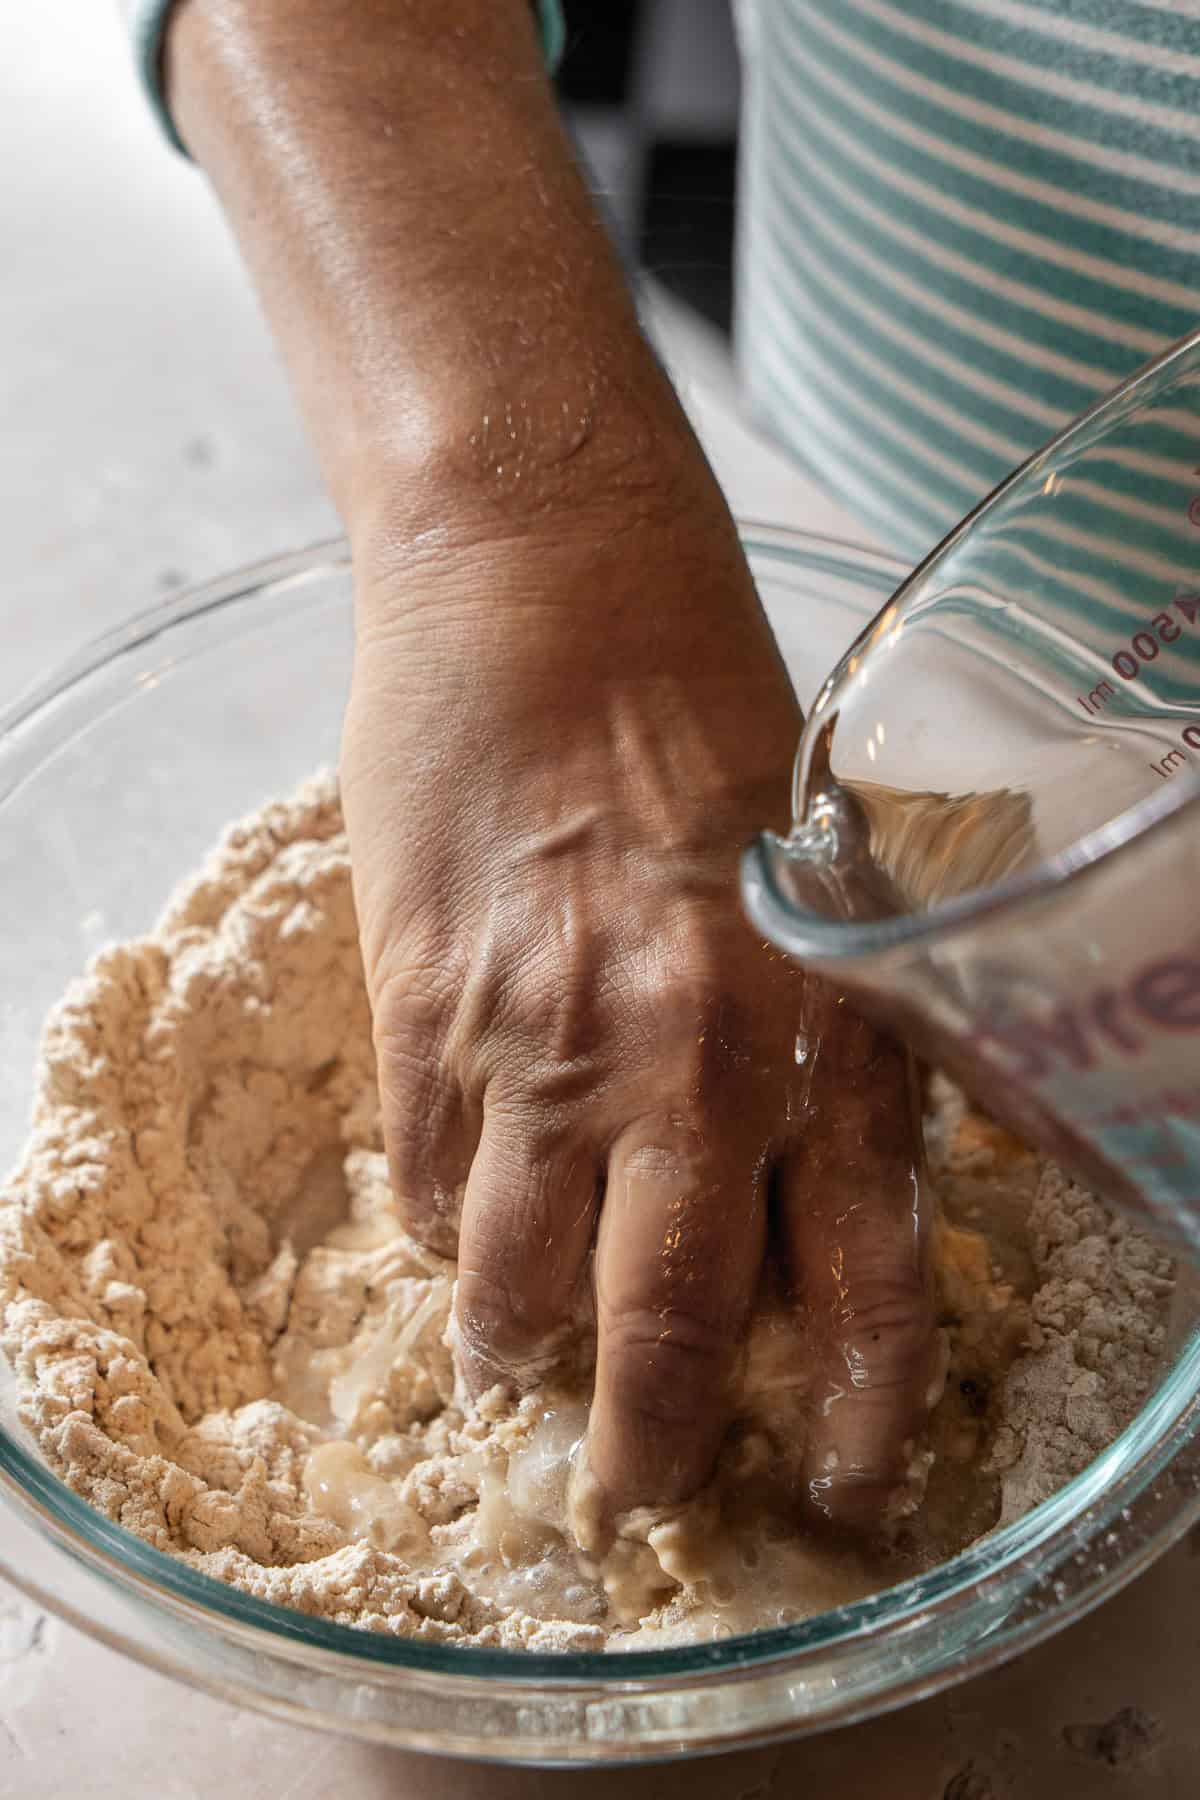
- Create a well in the middle of the atta. Slowly pour in the water while kneading the flour with clean hands, only using enough until it just comes together.
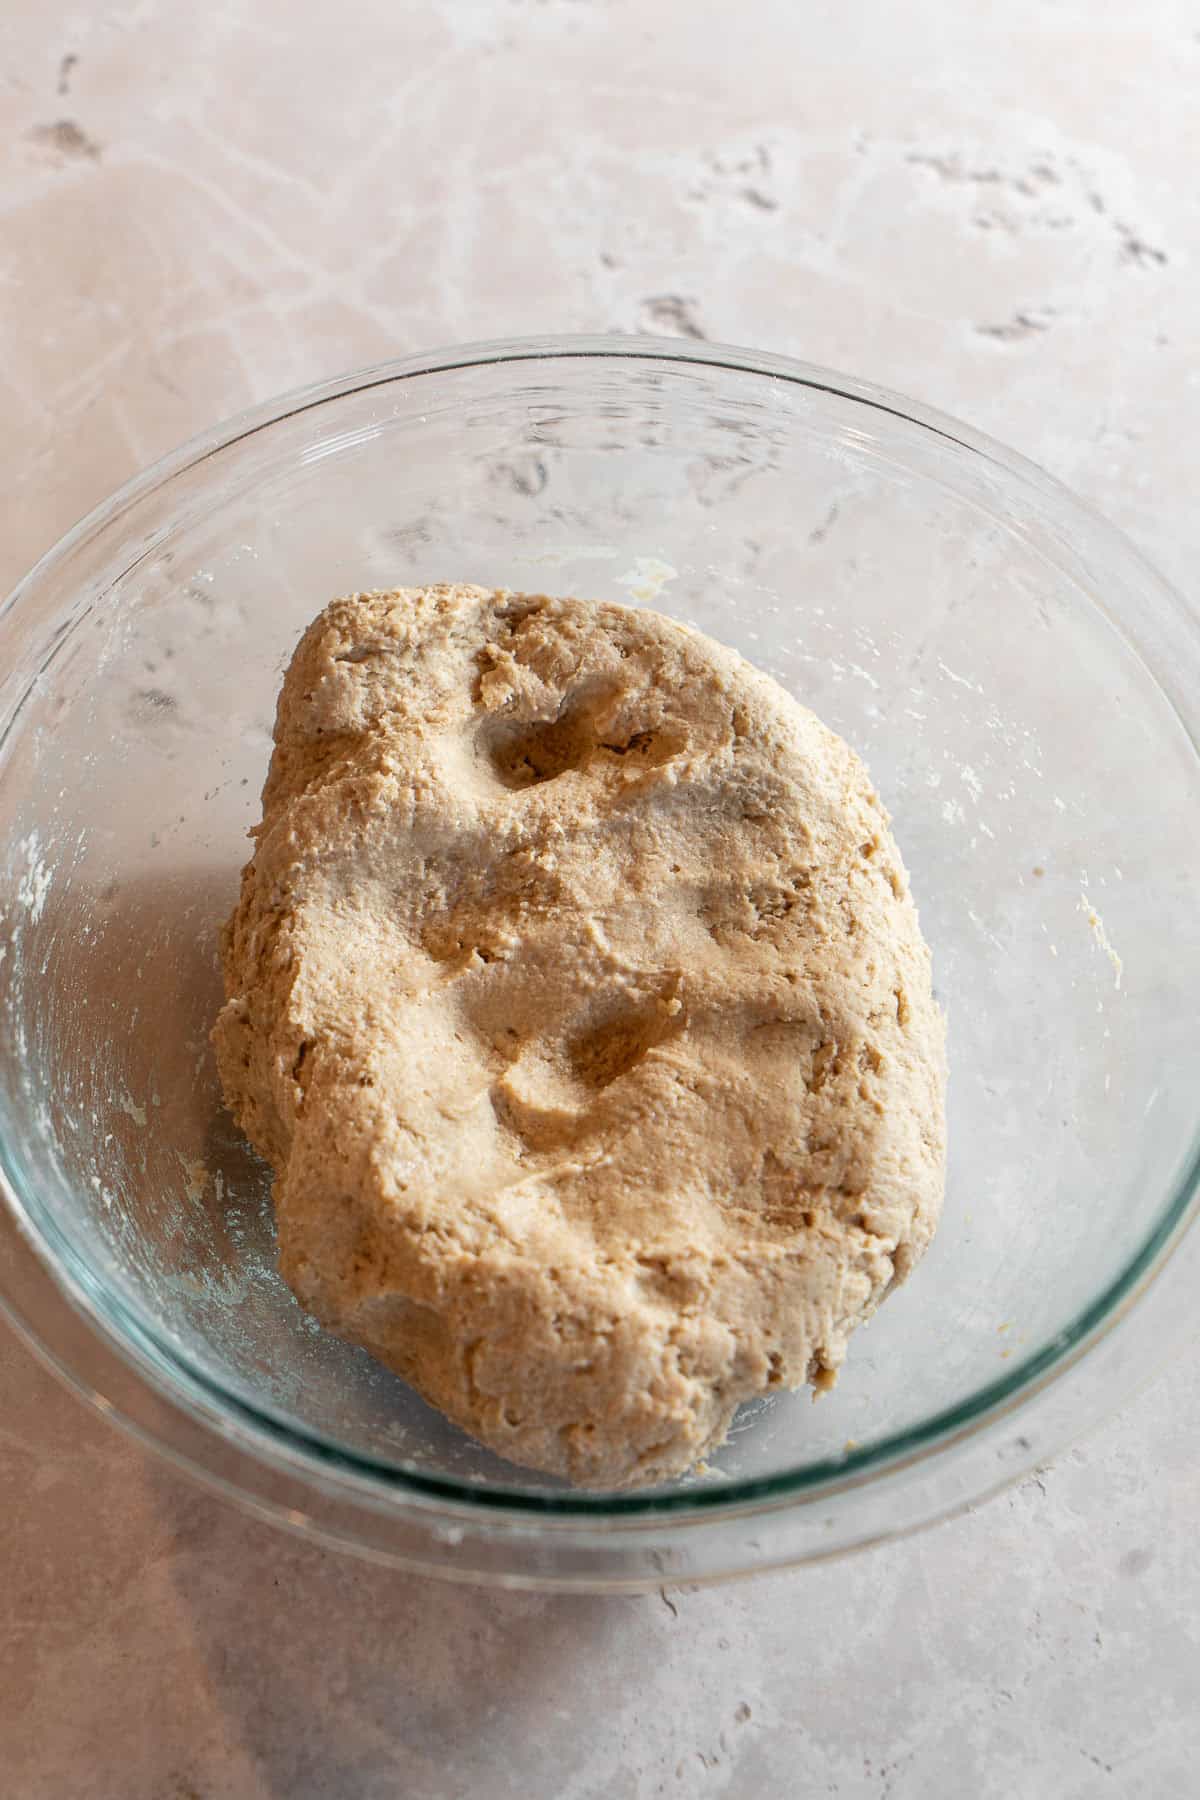
- The dough will be a bit sticky and soft. Let the dough rest covered for 20-30 minutes.
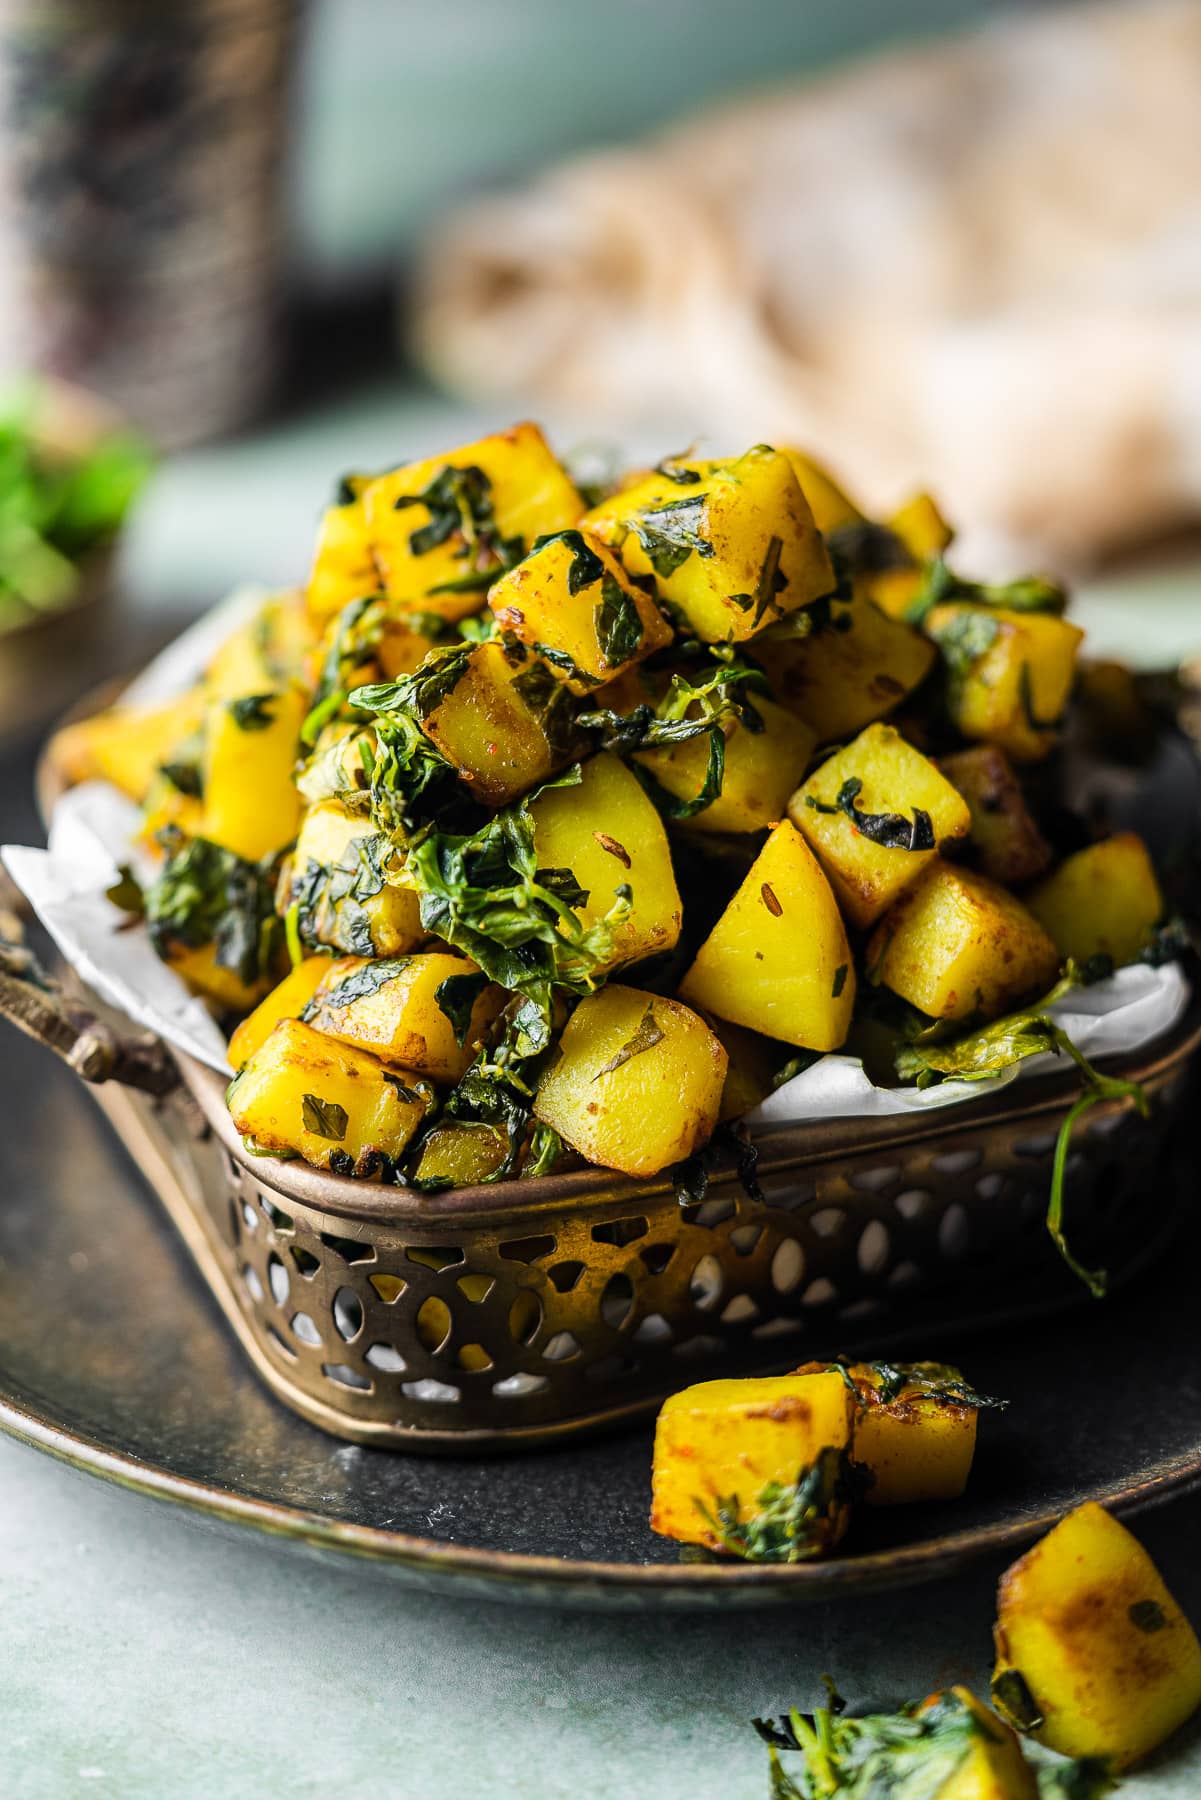
While the dough rests, make your other dishes such as Whole Masoor Dal or Dahi Arbi Sabzi.
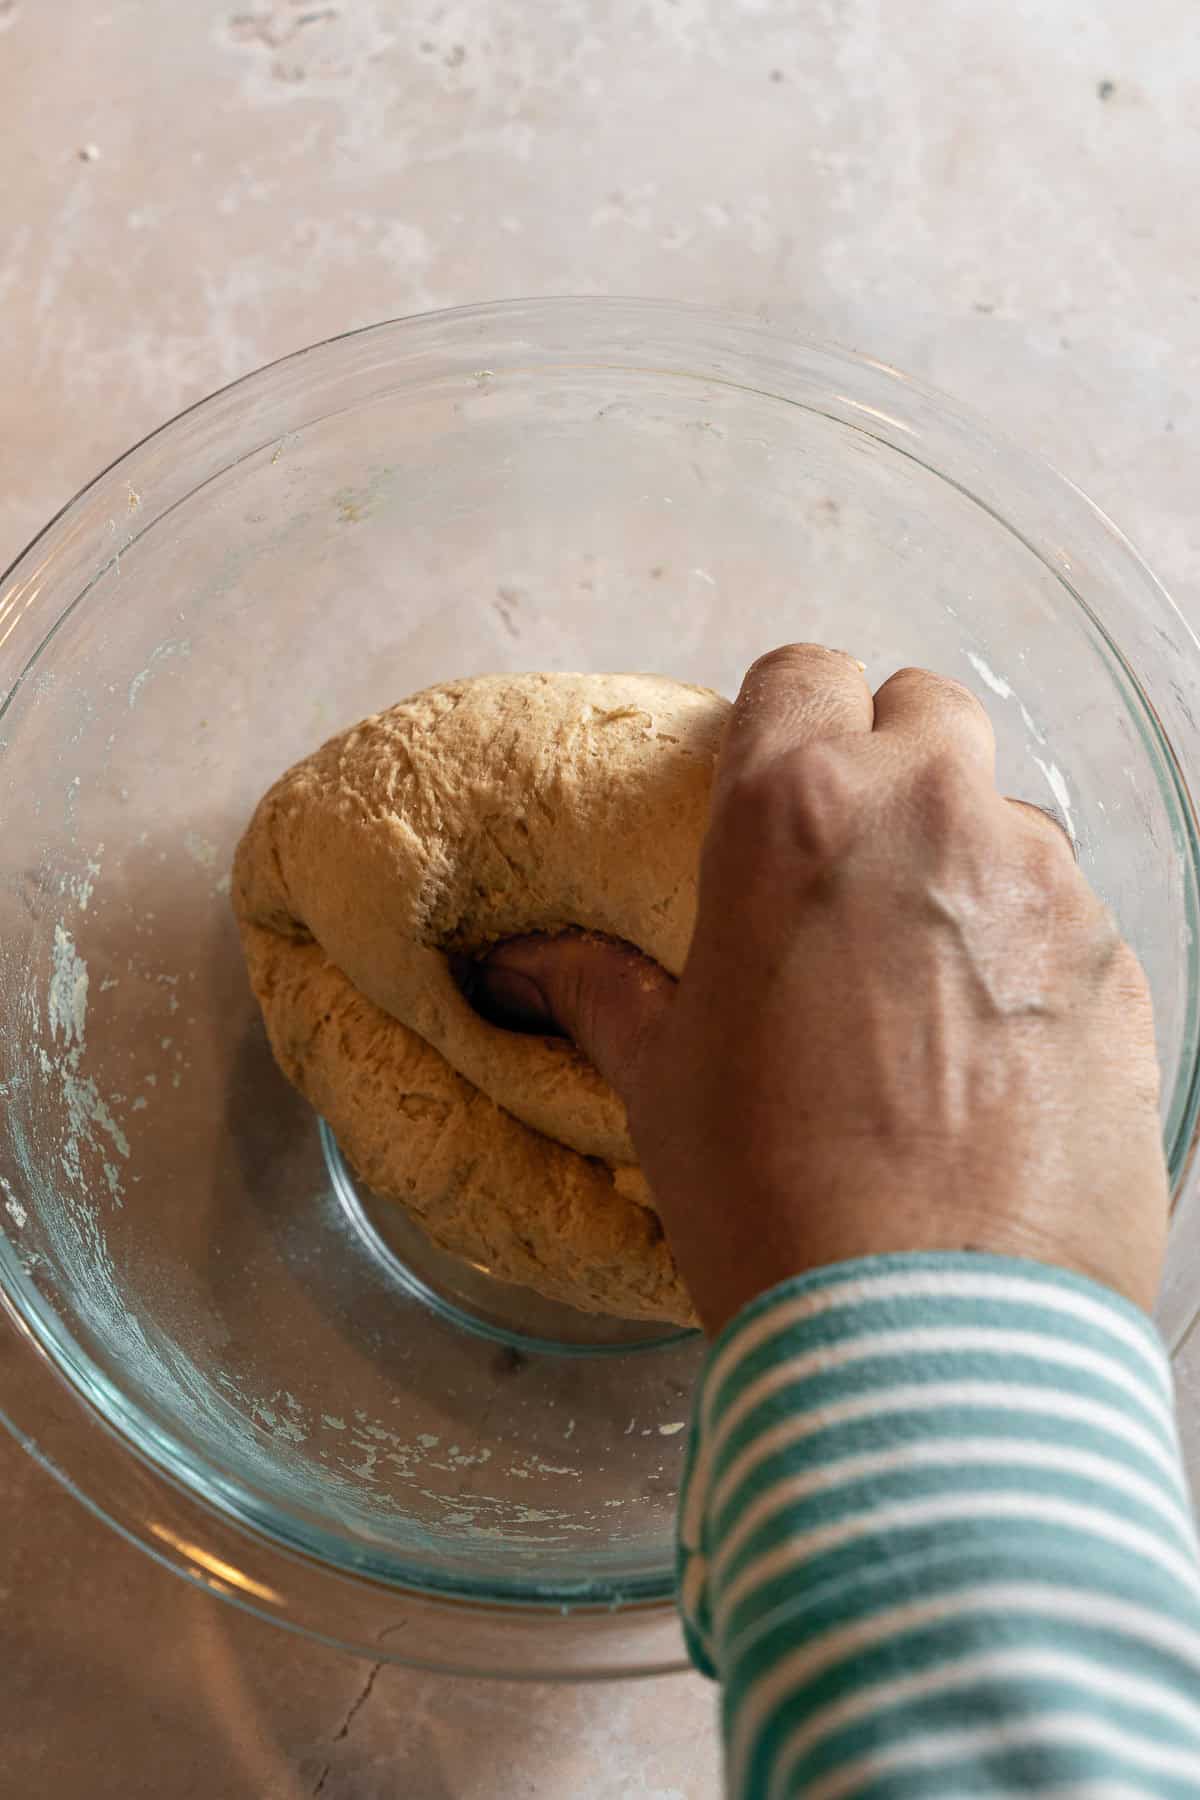
- After the resting period, dip your hands in water (to prevent sticking) and knead the dough again for another minute. The dough shouldn't be sticky anymore.
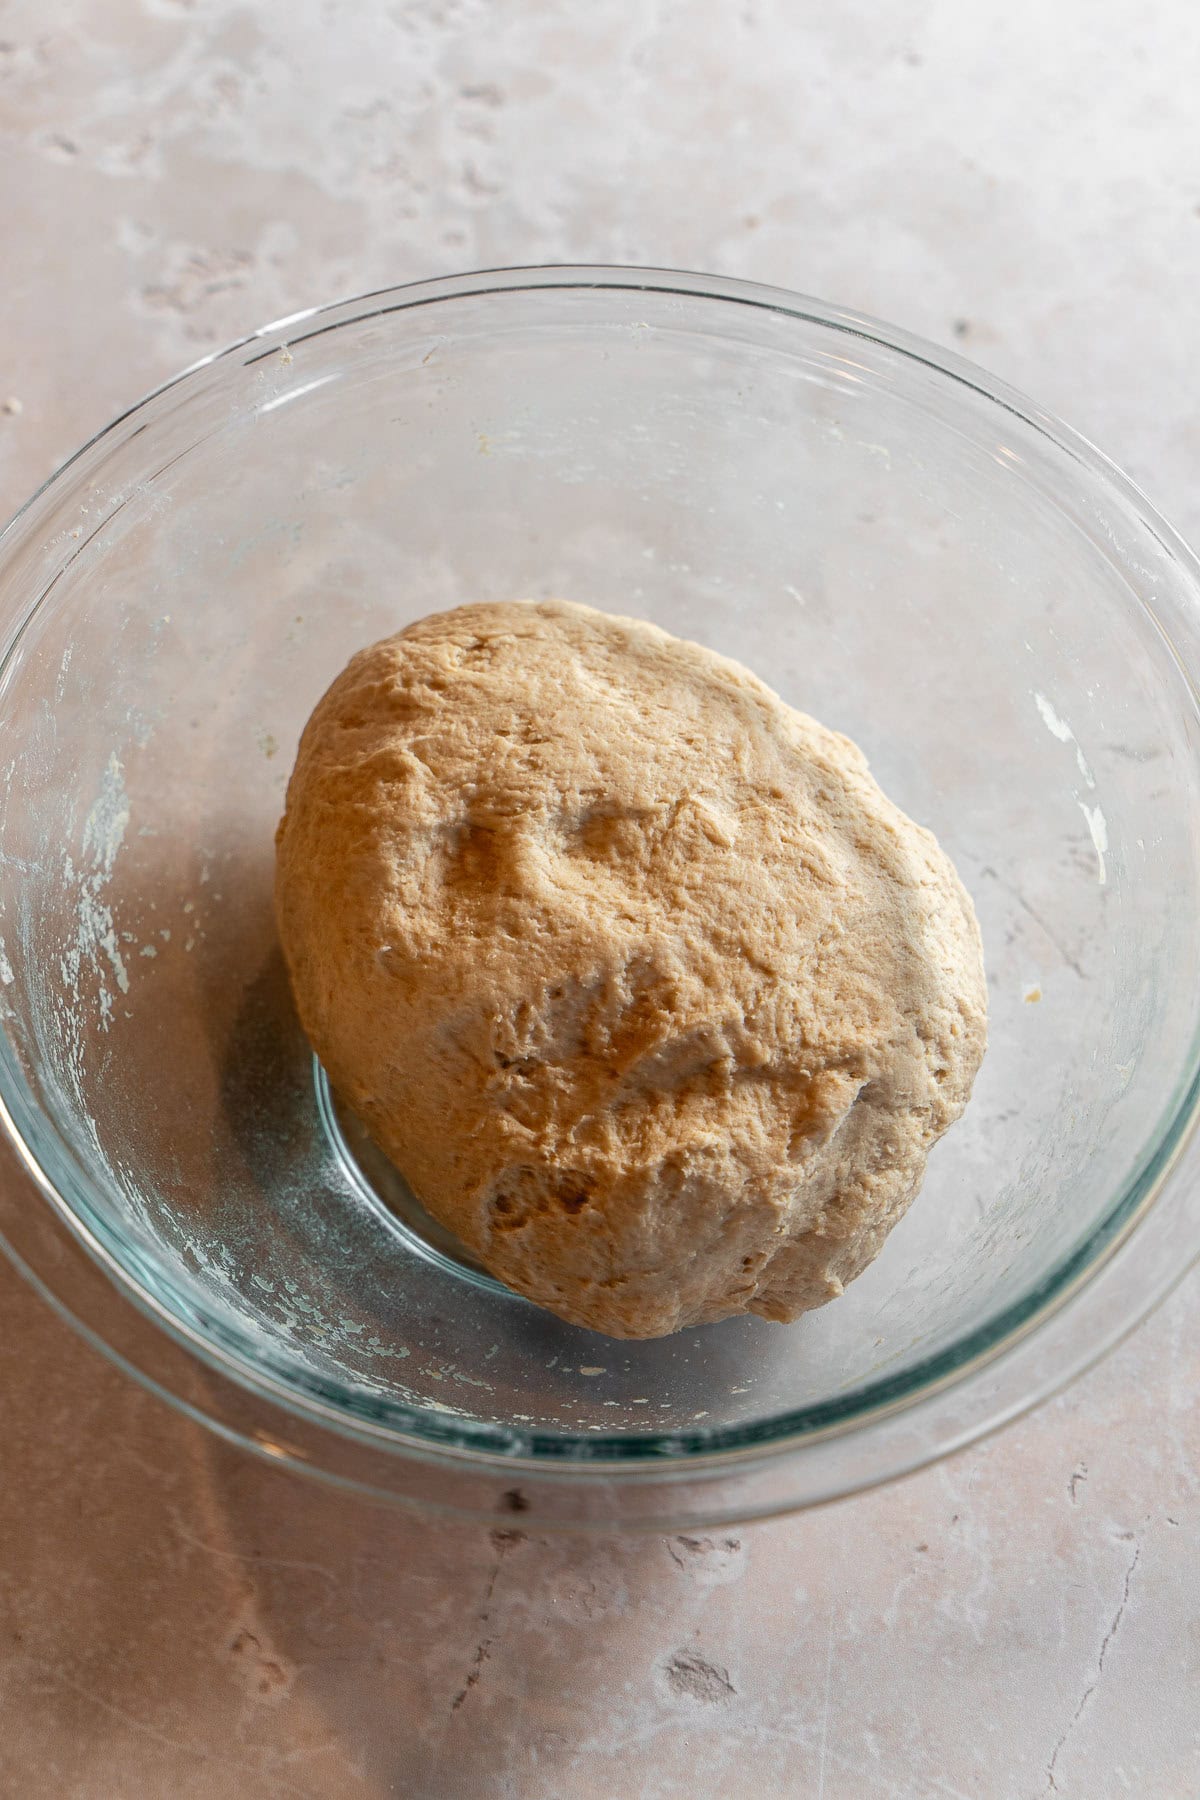
- The dough will keep indents and spring back very very lightly when ready.
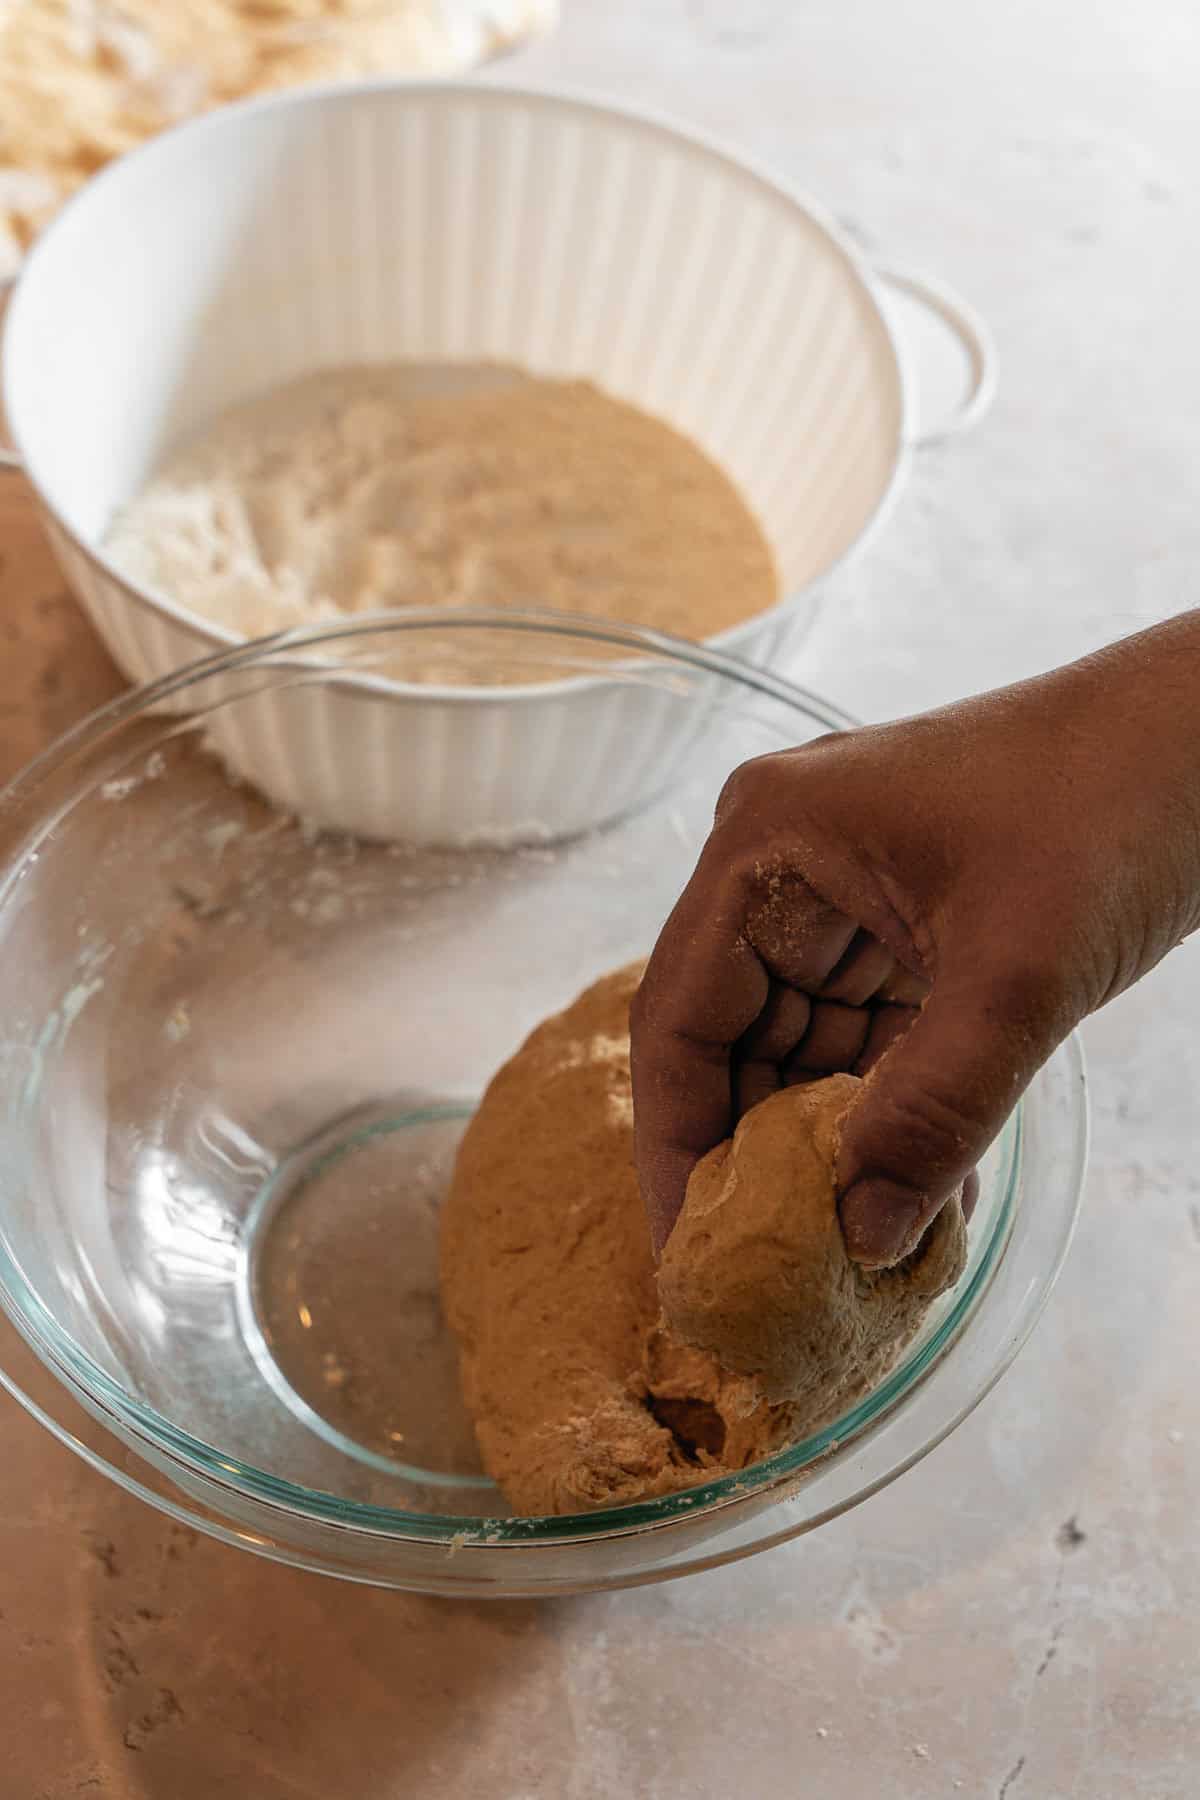
- Portion out 50-55 grams of dough to make 10 rotis.
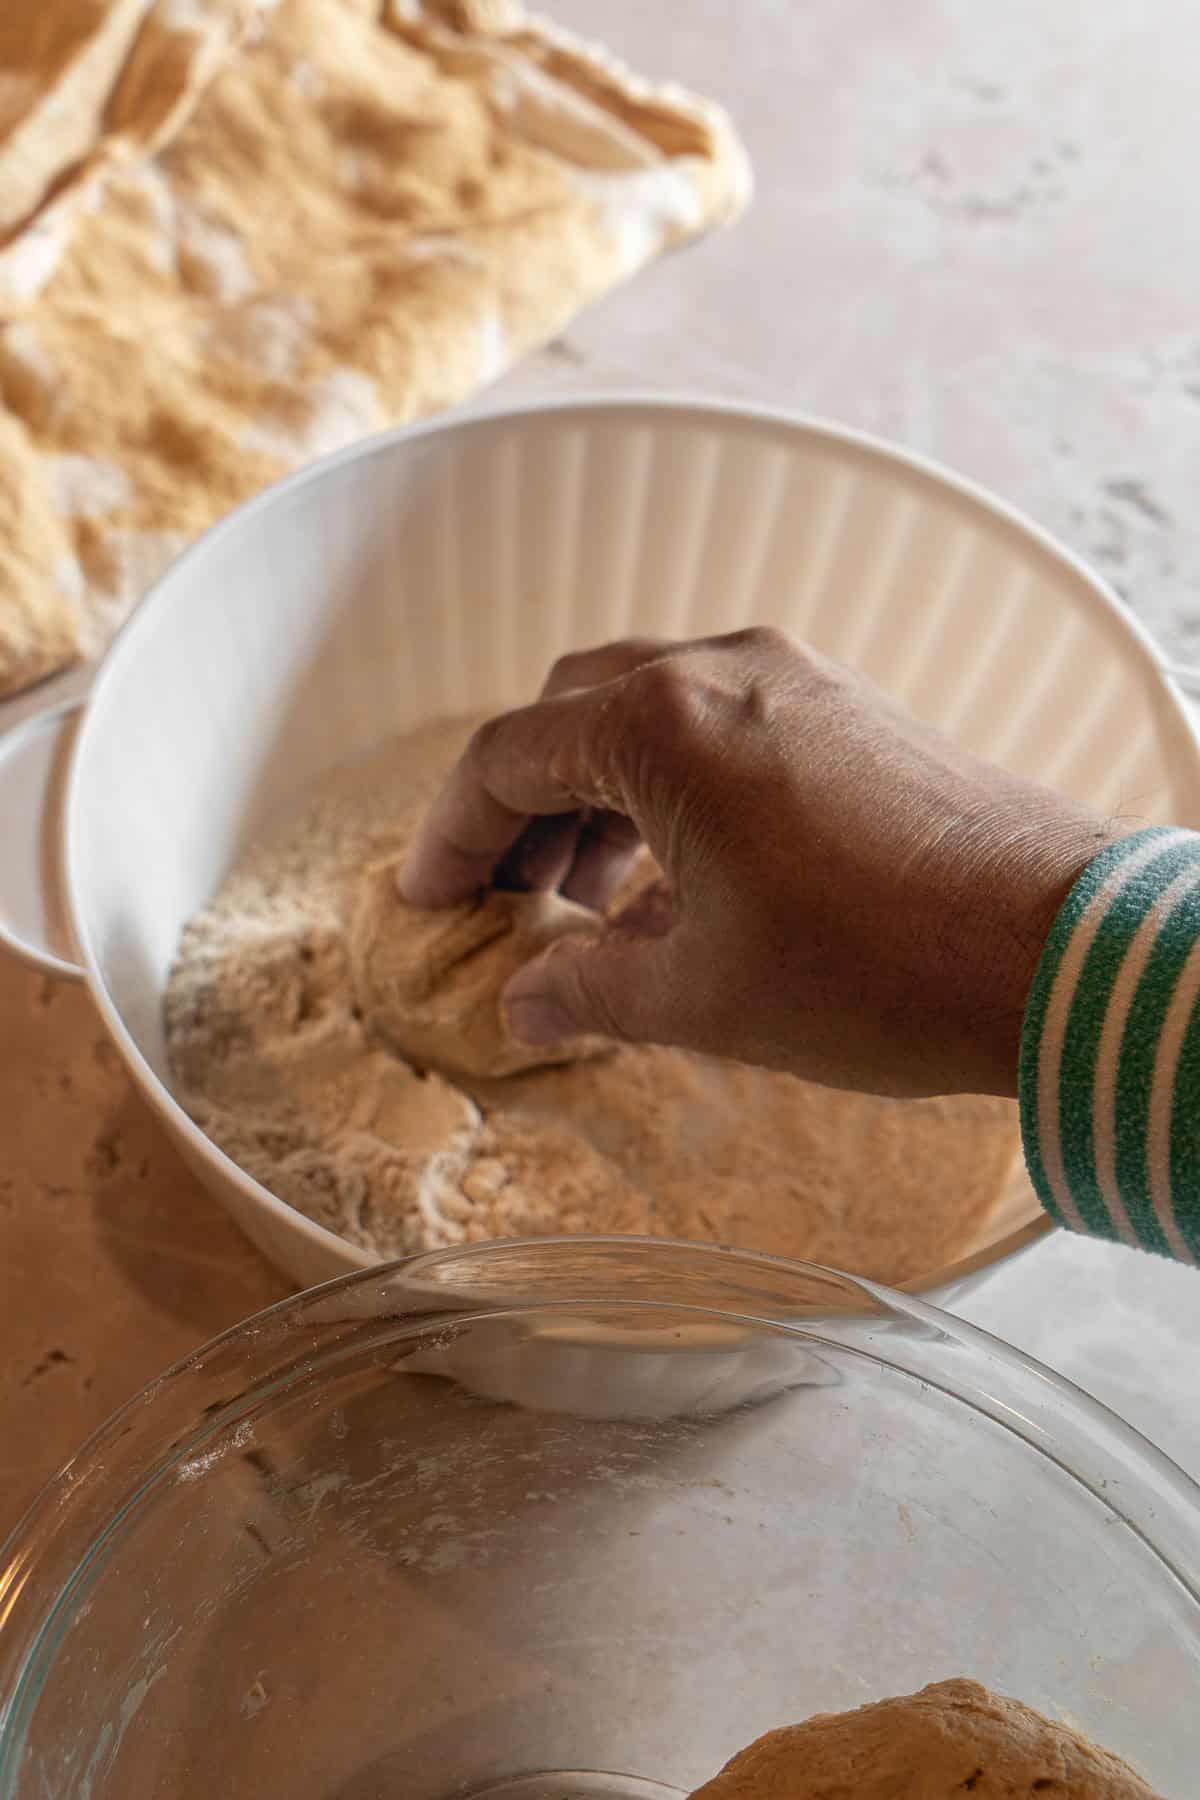
- Lightly dip the dough in extra atta to keep it from sticking to your hands.
This is a good point to begin heating your tawa, or cast iron skillet on medium heat. No oil necessary if your cast iron is seasoned properly.
- Roll the dough into balls between your hands.
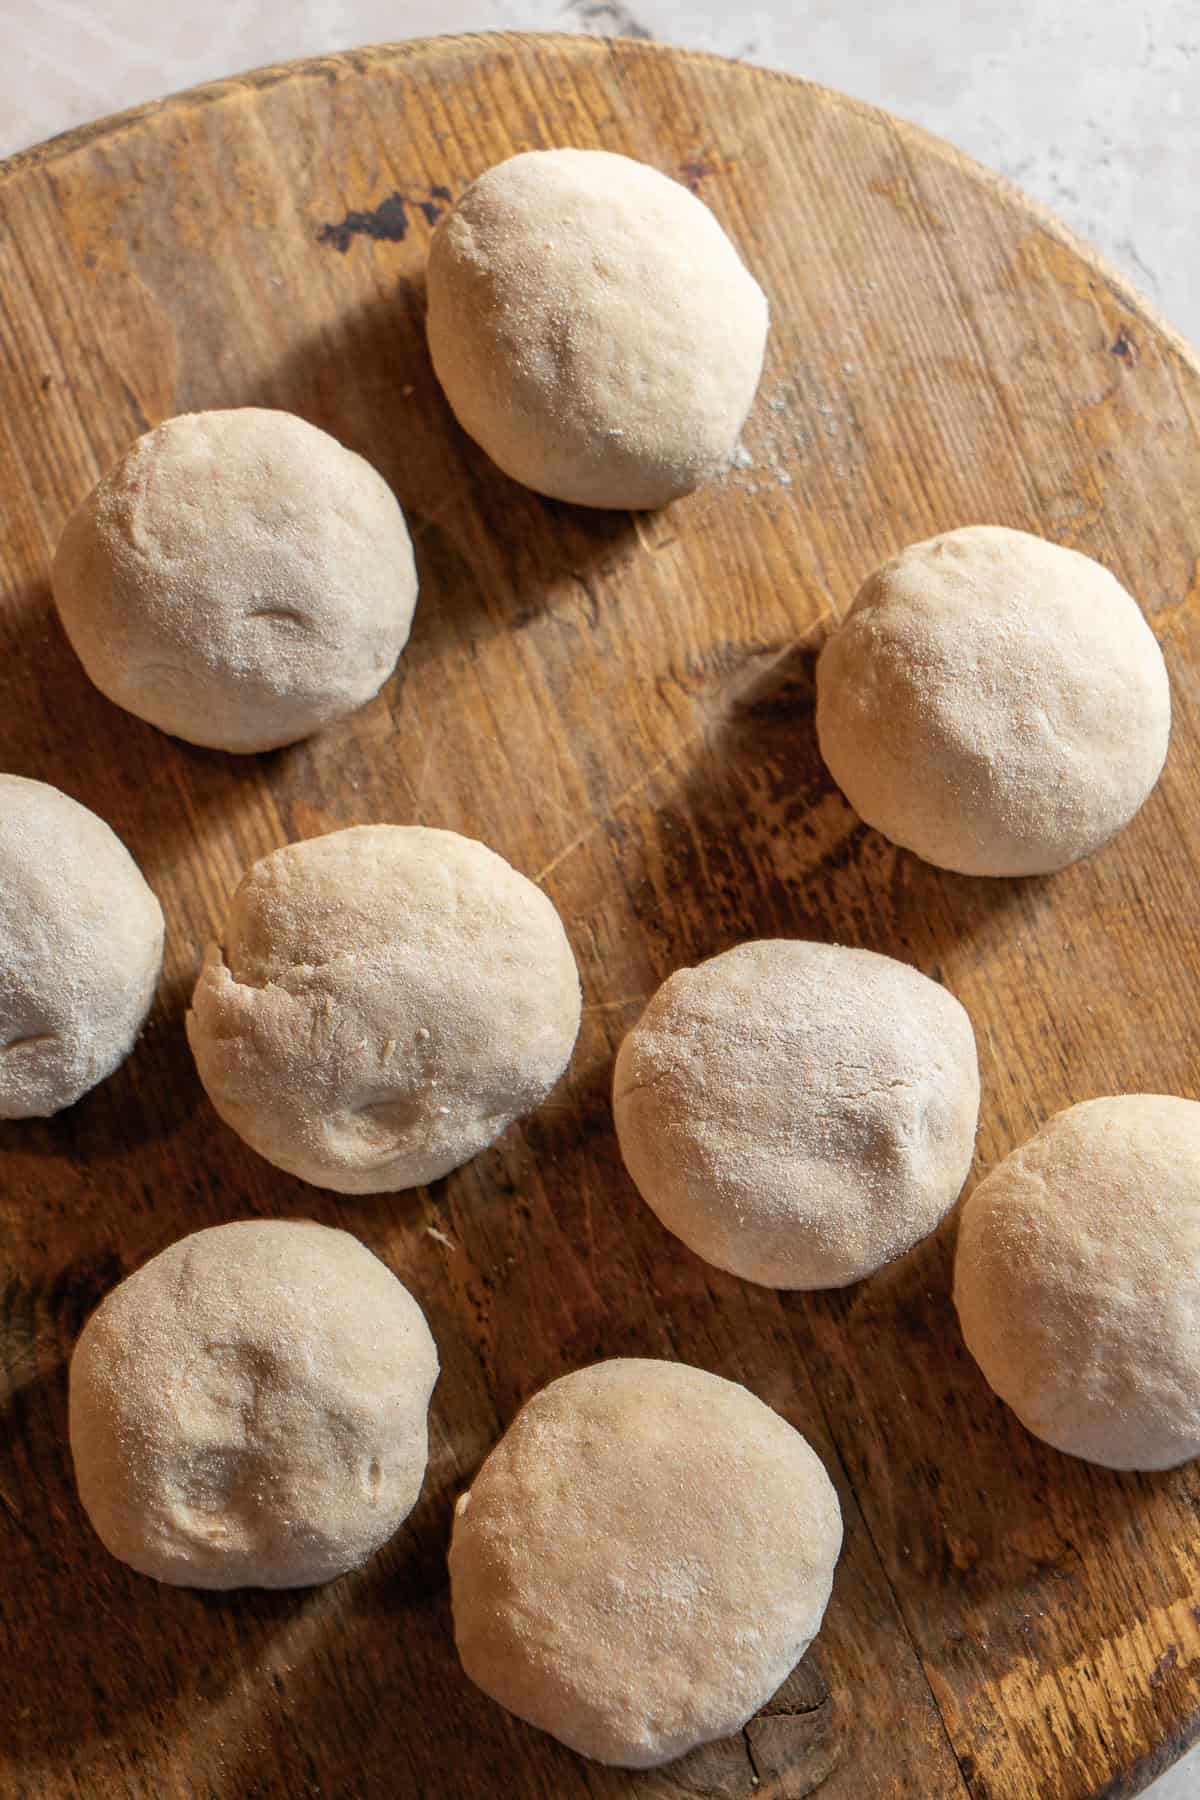
- Cover the balls with a tea towel while rolling out the rotis.
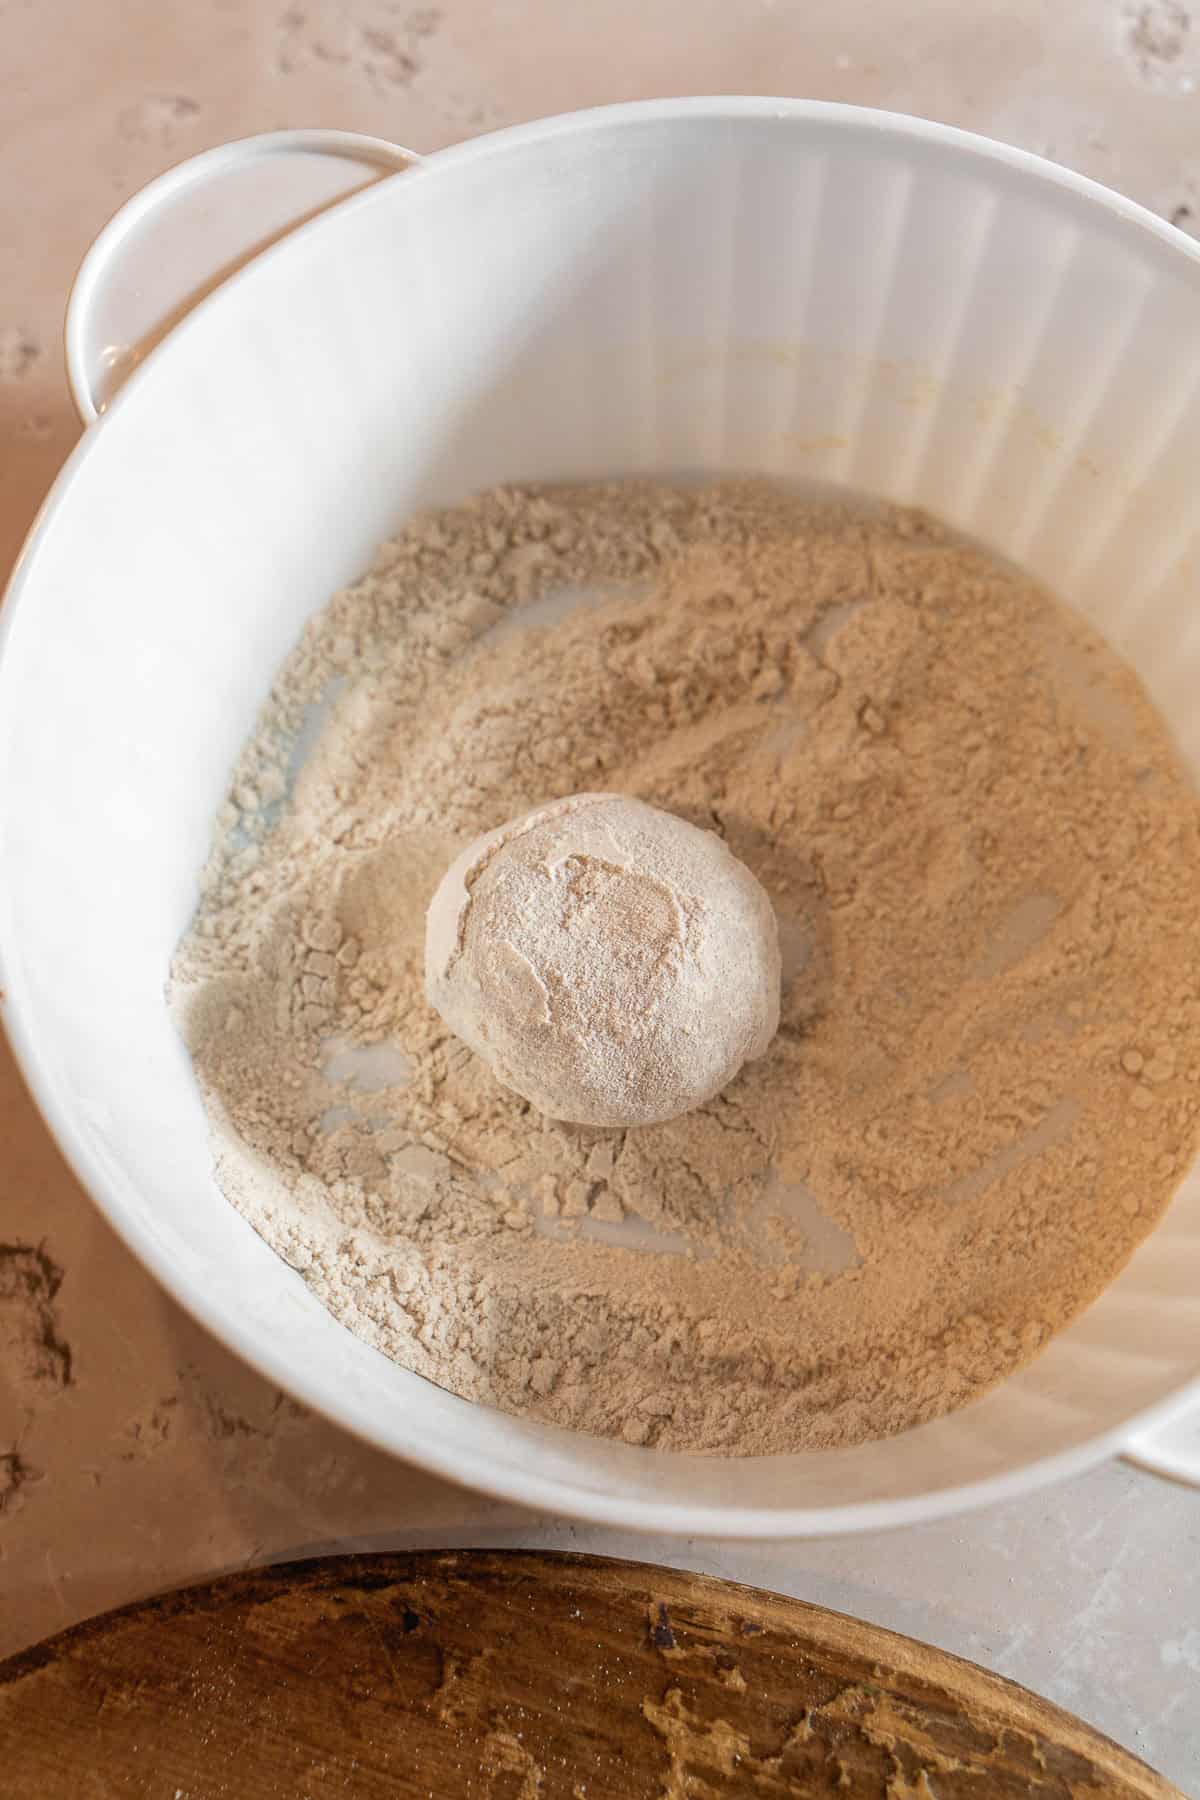
- Toss the ball of dough in the loose atta to coat it.
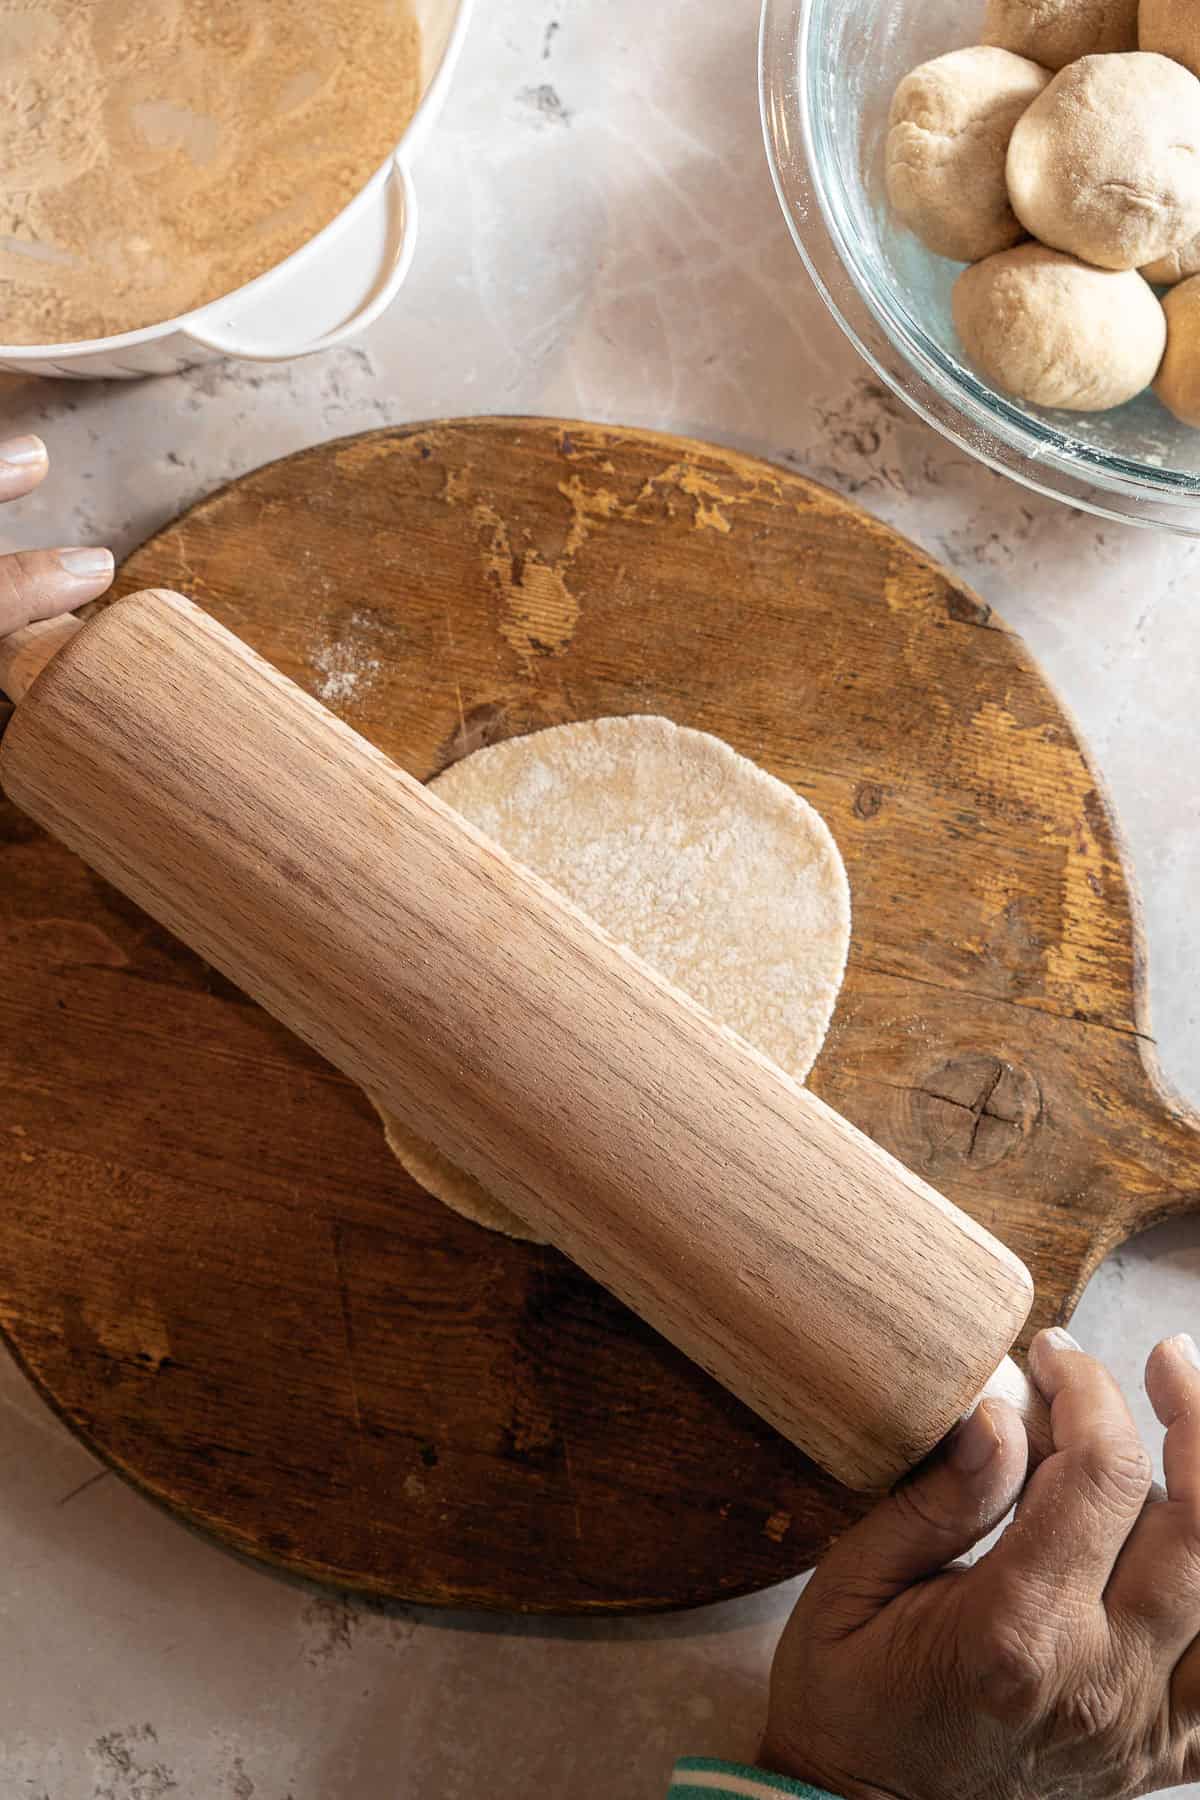
- Roll the ball out into a 3-4 inch circle with a rolling pin, turning it 90 degrees every few rolls to ensure an even circular shape.
A circular roti tastes just as good as any ambiguous shape you roll out! Just aim for an even thickness as you continue perfecting your technique. I can't leave out the joke, however, that a round roti means a better shot at finding a husband!
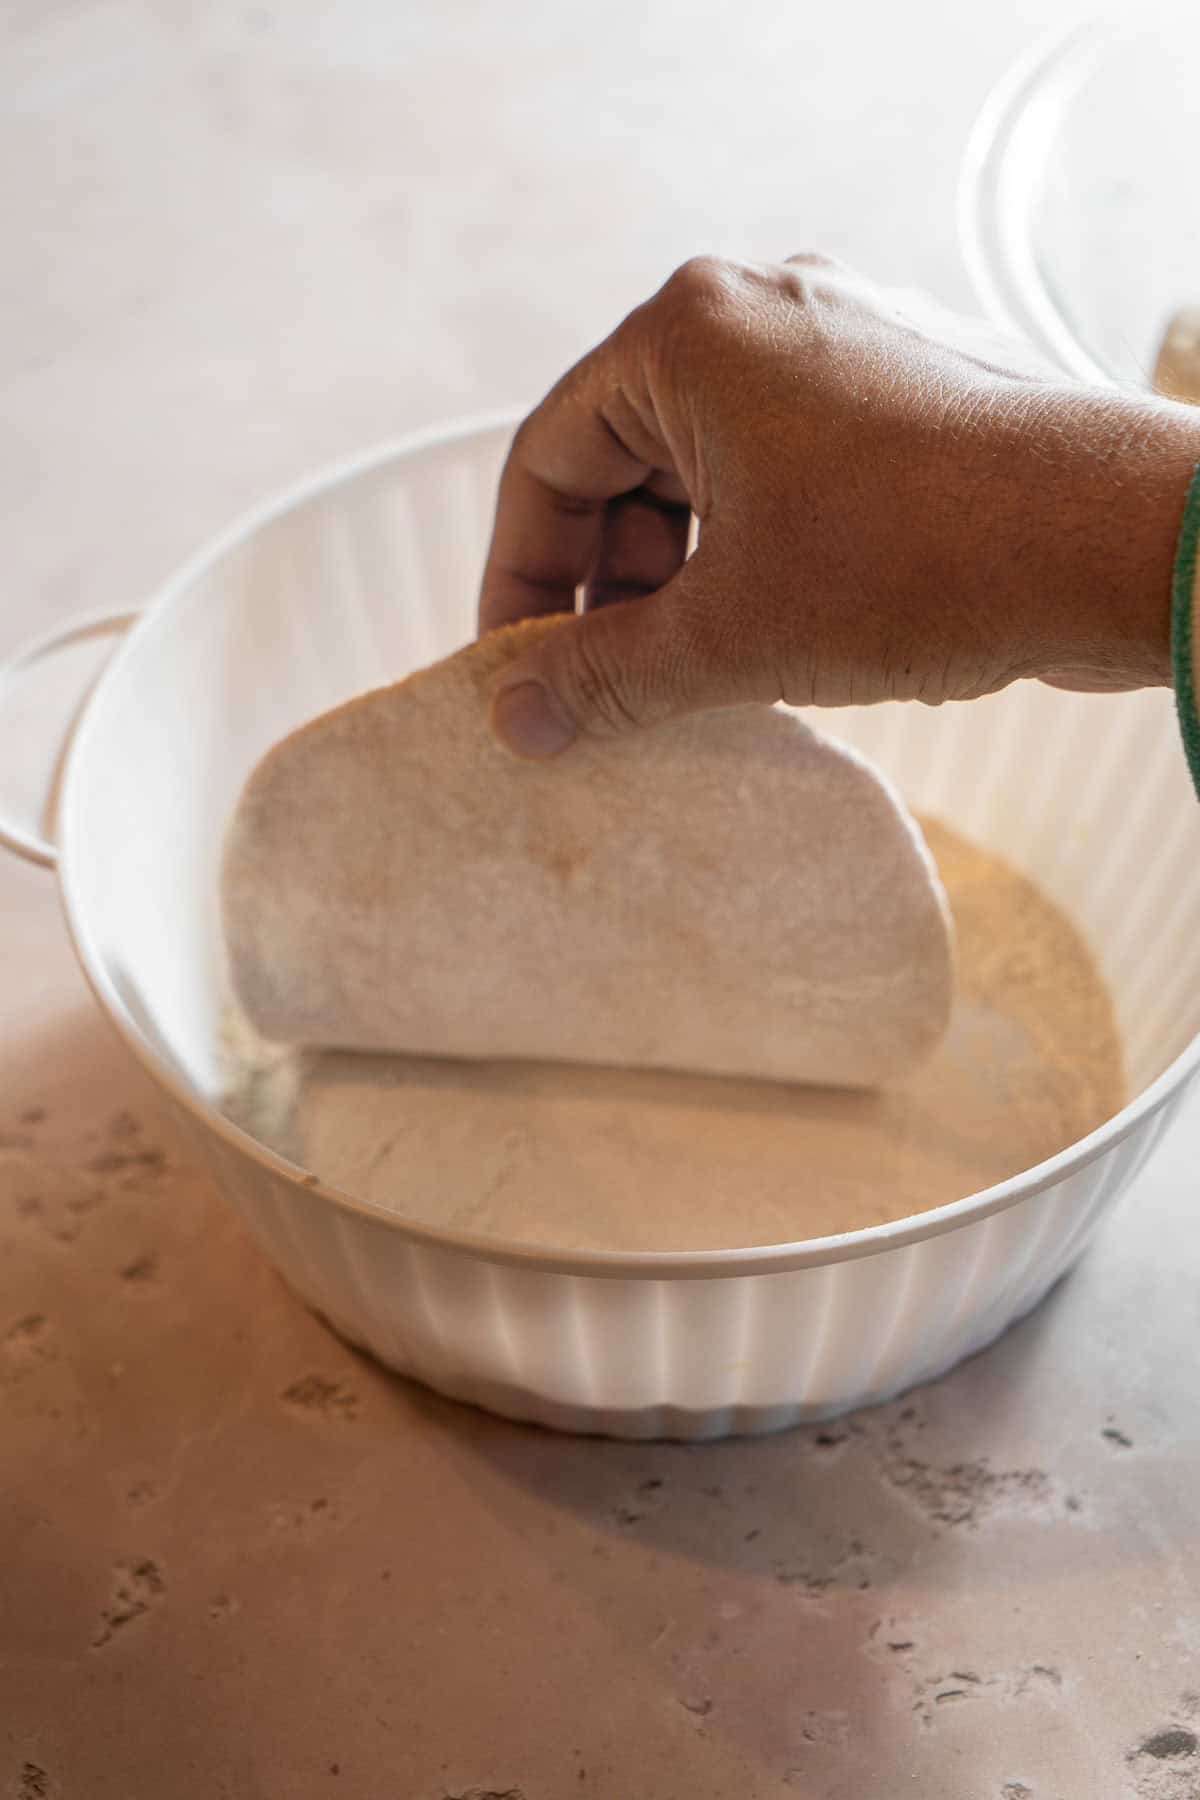
- Dip both sides into the loose atta to prevent sticking.
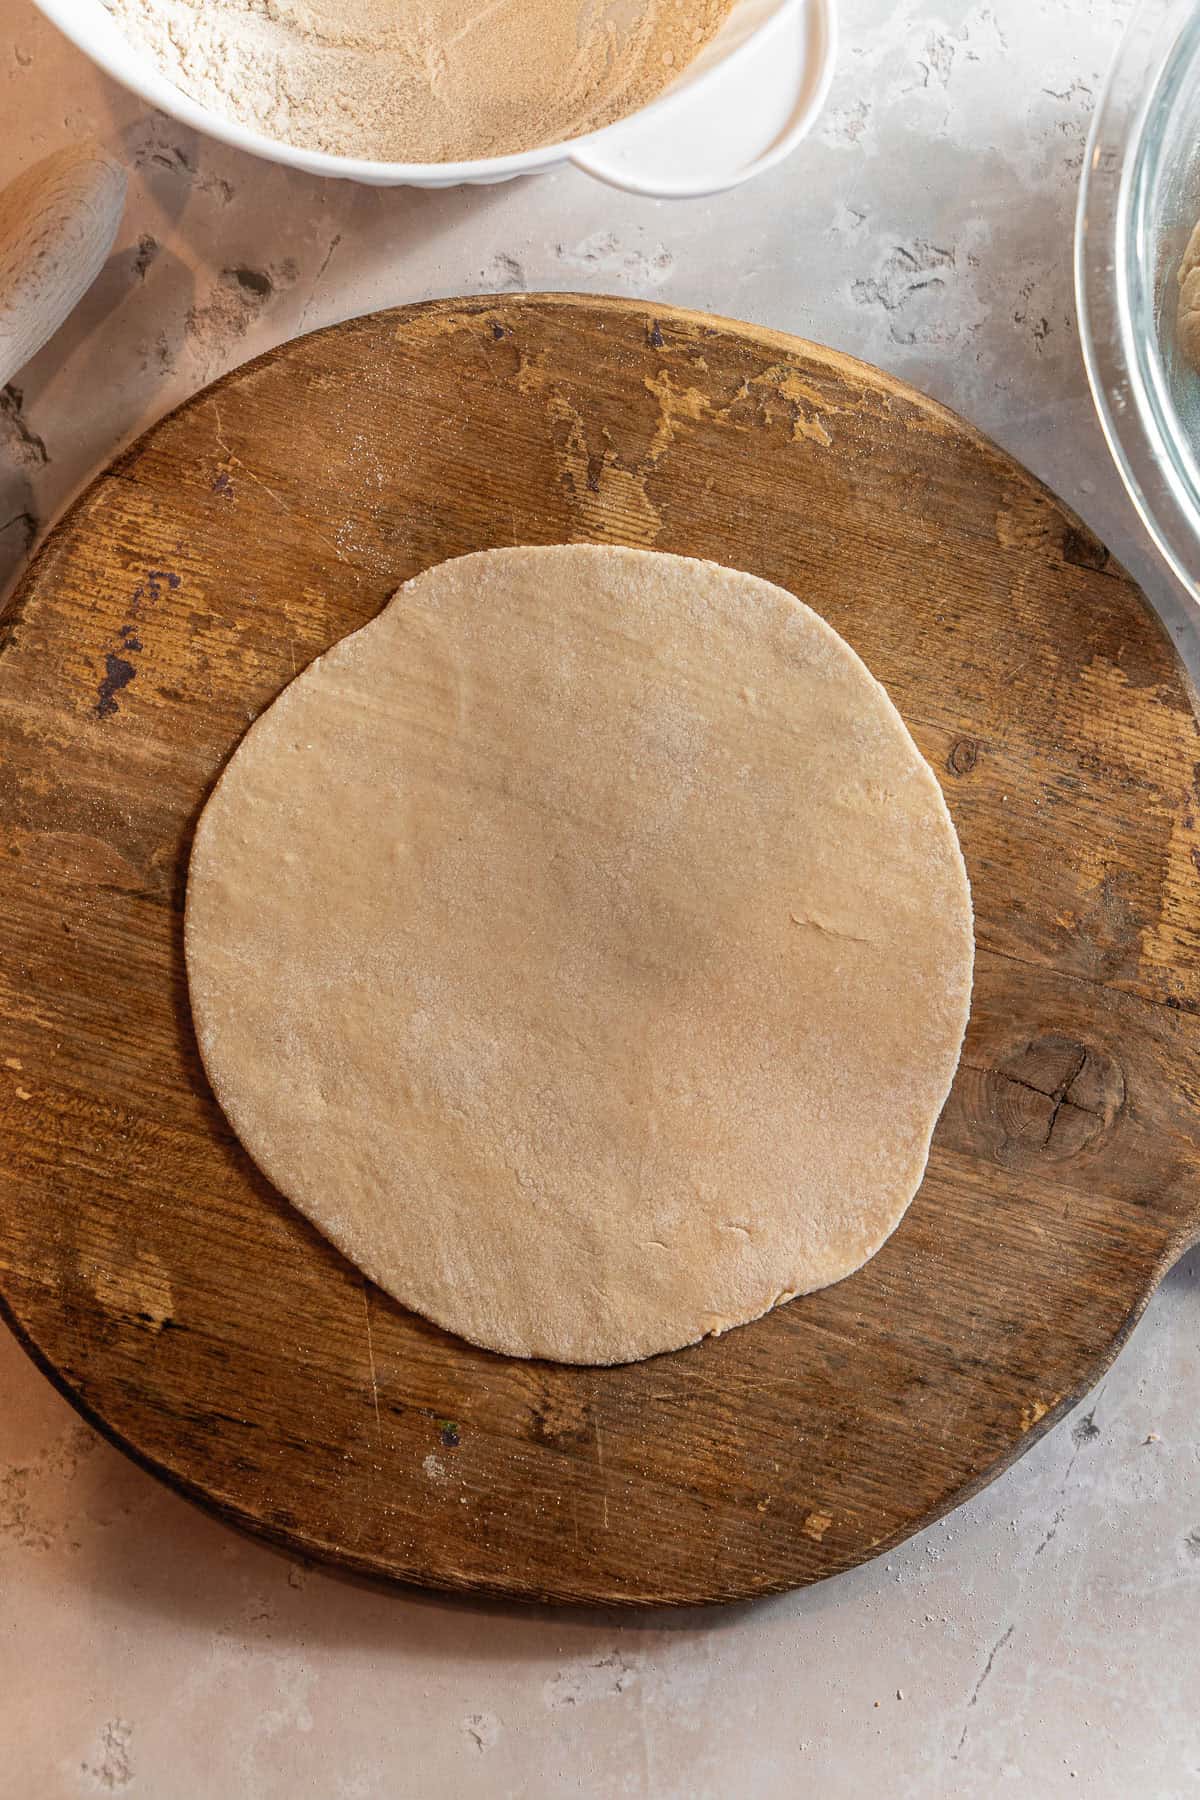
- Continue rolling out the dough until it's 7.5-8 inches in diameter.
While the first two sides are cooking, skilled roti-makers can usually shuffle between rolling out the next roti before the next flip.
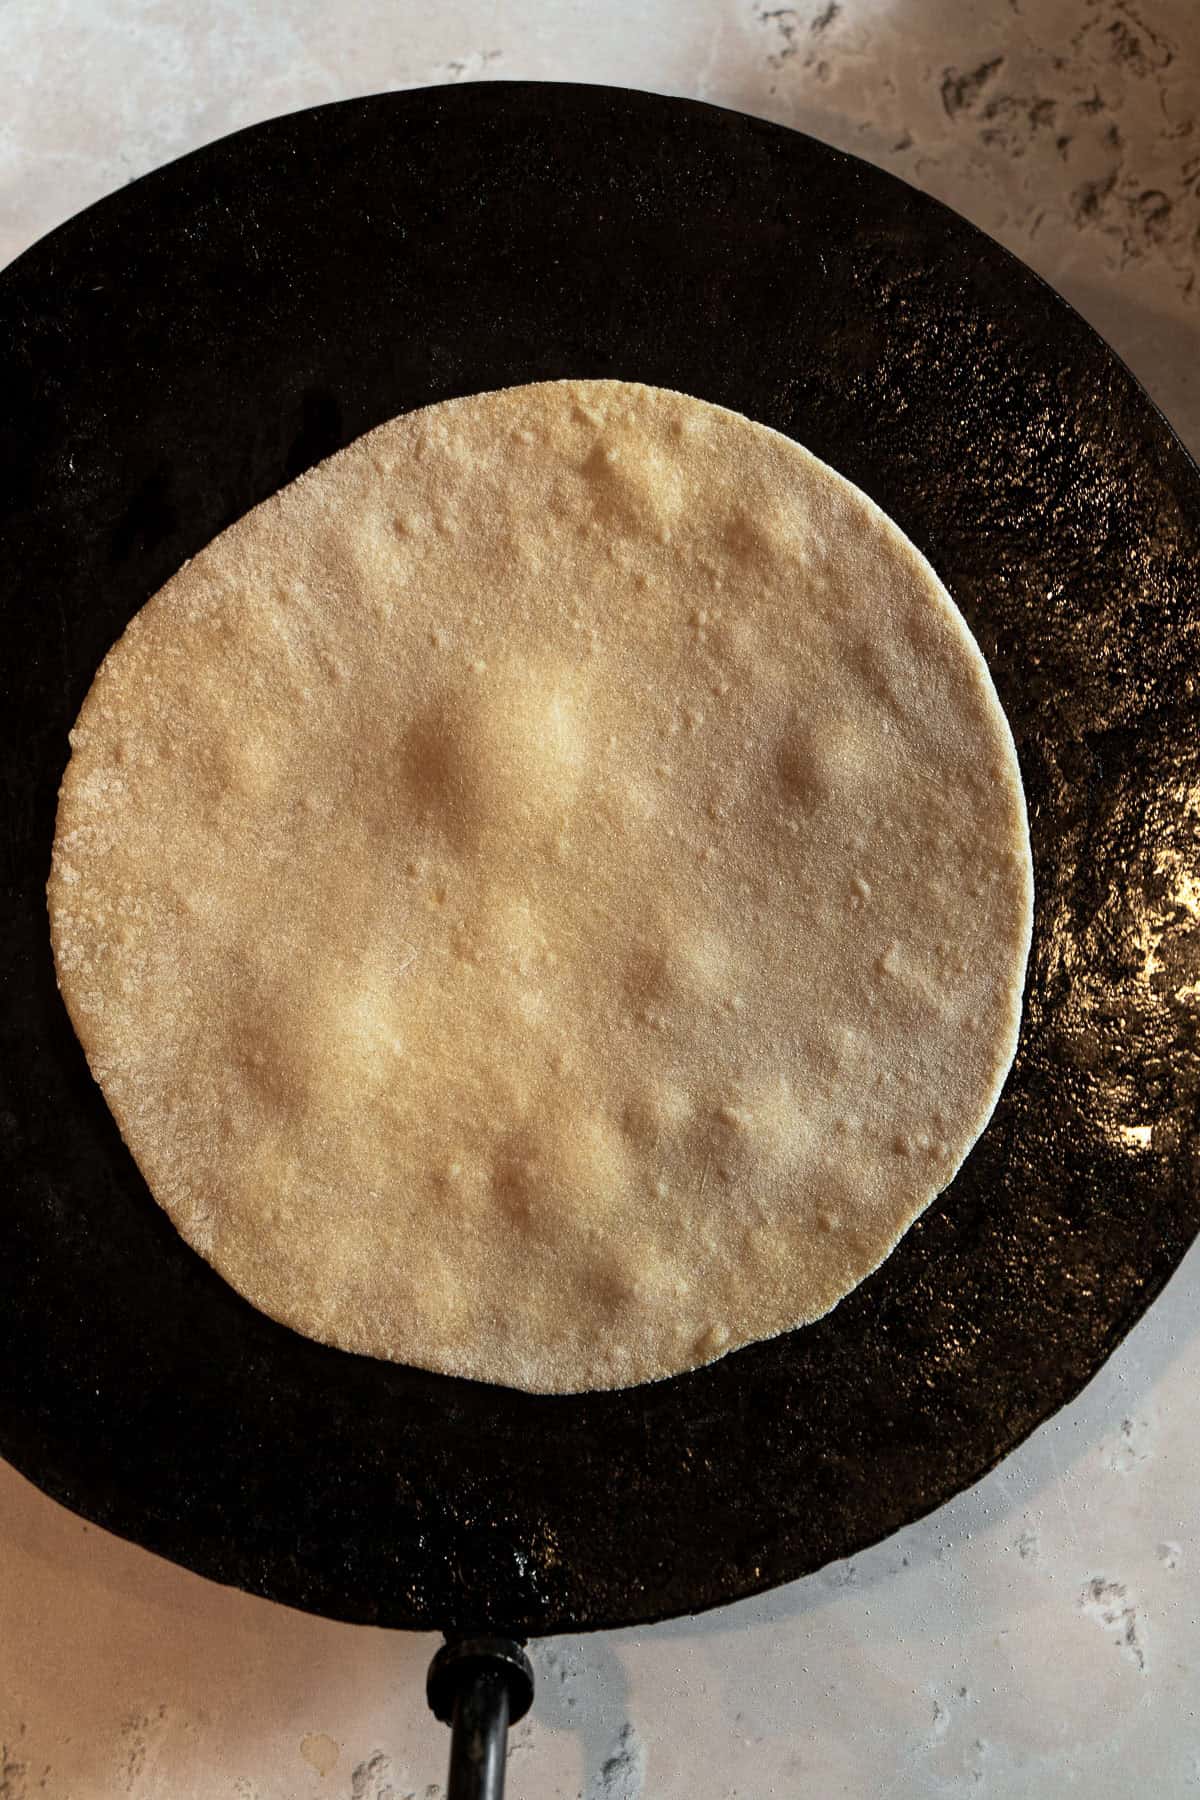
- Carefully transfer the roti to a dry tawa. After 30 seconds, it'll start to bubble and the color of the roti will darken. It's ready for the first flip.
- Flip the roti with tongs, or scooch it to the edge and flip the roti with your hands from there. The second side will have lightly browned spots from the contact points on the bubbles.
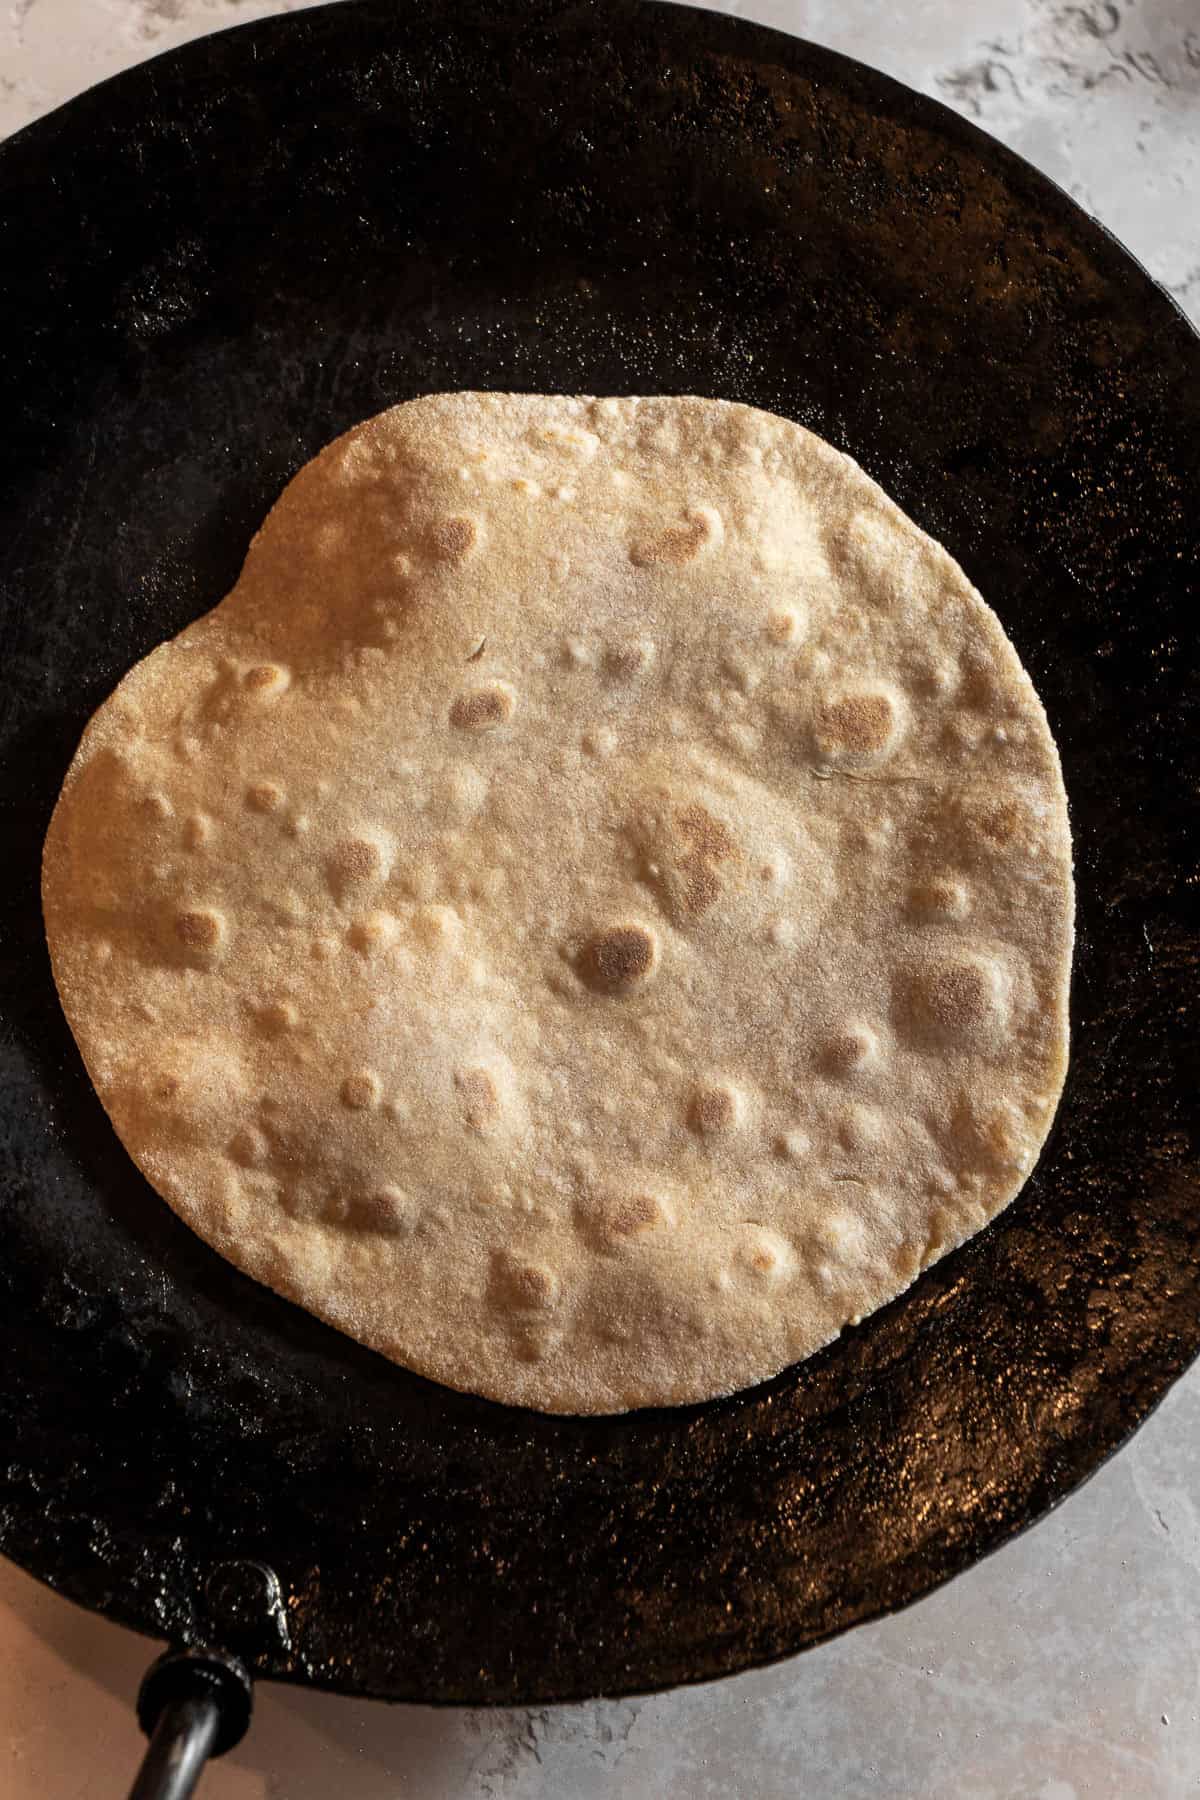
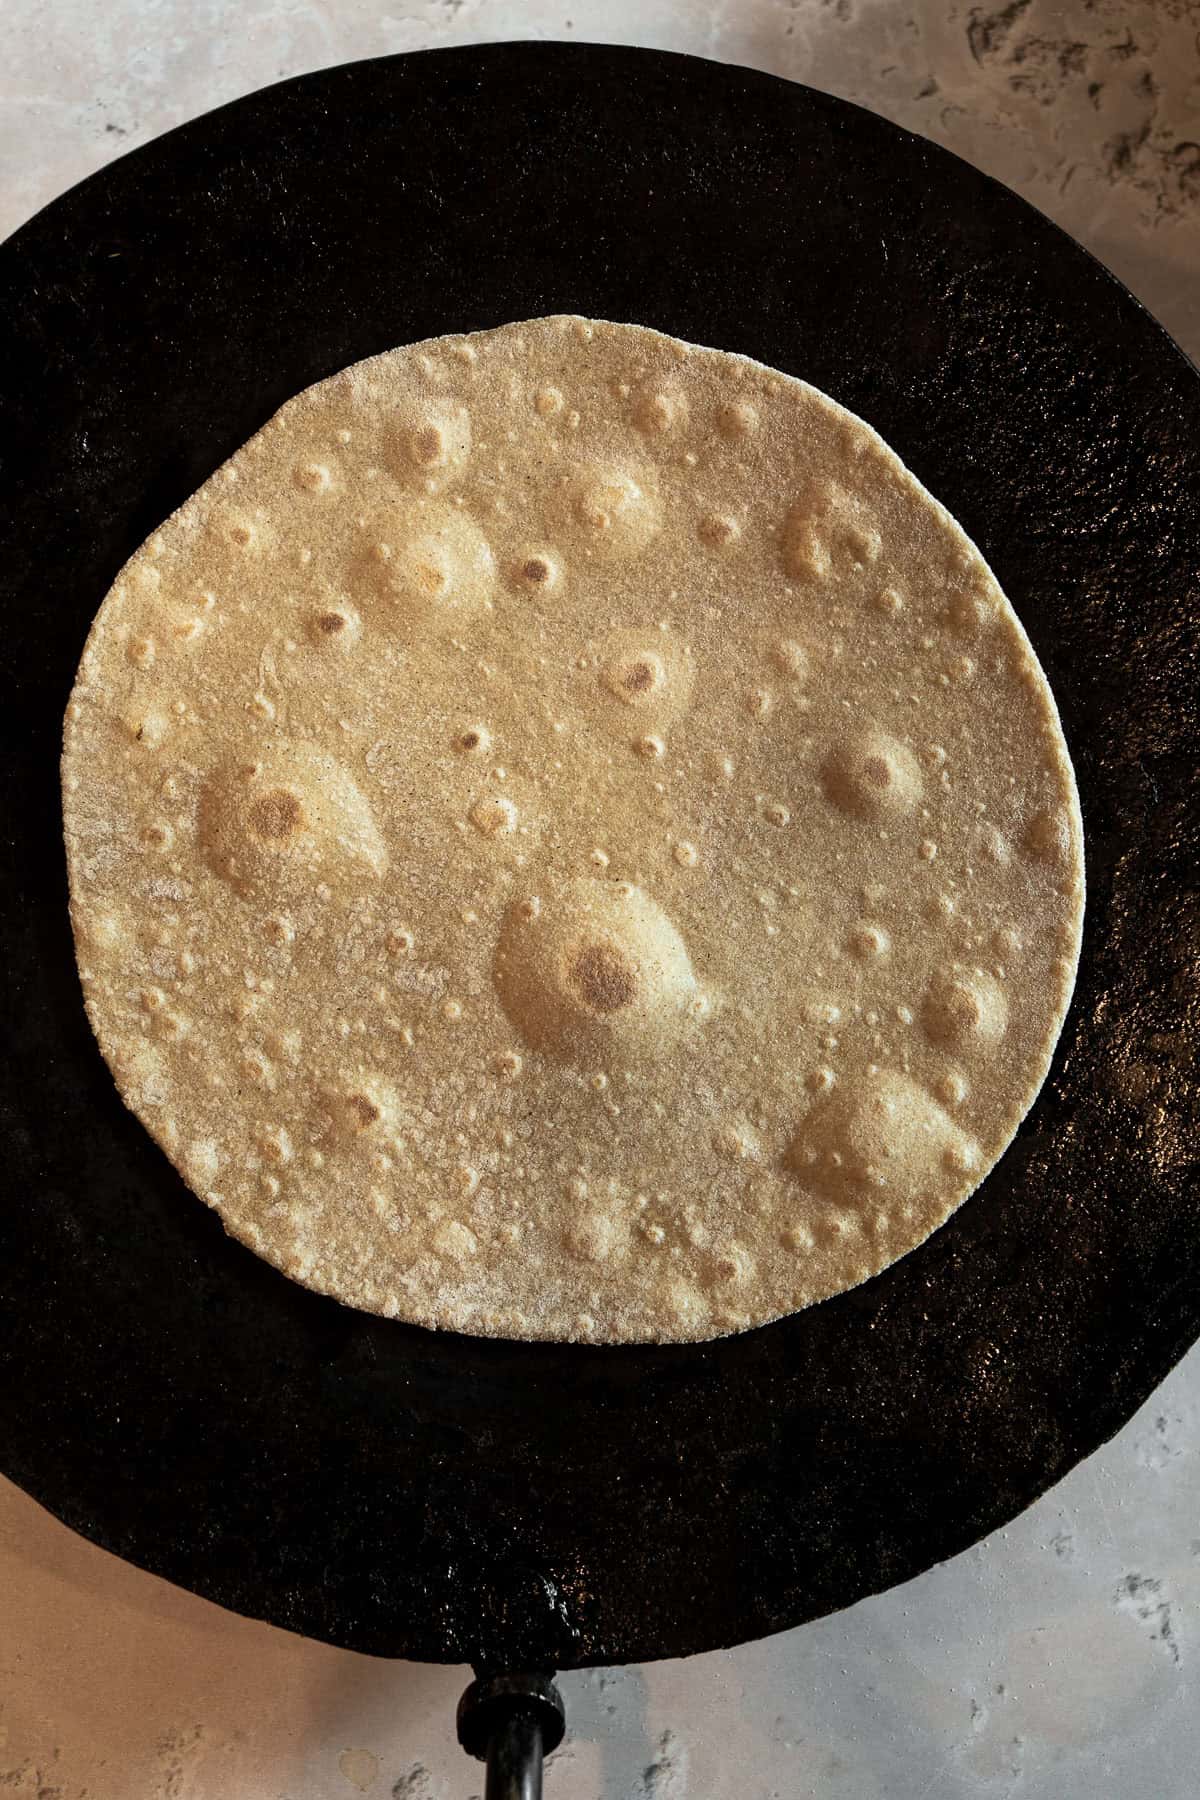
- After a minute, flip the roti again. The first side will be fully cooked and begin puffing.
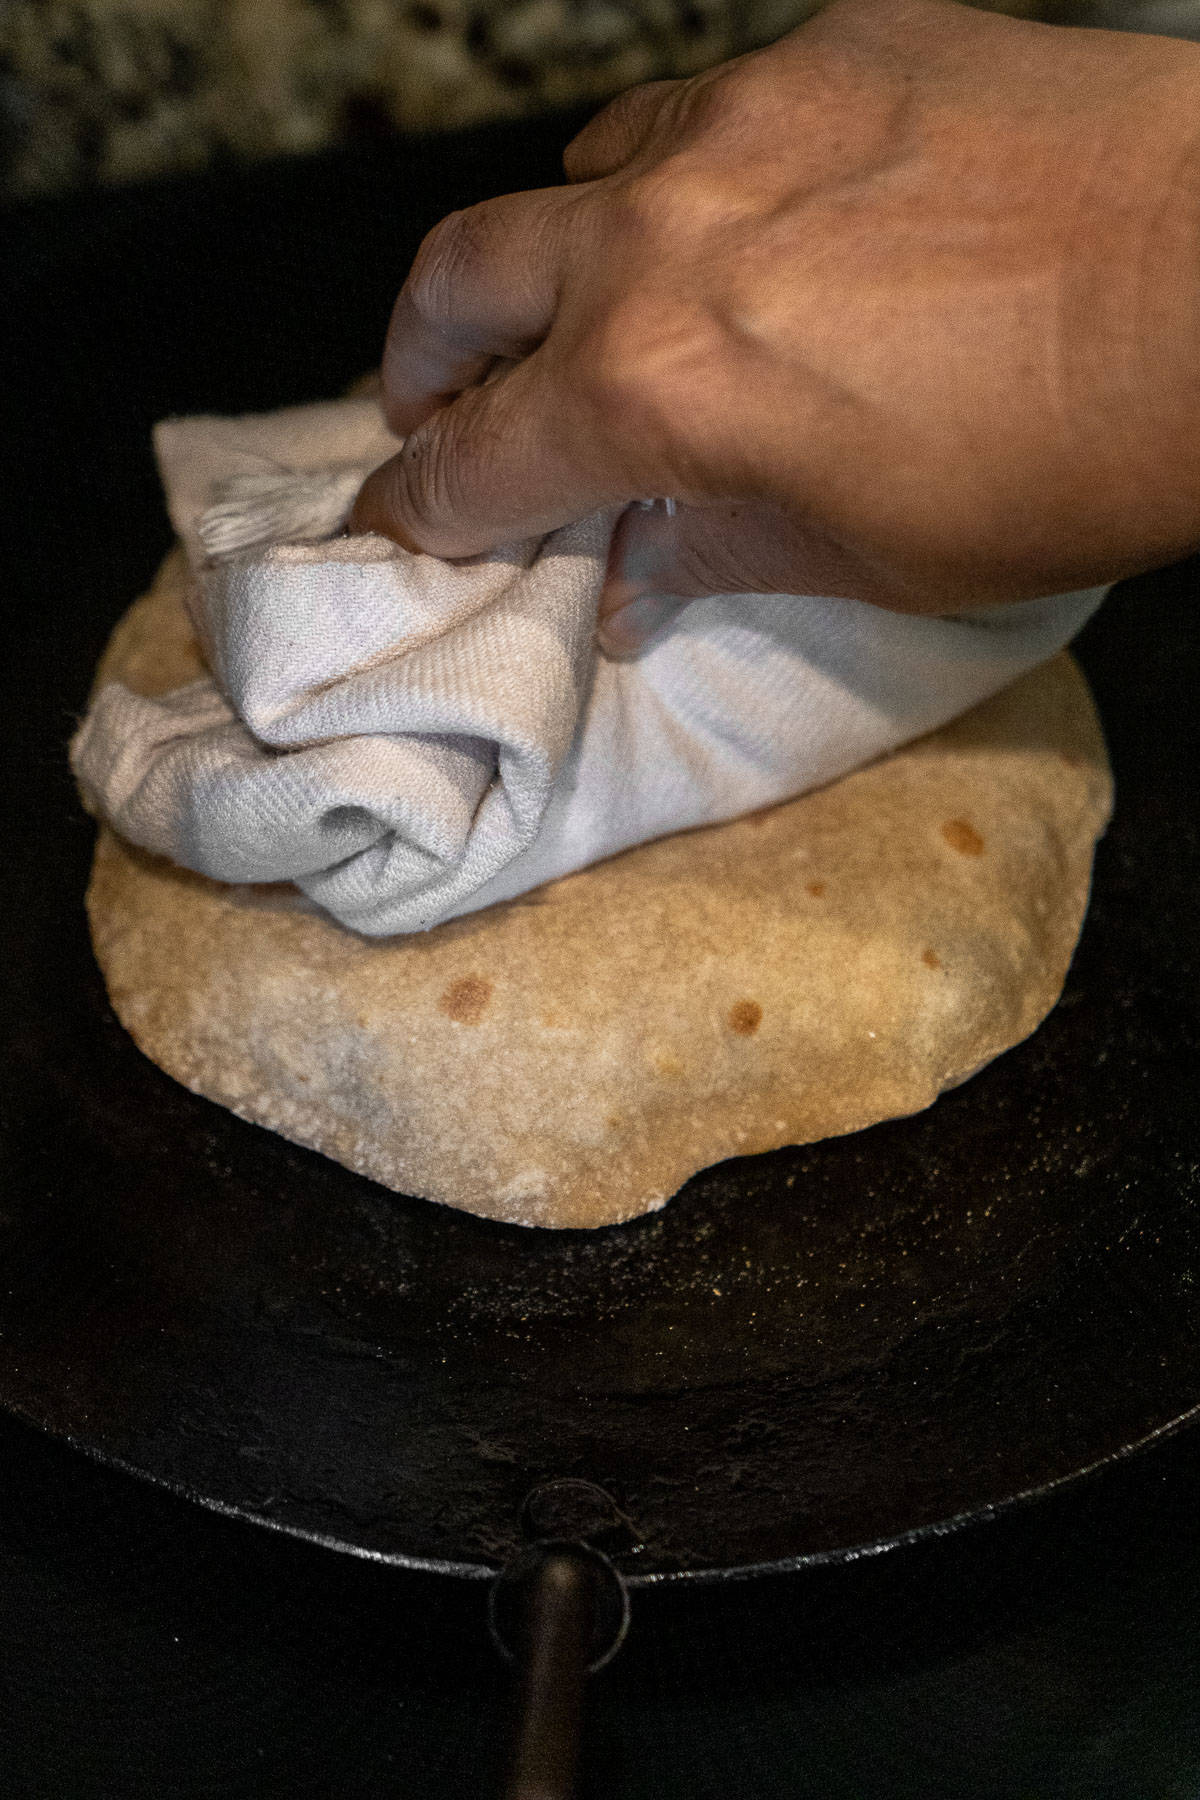
- Use a clean kitchen towel or a spatula to lightly press the roti on the sides to encourage puffing, which is steam moving and building up inside the roti to cook it. Continue cooking until the raw dough is fully cooked through.
Tawas, an Indian cast iron griddle with a slight concave, work really well on an induction stovetop for the entire roti-making process. It works just as well over gas, however skilled roti-makers are able to get impressive puffed up rotis and browning by transfer the half-cooked roti over a low open flame burner to finish cooking.
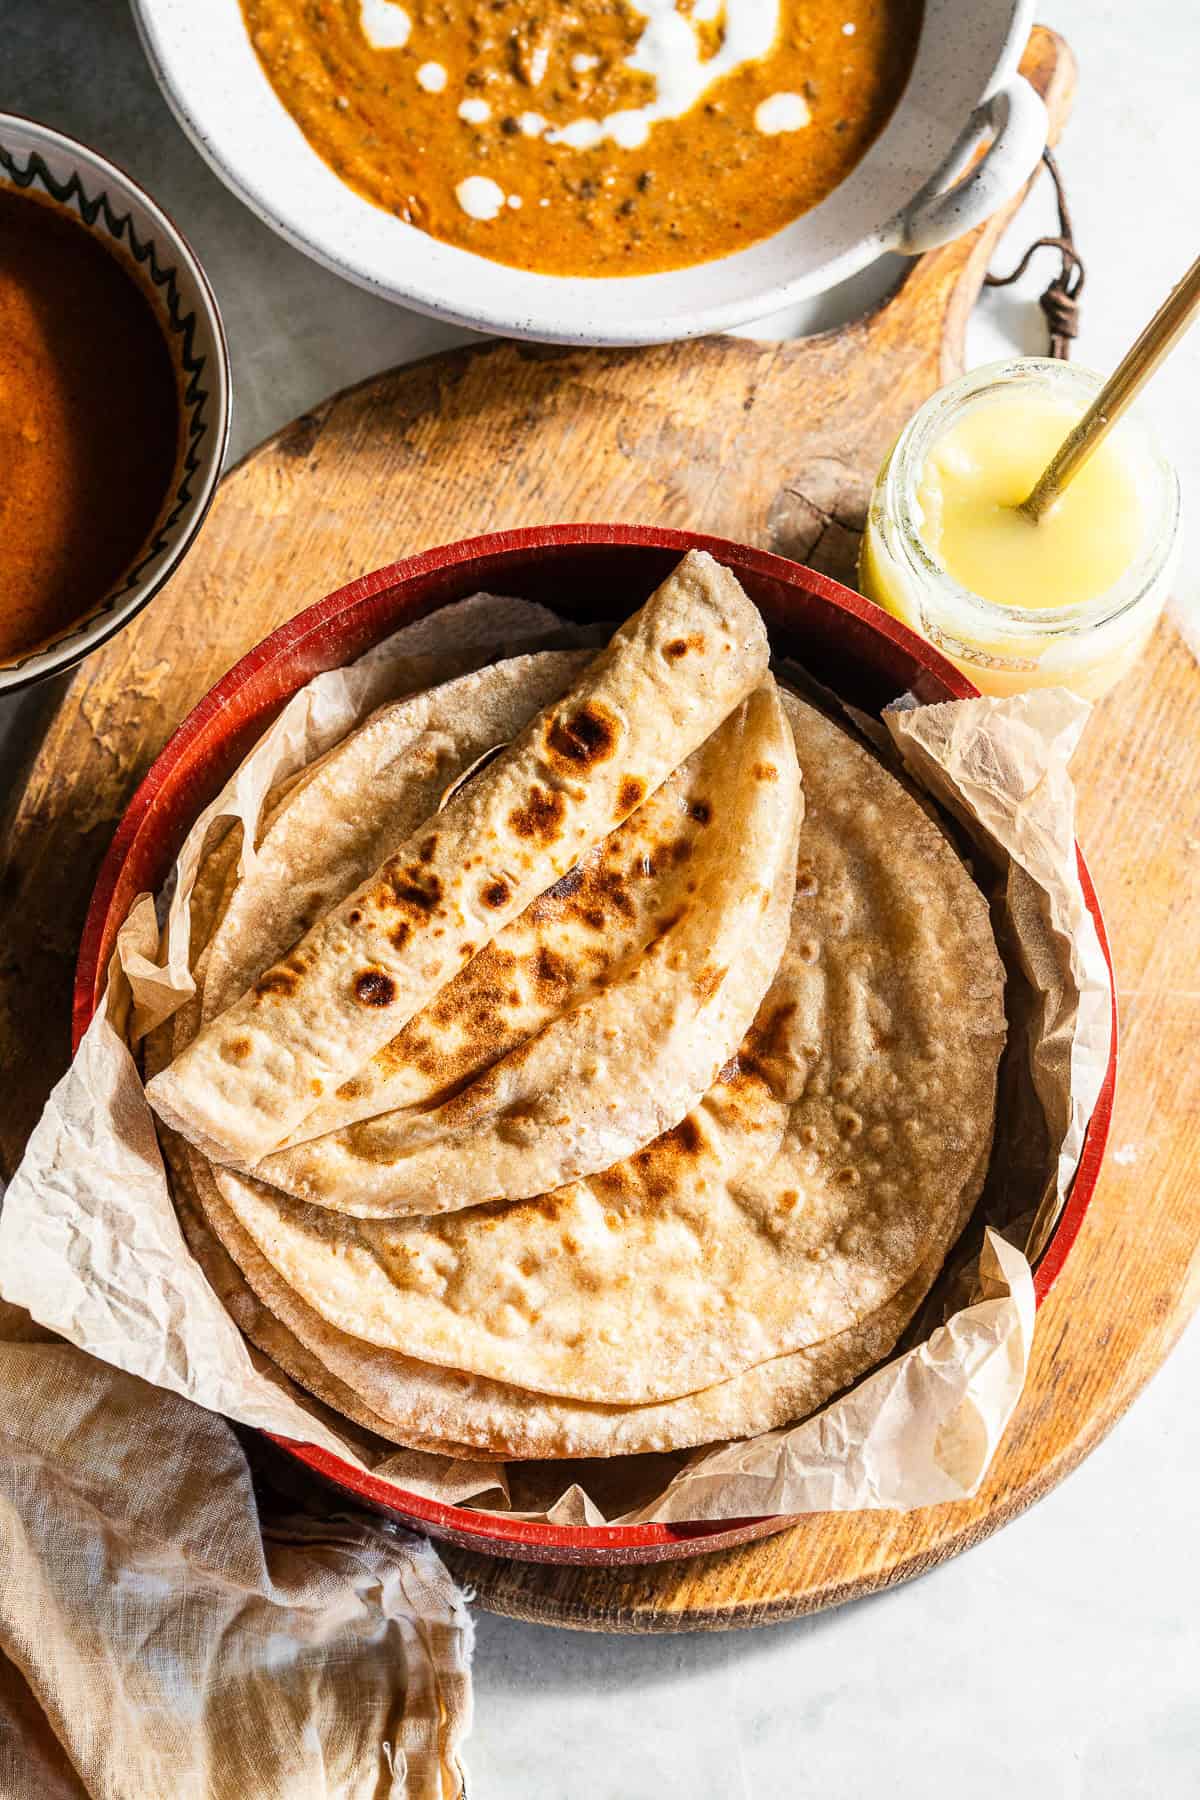
- Transfer the cooked roti to a tortilla warmer with a paper towel on the bottom. The rotis will deflate at this point. Slather the top with half a teaspoon of ghee. Keep it covered so that the roti stays soft and warm from the steam. Continue to add to the stack of rotis, being sure to butter the top of each one.
How to Eat Roti the Traditional Way
If you've eaten roti before, skip this section!
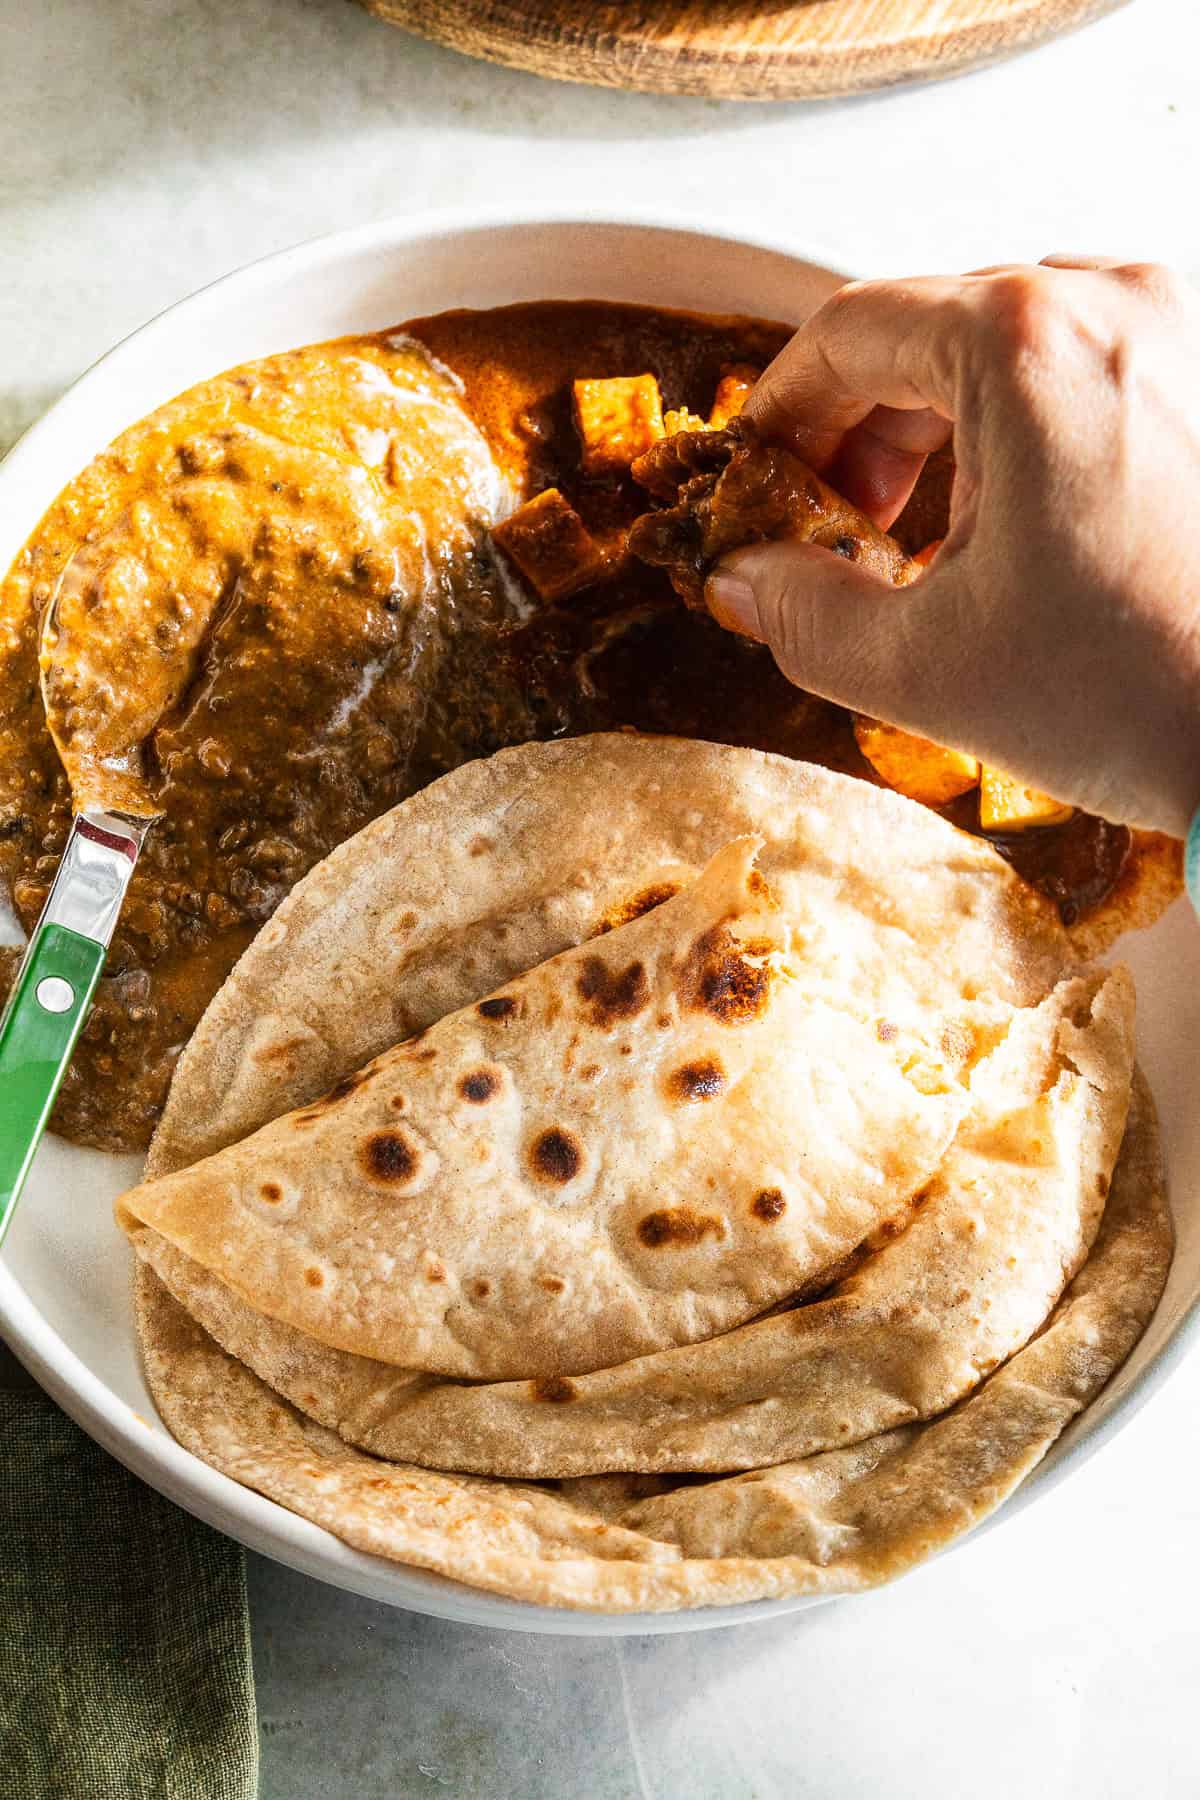
If you've never had roti, then this is a sweet and simple guide on how to eat roti. I've seen too many American friends scoop the curry on to a piece of roti with a spoon, which is fine, but not the traditional way.
To do this, you will be eating with your hands.
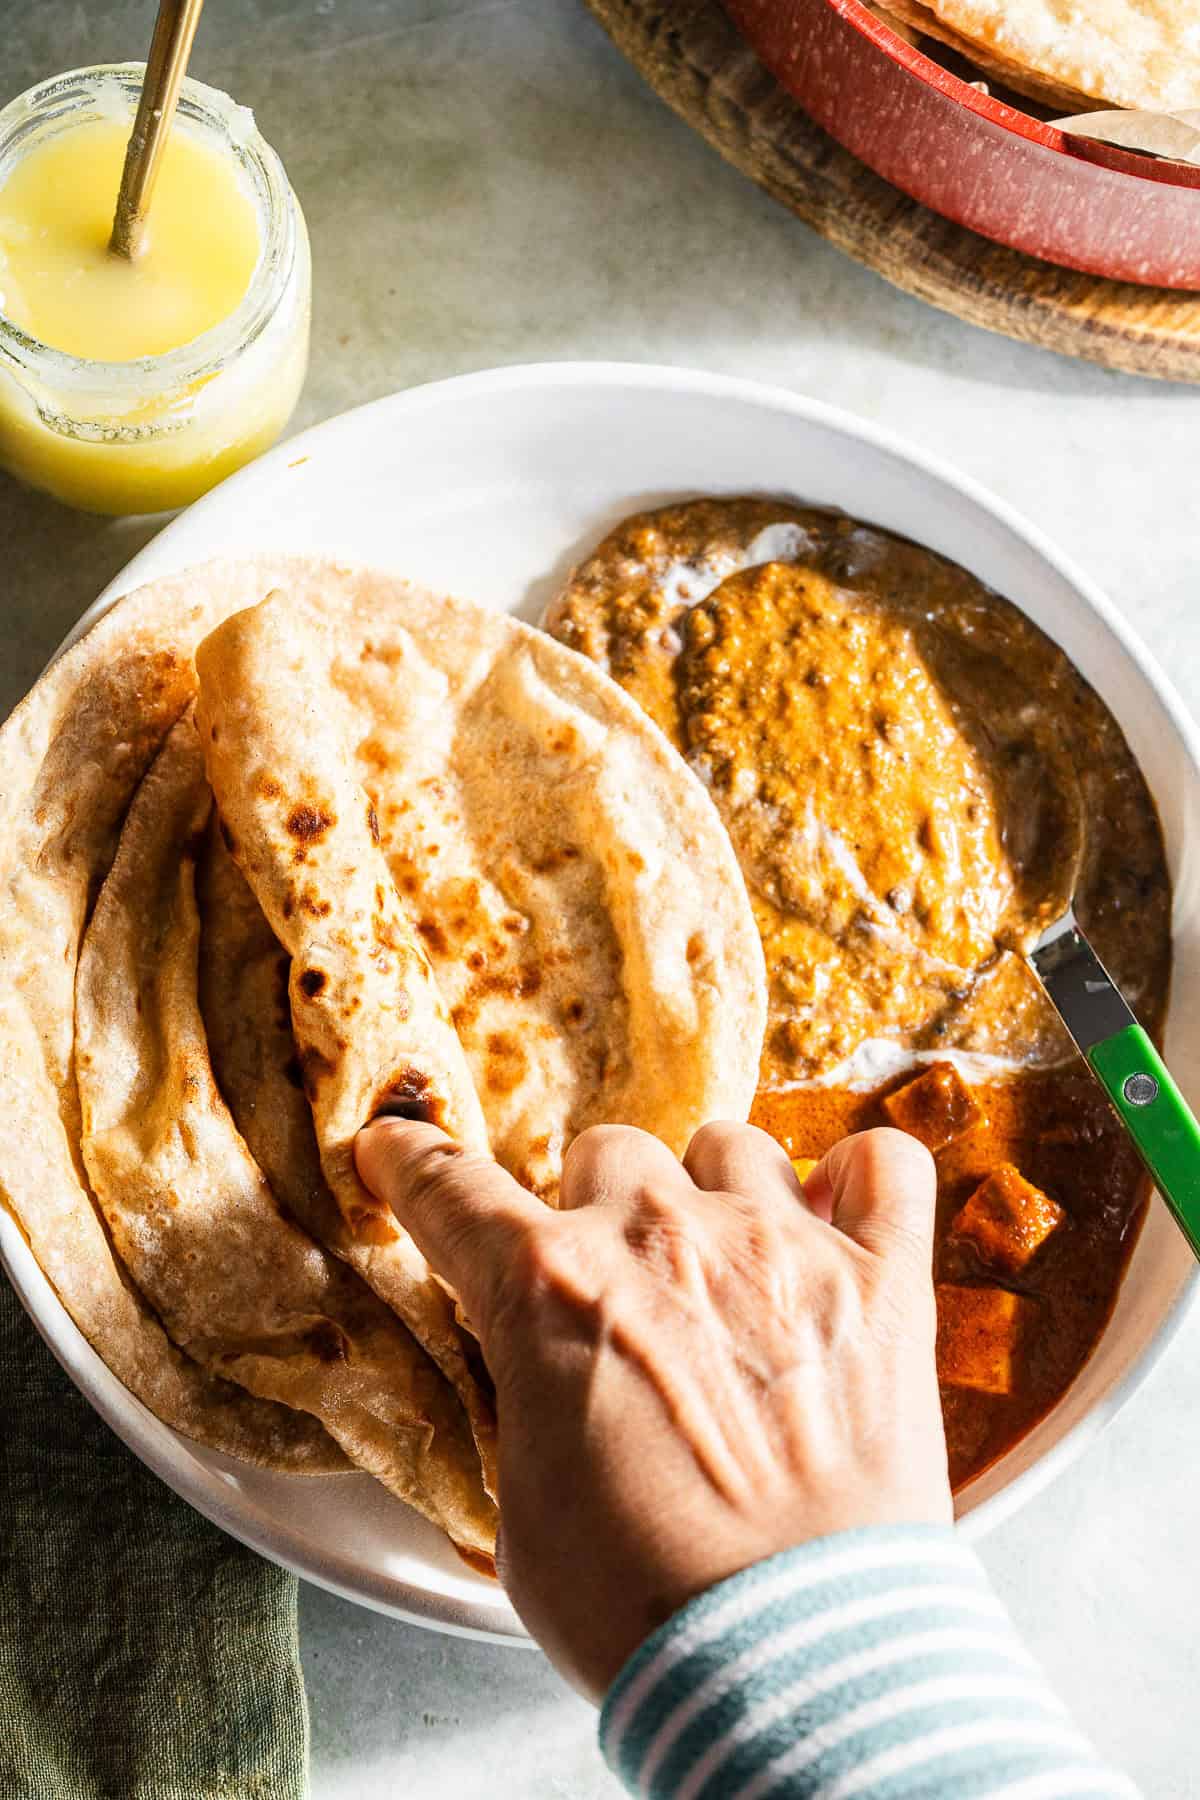
- Use your right hand to tear off a small, bite-sized piece of roti. If the roti is fresh and soft, you can pinch using your index and thumb and pull the piece towards you to tear it. If it's slightly firmer, use your index finger as an anchor right above the piece you want to tear, and use your middle finger and thumb to tear it.
- Pinch the side closest to you together to form a scoop. This allows you to scoop up dals and curries. Don't overload the roti with too much food; it should be easy to pick up and eat in one bite.
- Alternatively, lay the piece of roti on the dal or sabzi you want to eat and pinch the roti over it to scoop it up.
Serving Suggestions
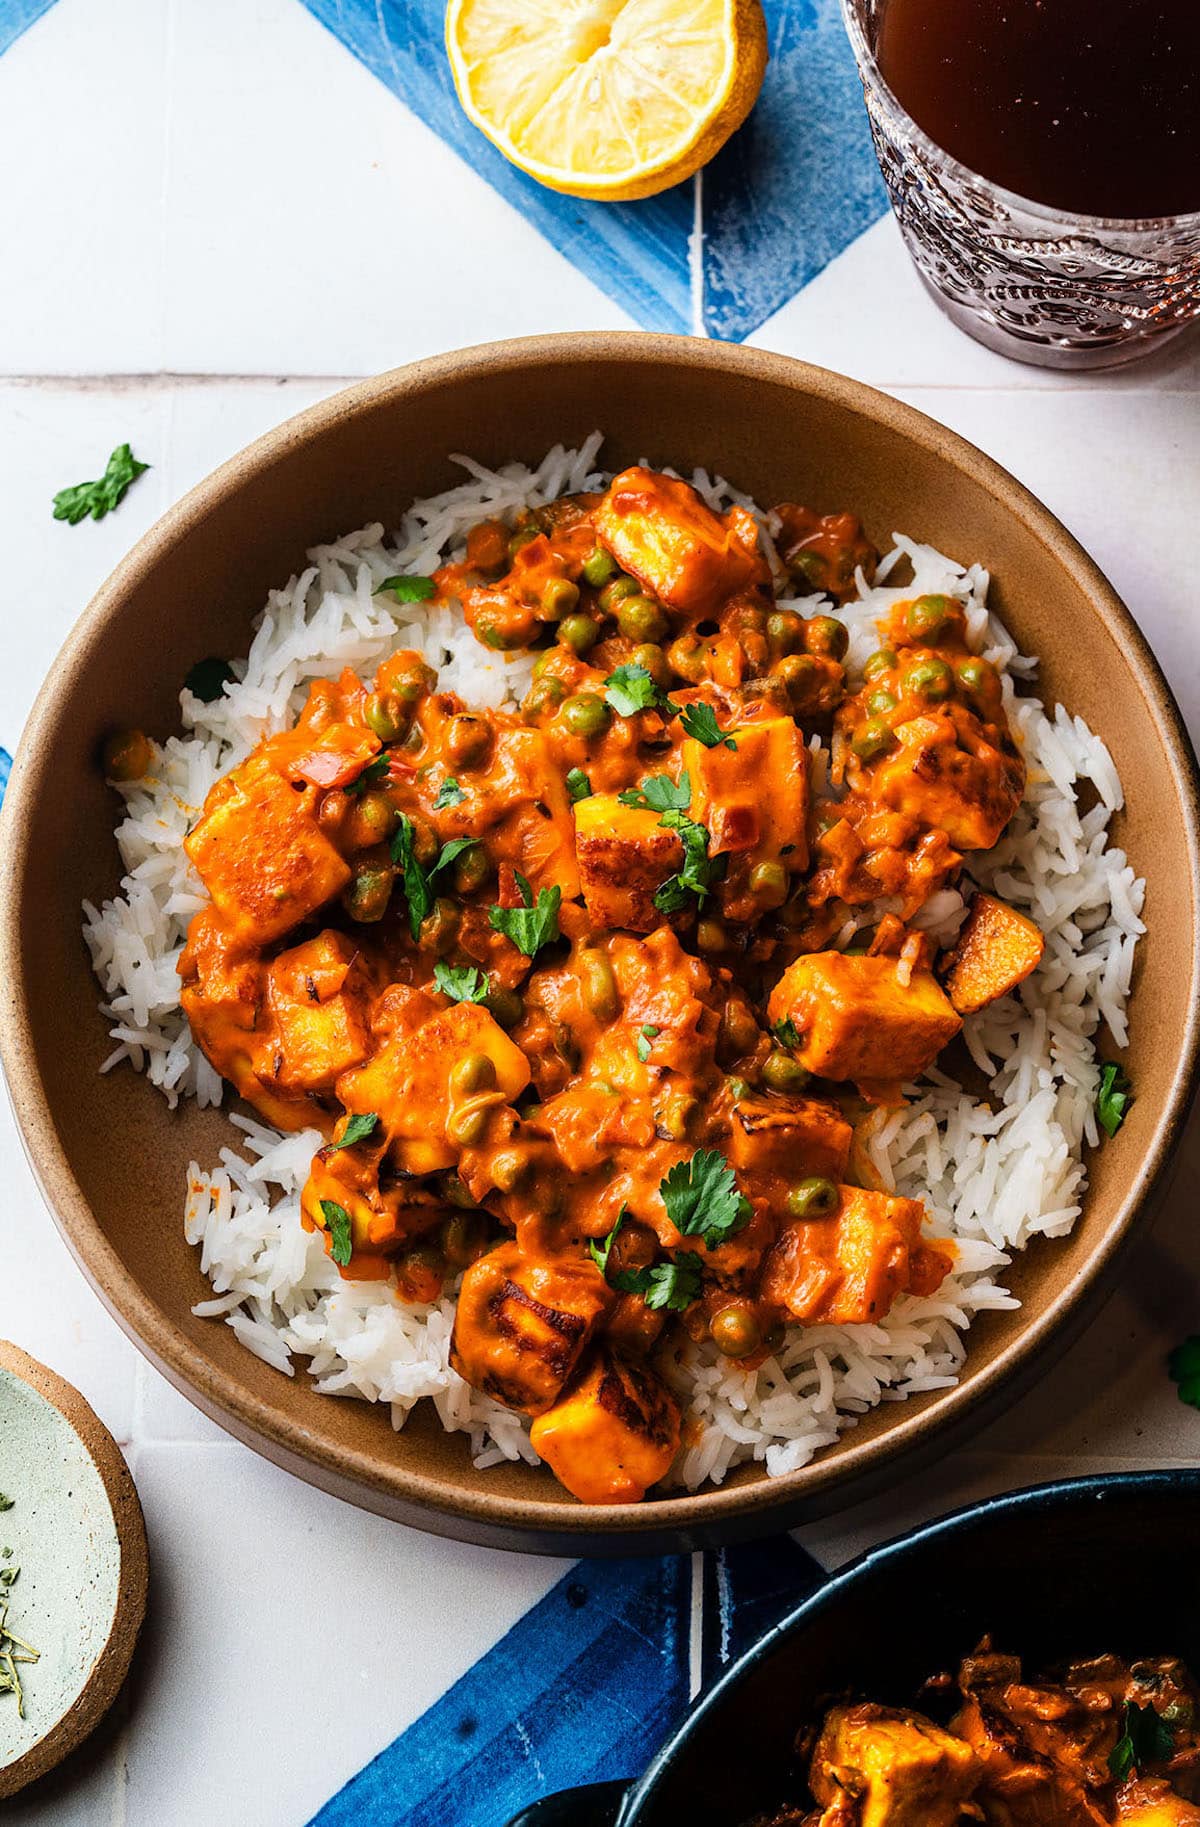
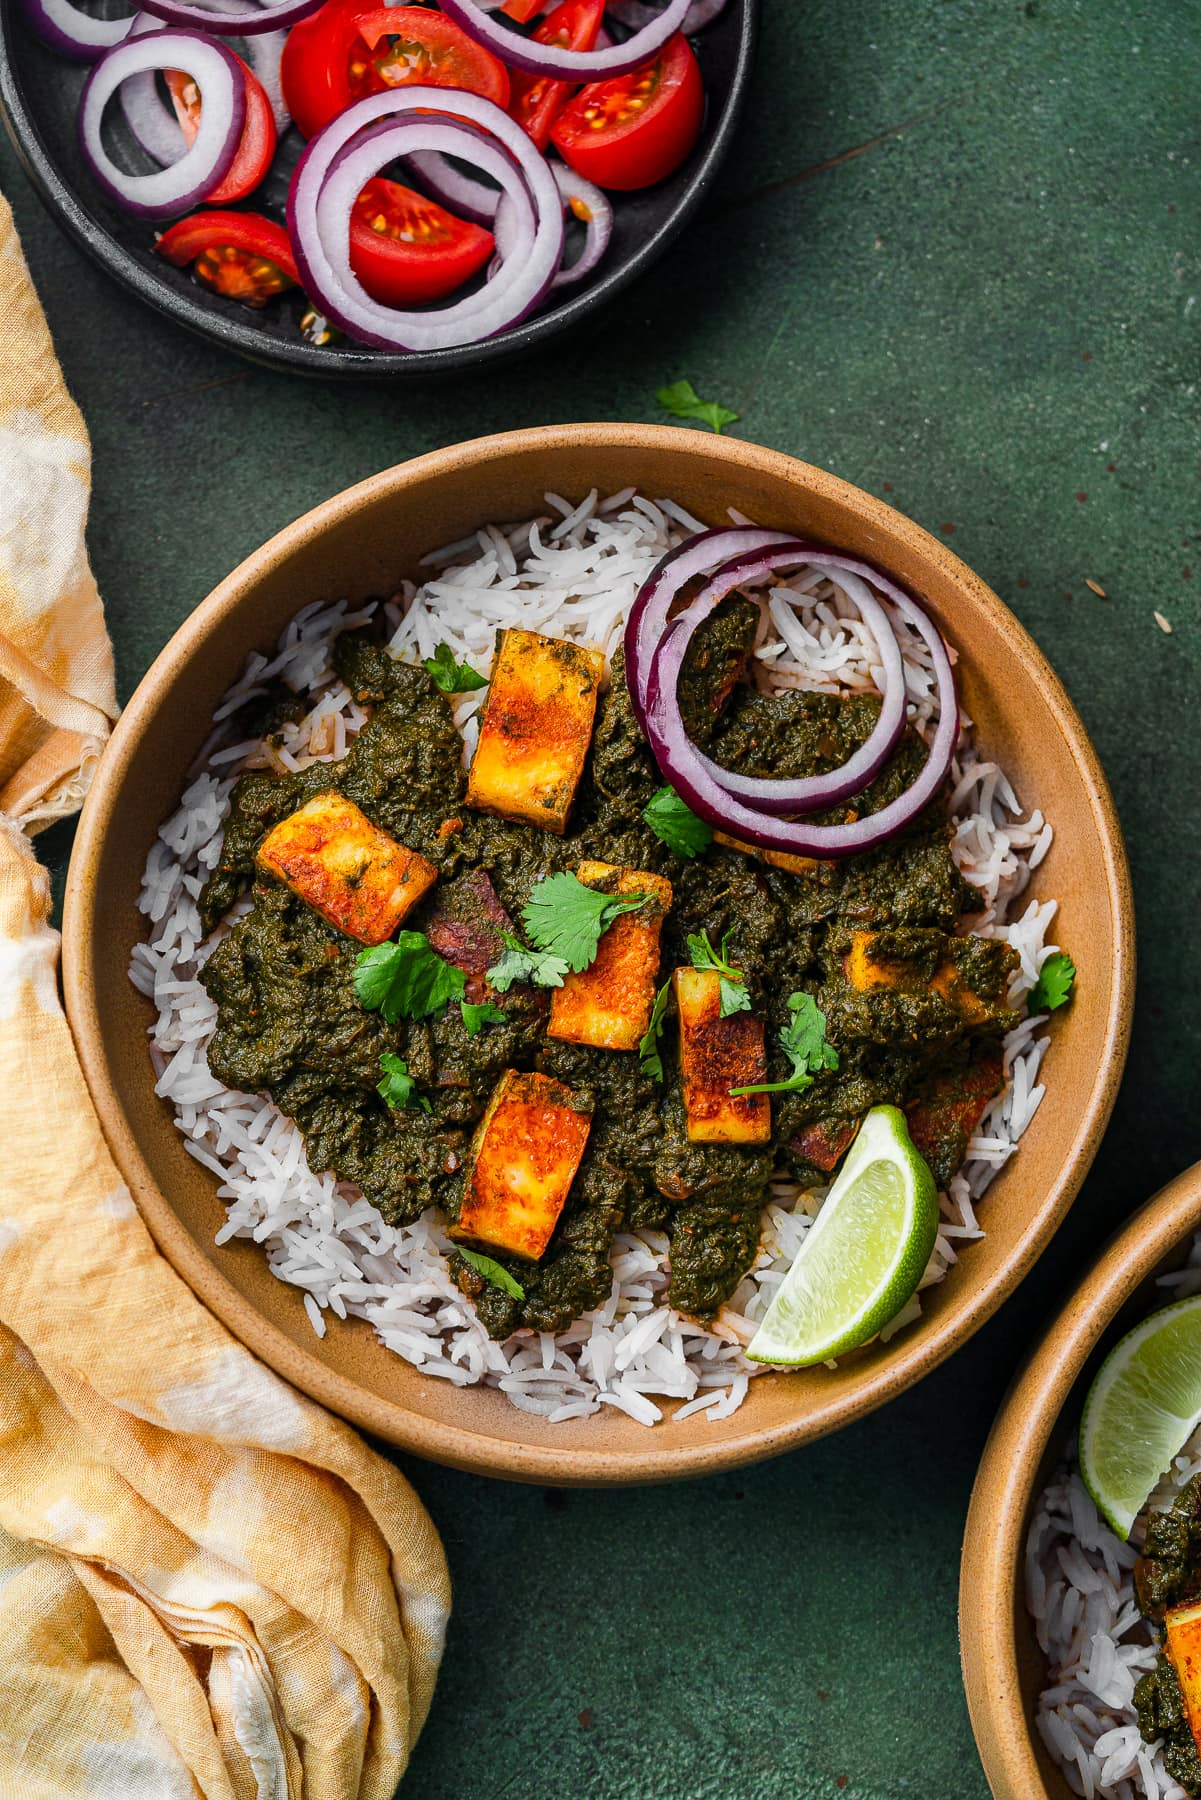
Desis eat buttery rotis with Indian dishes like dal, paneer curries, sabzi, and meat-based gravies. It's also great for rolling up with veggies, butter, or jam for a quick snack. You can even use roti to make these Chicken Smash Tacos for a quick lunch.
Typically 1-2 rotis is enough for an adult.
Expert Tips and Tricks
- Resting the Dough: Allowing the dough to rest ensures soft rotis.
- Rolling Evenly: Roll with gentle pressure to avoid tearing or uneven cooking.
- Puffing Up: Pressing gently with a spatula helps encourage puffing. If it doesn't puff, the dough might be too dry, thick, or ripped. A well-hydrated dough will create enough steam pressure to puff up the roti as it cooks.
- Stacking: Keep cooked rotis wrapped in a clean kitchen towel to retain moisture. Even better to use a tortilla warmer.
What is the difference between roti, naan, and chapati?
Roti, naan, and chapati are all popular Indian flatbreads, but they differ in ingredients, preparation, and texture. Chapatis are usually softer and thinner, whereas rotis can be thicker and slightly denser depending on the region with variations such as tandoori roti.
| Roti | Naan | Chapati | |
|---|---|---|---|
| Leavening | No | Yes (yeast/baking powder) | No |
| Flour Type | Whole wheat (atta) | All-purpose | Whole wheat (atta) |
| Cooking Method | Tawa | Tandoor | Tawa |
| Texture | Light, chewy | Soft, fluffy, slightly charred | Soft, thin, slightly crispy |
| Common Usage | Everyday | Restaurant / special occasions | Everyday |
| Other Ingredients | Ghee for brushing | Yogurt, can be stuffed or flavored | Butter/oil, salt |
Storage Instructions
Store leftover rotis in an airtight container or wrap them in a kitchen towel inside a sealed bag. They stay fresh at room temperature for up to 12 hours or in the refrigerator for up to 2 days. Reheat on a dry skillet or in the microwave with a damp paper towel to restore softness.
How to Freeze Roti:
- Partially cook the roti - Lightly cook on a tawa (griddle) for 10-15 seconds per side, just until it changes color but doesn't brown.
- Cool completely - Let them cool to avoid moisture buildup.
- Layer with parchment paper - Stack the half-cooked rotis with parchment paper between each to prevent sticking.
- Store in freezer bags - Place them in an airtight freezer bag or container.
- Freeze for up to 3 months.
- Cook directly from frozen on a hot tawa, flipping until fully cooked and puffed up.
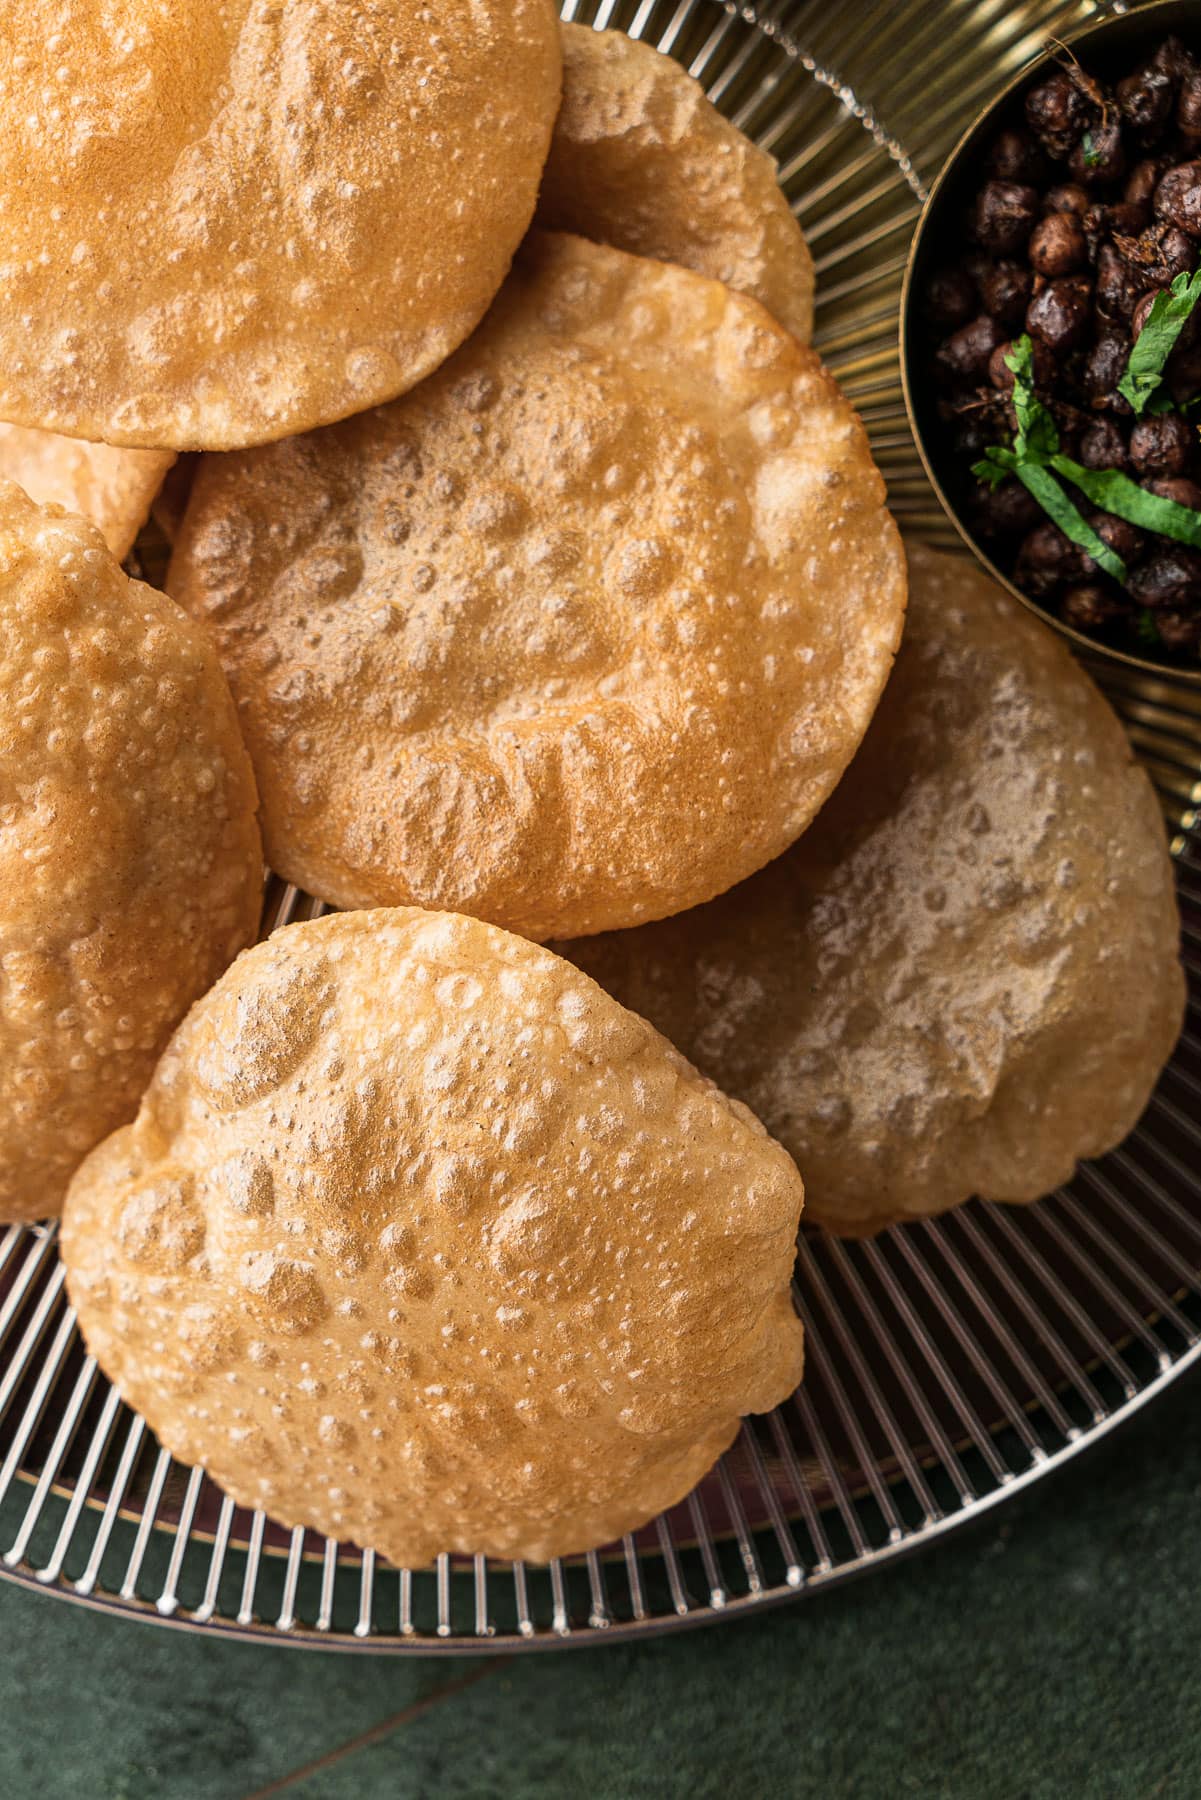
More Indian Breads to try


Recipe
Want to Save This Recipe?
Thinking about making this recipe? Enter your email and I'll send it straight to your inbox to save for later. Plus, get new recipe inspiration from me every week!
By submitting this form, you consent to receive emails from Masala and Chai.
How to Make Indian Roti
Recipe Video
Ingredients
- 2 ⅓ cups atta flour (whole wheat flour), + ¼ cup for dusting
- 150 ml water, room temperature
- 1 tablespoon ghee, for brushing
Instructions
- In a large bowl, add the flour and create a well in the middle. Gradually pour room temperature water while kneading into a soft, pliable dough. (Optional) Add a teaspoon of oil or ghee for extra softness. Cover and let it rest for 20-30 minutes.
- After the dough has rested, knead the dough for 1 minute. Divide the dough into equal-sized balls, about 50-55 grams. Lightly dust the surface with flour and roll out each ball into thin, even circles about 7.5-8 inches in diameter.
- Heat a tawa or skillet over medium heat. Place the rolled-out roti on the hot pan and cook for about 30 seconds until bubbles form. Flip and cook for another 1 minute. Flip once more, pressing lightly with a spatula or cloth to help it puff up. Cook for another minute or so, flipping as needed until the dough is fully cooked through.
- Remove from the pan and brush with ghee or butter for added flavor and softness.
Anonymous says