
Homemade Paneer is one of the easiest cheeses to make in your own kitchen with two simple, accessible ingredients - milk and lemon juice! This mild Indian no-melt cheese stays firm and creamy. It's ideal for absorbing flavor in curries, grilling, or even making into desserts!
This guide to making homemade paneer walks you through every step to successfully make this popular Indian cheese at home with just two ingredients - whole milk and lemon juice or vinegar.
Making paneer at home takes all of 20 minutes, and the rest of the time is just spent waiting for the cheese to set before you can enjoy it! If you have a lot of whole milk that's going bad, this is a great way to use it. I'm sure you'll find that there's no need for store bought paneer again!
Jump to:
Why this Recipe Works
Homemade paneer results in creamy, soft cheese that's truly incomparable to store bought. You'll love this recipe because:
- It's easy. Plain and simple. If you've made cheese before, this one is really truly a no brainer. Making paneer is easier than making any other cheese I've ever made at home.
- You only need two ingredients - full fat milk and lemon juice. If you don't have lemon juice, vinegar works as well!
- This recipe has exact temperature, detailed instructions, photos, and video so you can ensure you things look exactly like they should in the process.
- You can use this recipe to make chenna, or milk curds used a base to make a lot of desserts like Ras Malai.
What is Paneer?
Paneer is a fresh mild Indian cheese typically shaped into a firm block. It's a soft cheese with a pleasant smooth texture - dissimilar from cheeses like ricotta, cottage cheese, or tofu that it's constantly compared to. Because it's fresh, you can eat it immediately without any aging!
It's an excellent source of protein for those that follow vegetarian diets. The best part about paneer is that it is very absorbent, making it ideal for Indian curries such as Paneer Makhani, Palak Paneer, Chili Paneer, Shahi Paneer, and more.
Paneer is frequently described as "Indian cottage cheese." Same same, but extremely different. Cottage cheese is drained and salted. The curds are loosey goosey with a strong tinge of whey. I can't imagine ever putting cottage cheese in curry.
Paneer, on the other hand, is unsalted and pressed until all the whey is removed. It is a very mild cheese that does not melt, which is why it's ideal to mix with spices and curry or grill.
Ingredients - Notes and Substitutions
I've once had a brand tell me that paneer is an inaccessible ingredient for a recipe I pitched. It blew my mind. Paneer is made of TWO ingredients that are available in every single grocery store year-round. It may not be ideal to make it, but it's definitely accessible.

Milk - Unpasteurized whole milk or raw milk is the best make the best paneer. However, this is illegal in a lot of states so pasteurized milk also works if the latter is not available, but avoid using ultra-high temperature (UHT) pasteurized milk. Use full fat milk. Other milks such as 2% on non-fat won't have enough milk fat to make a lot of paneer.
You can also add half a cup of heavy cream at the beginning of the process to make malai paneer.
Buffalo milk and goat milk can also be used to make paneer.
Lemon - The juice of a lemon is what makes the milk curdle. You'll want to be careful with the amount you use - and not juice a lemon willy nilly and guesstimate the amount. You can easily end up with sour paneer.
Other notes are that instead of lemon juice, you can substitute with the same amount of vinegar. If you do use vinegar, you'll want to rinse the milk curds before draining and pressing.
Note: While the milk is boiling, you can also add spices or even finely diced veggies into your paneer!
The Equipment You'll Need
For making paneer you'll need the following equipment:
- A heavy bottom pot. Since we are bringing the paneer just up to a boil, heavy bottom pots are ideal for making sure the milk doesn't burn on the edges.
- A food thermometer. Bringing the paneer up to the correct temperature is key to making great paneer. You can also watch for when the milk starts to bubble on the sides.
- A cheese cloth. For capturing the milk curds and draining the whey. The less whey in the end product, the better.
- A large strainer. For draining out the whey.
- Mixing bowl. Something to drain the whey into.
- Weights. You'll need something like a heavy cast iron with beans to weigh down the paneer to press out any of the excess whey and help compact the milk curds.
How to make Homemade Paneer
I've attempted to make a lot of cheese before, and paneer is by far one of the easiest cheeses to make. There's three main steps - 1) getting the milk curds, 2) draining and straining out the whey, and 3) pressing the paneer.
1. Make the milk curds
Pour the milk into a heavy bottom pot that holds at least 4 quarts of liquid. Using a food thermometer, bring the temperature up to a boil (ideally around ~203°F) on medium heat, stirring occasionally to prevent the milk from burning. If you're going to add any spices or finely diced veggies, this would be the time.
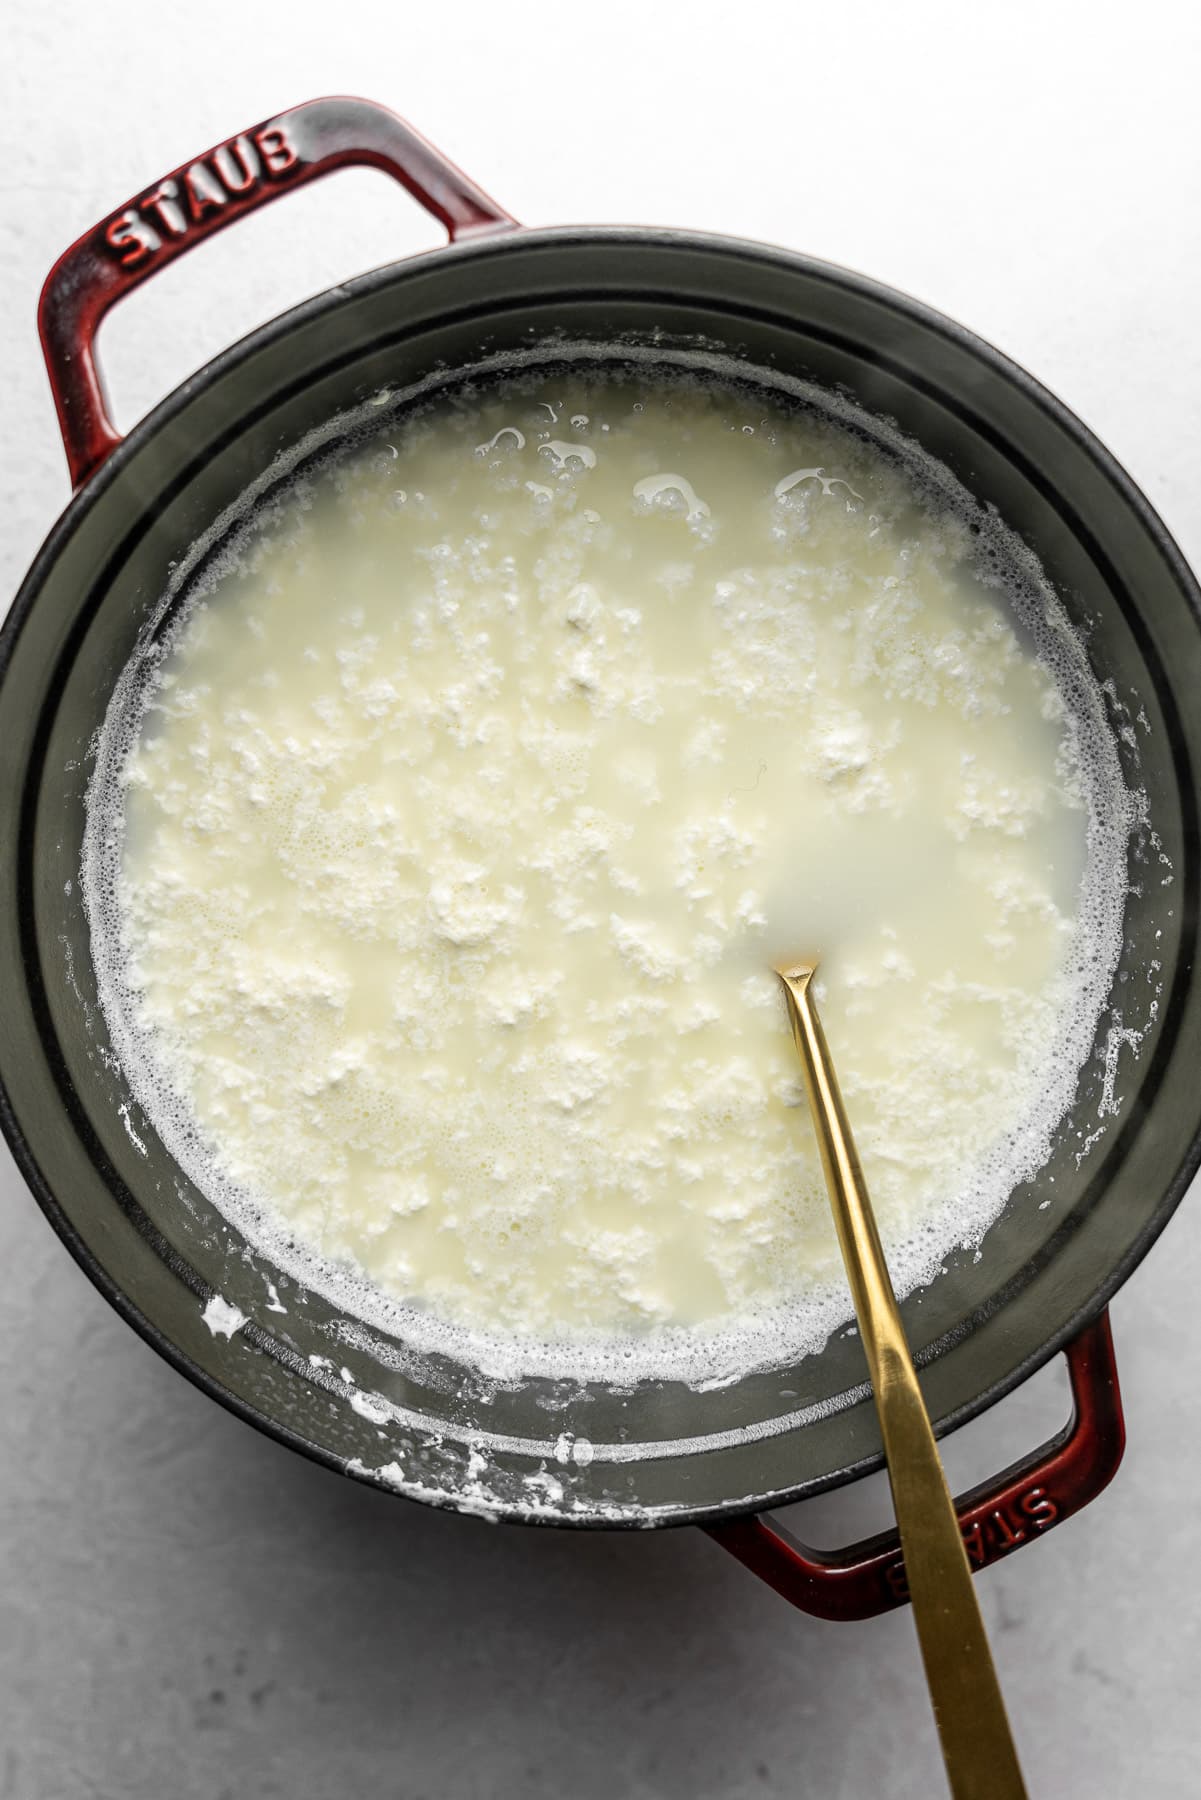
Once the milk just reaches a boil, turn off the heat and disperse the lemon juice all over. Use a slotted spoon to give the milk a good stir. Let the milk sit for 10 minutes without touching it.
After 10 minutes, there will be signs that the curds have started separating from the whey when you see a yellow liquid. Use the slotted spoon to stir again to separate the curds.
Pro Tip: If the curds and whey aren't separating, add another tablespoon of the acidic agent (lemon juice or vinegar) to curdle the milk. Bring the milk up to a boil and continue to stir until it curdles. Remove from heat when it curdles immediately and add a few ice cubes to stop the cooking.
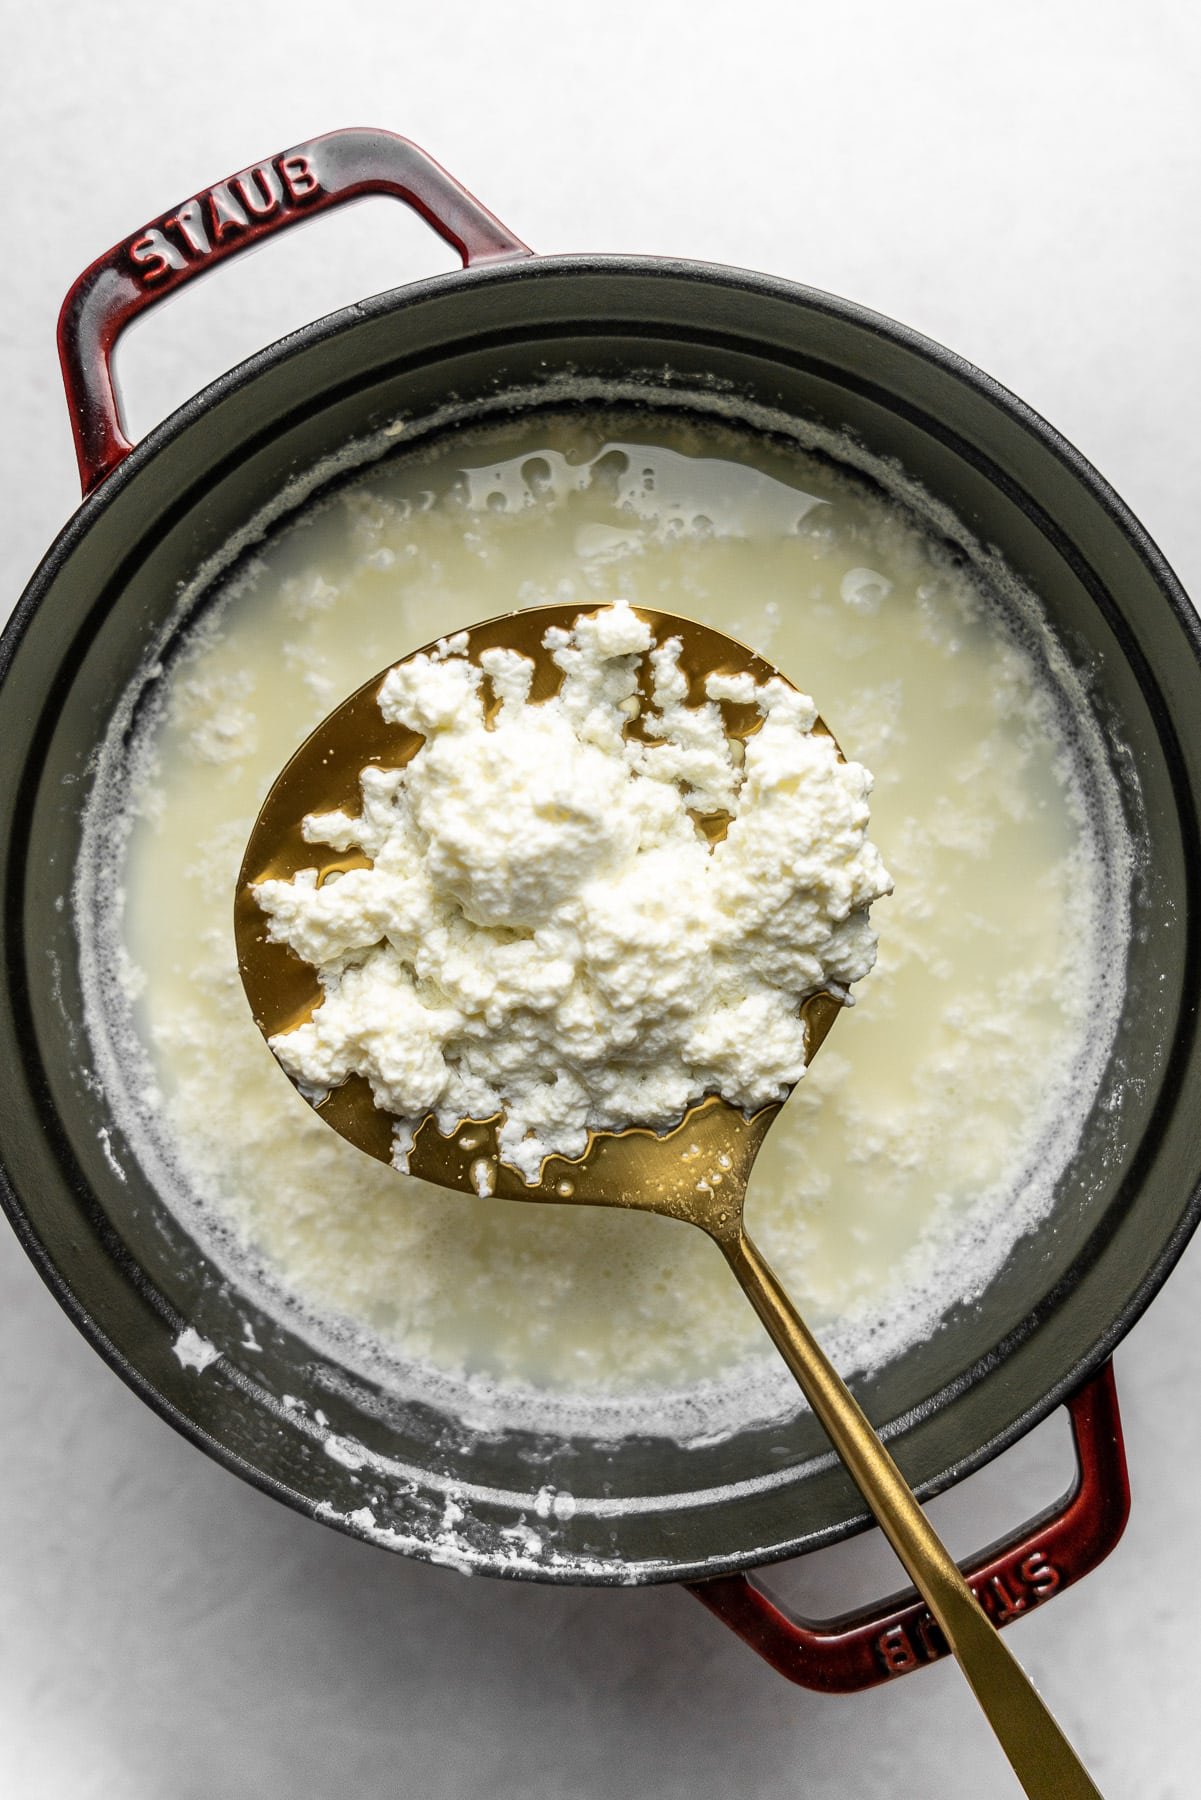
2. Strain and drain
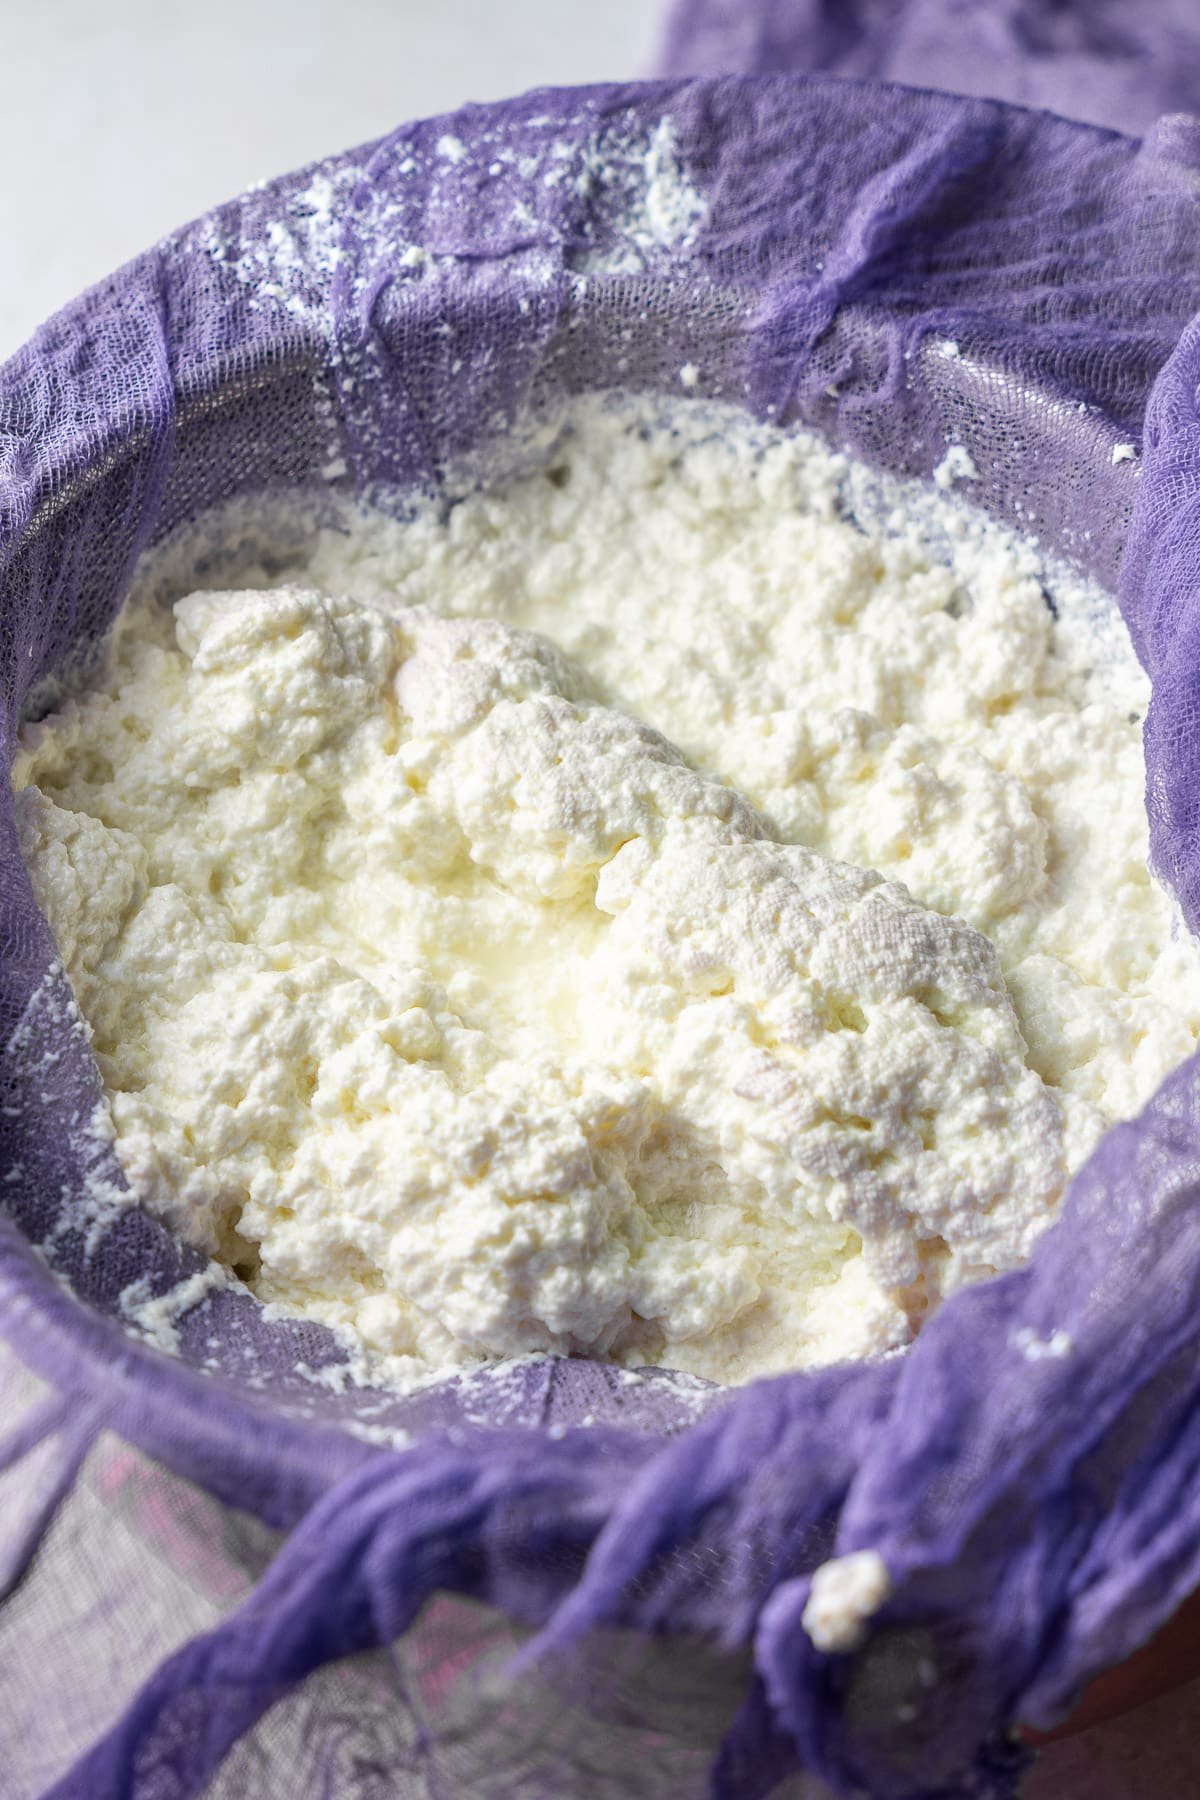

Prep the draining station by placing a large mesh strainer over a large bowl. Place a cheese cloth over the strainer. Slowly pour the milk curds and whey over the cheese cloth. Use a spoon to press the whey out.
Note: If you used vinegar, this is when you would rinse out the curds using warm water to get rid of the taste and smell of vinegar.
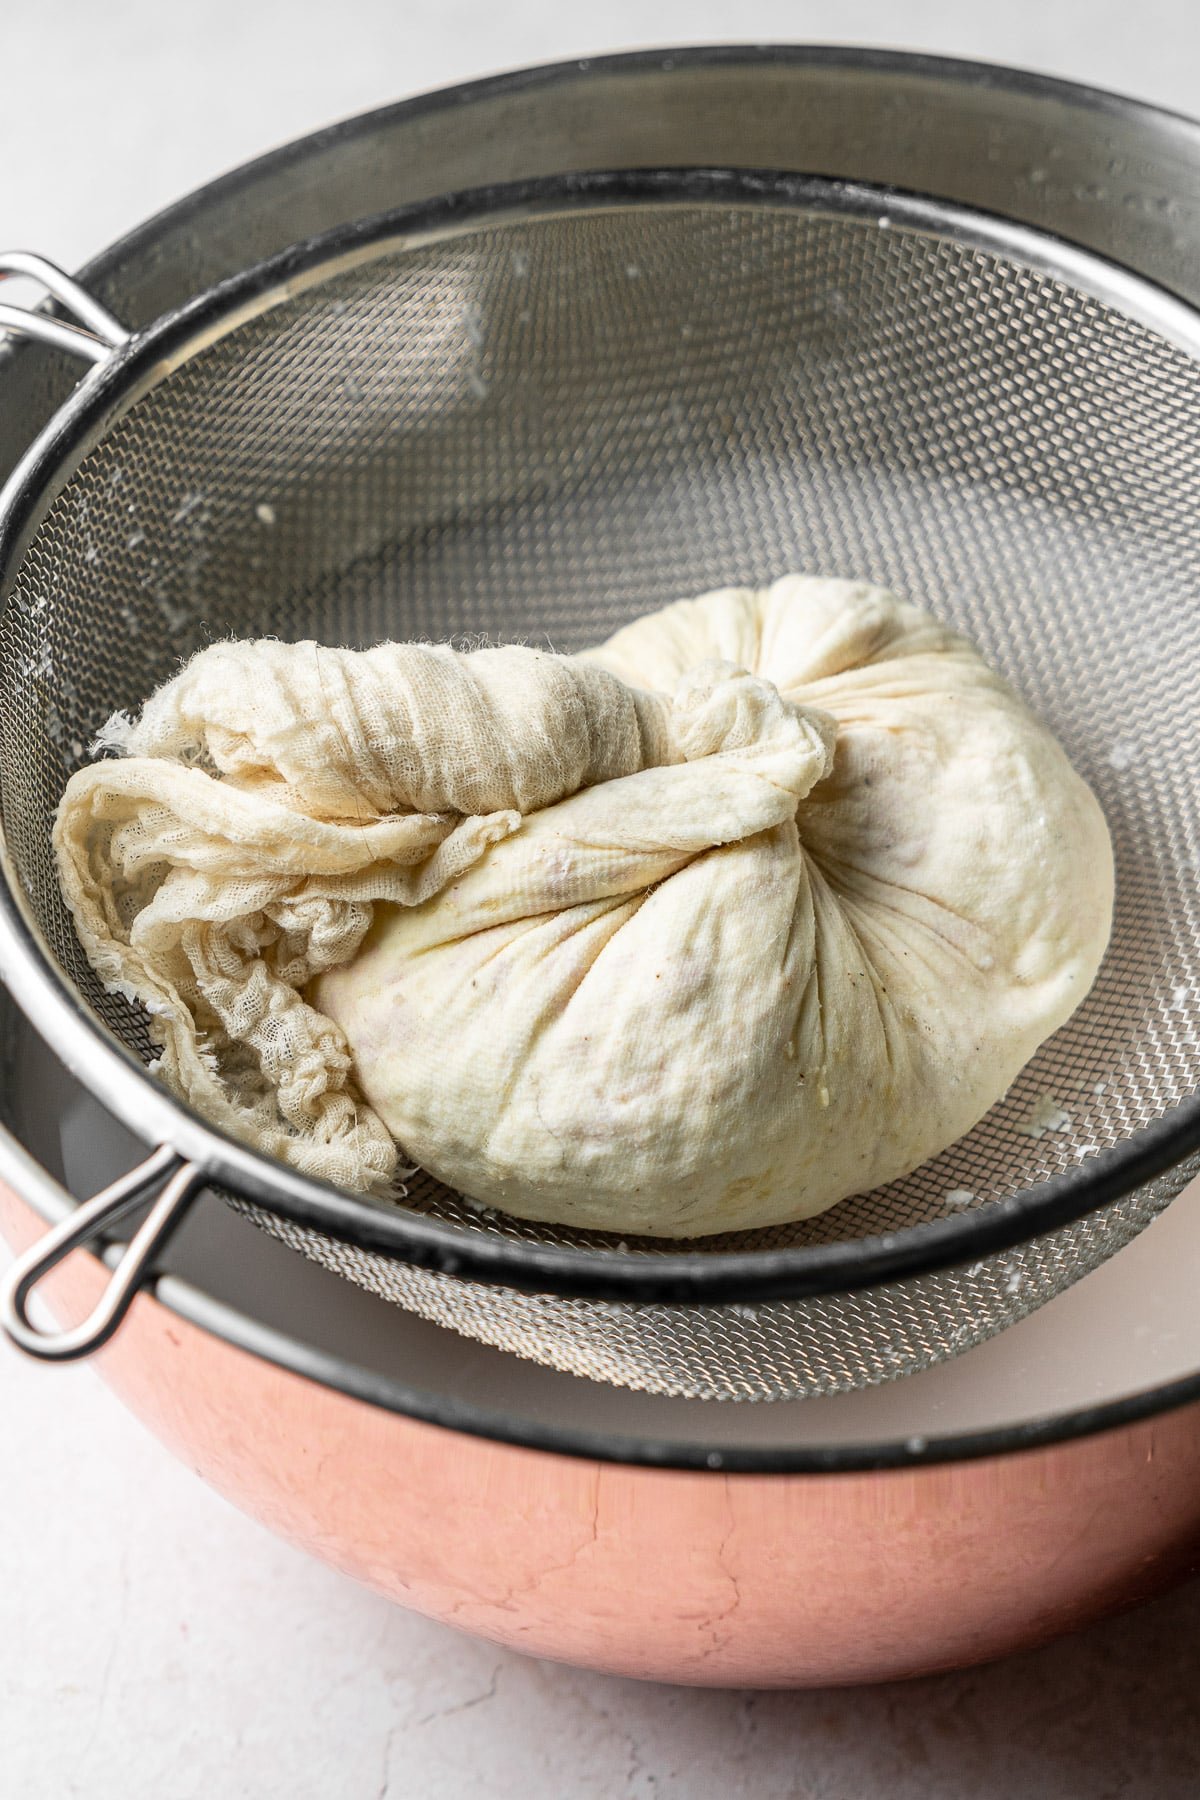
Tightly wrap the milk curds in the cheese cloth. Begin twisting and pressing the cheese to get as much whey out as possible. Some people even hang the ball of cheese in the cheese cloth off of their kitchen sink faucet for half an hour to allow gravity to bring the whey to the bottom.
Pro Tip: Save the whey!! It's great to add in smoothies or curries.
3. Press, shape, and chill
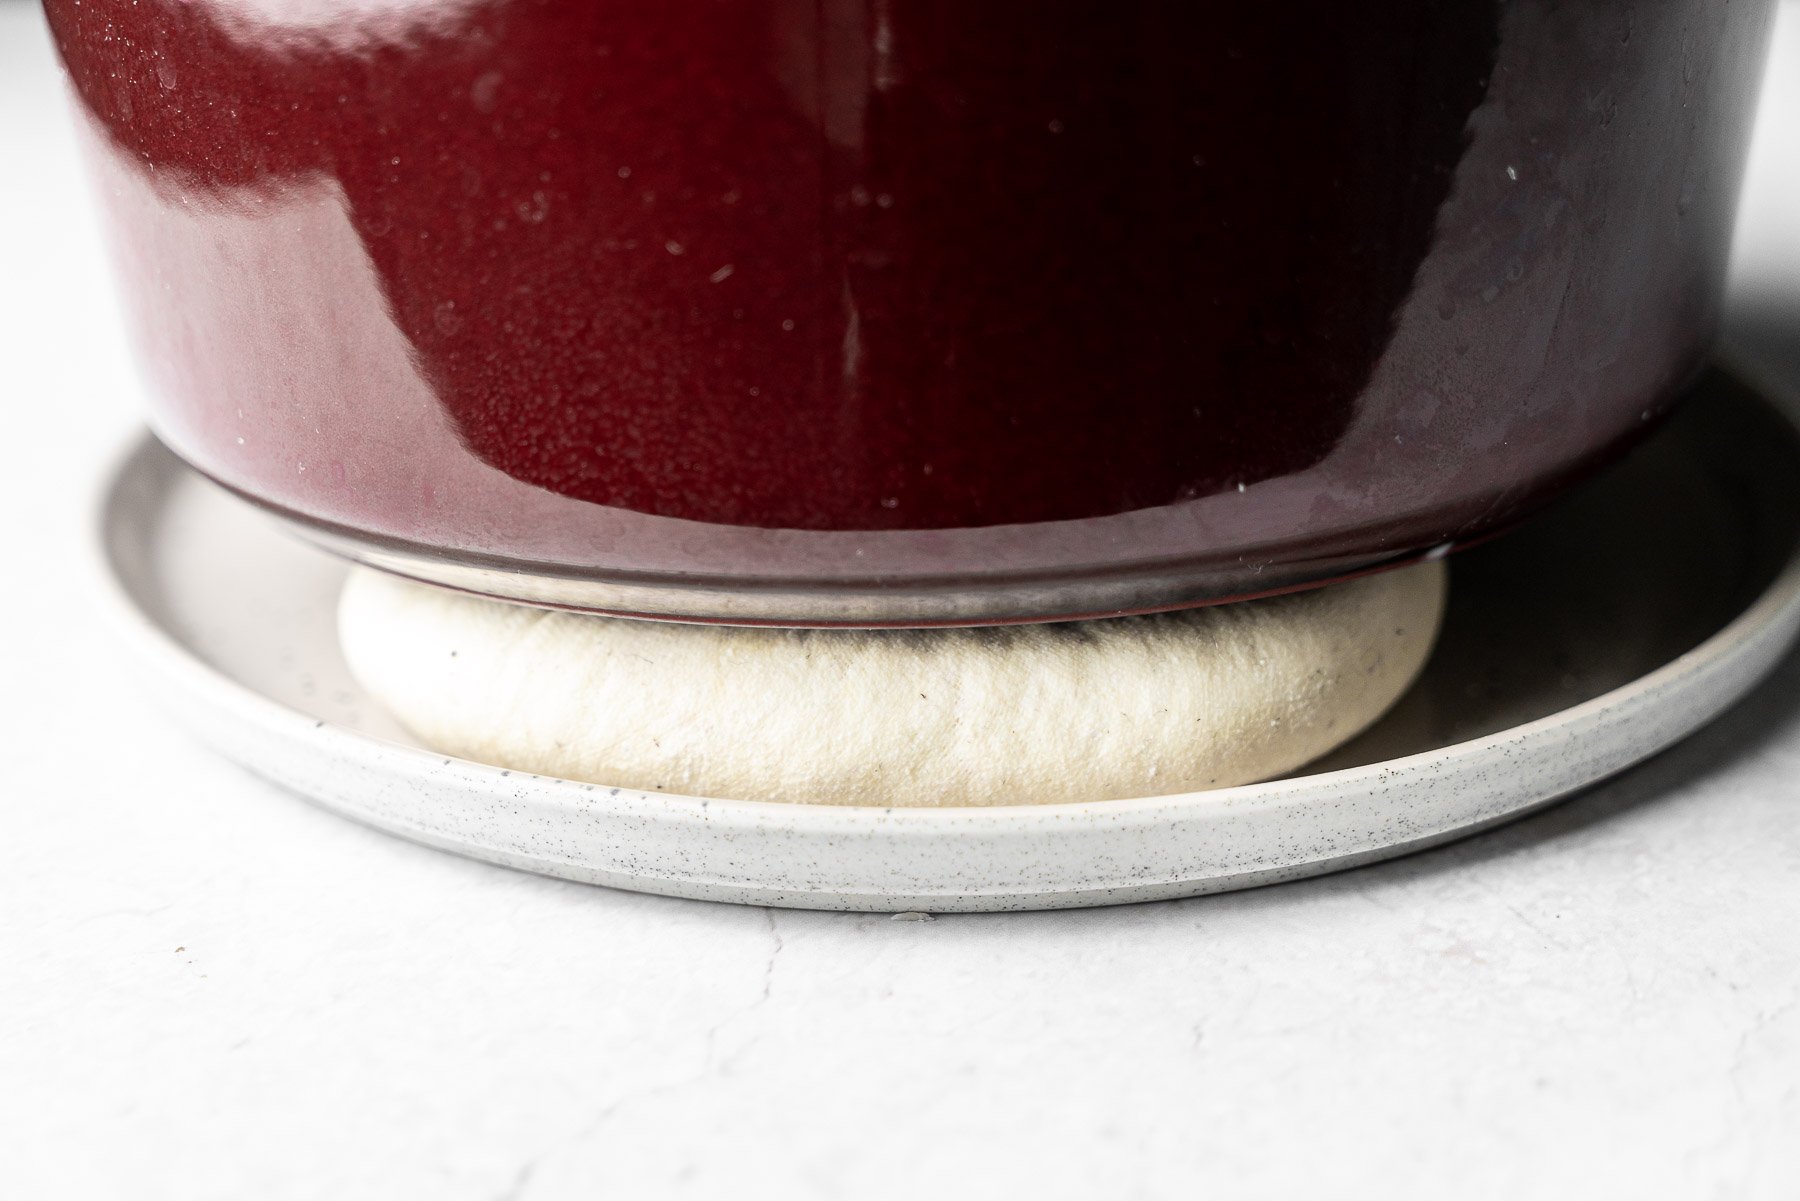
Place the ball of paneer, still wrapped in the cheesecloth, in plate or large bowl. Before pressing the cheese, release the knot and twists from the cheesecloth, open it up, and fold it over the curds. This prevents a large indentation on the top of the cheese from the knot.
Carefully lower a heavy object on to it to press it down until it's about 1.5 - 2 inches thick, or desired thickness. I opted to use my cast iron cocotte and placed a bag of rice in it and let it sit for about half an hour. This allows the milk curds to firm up and press into each other.
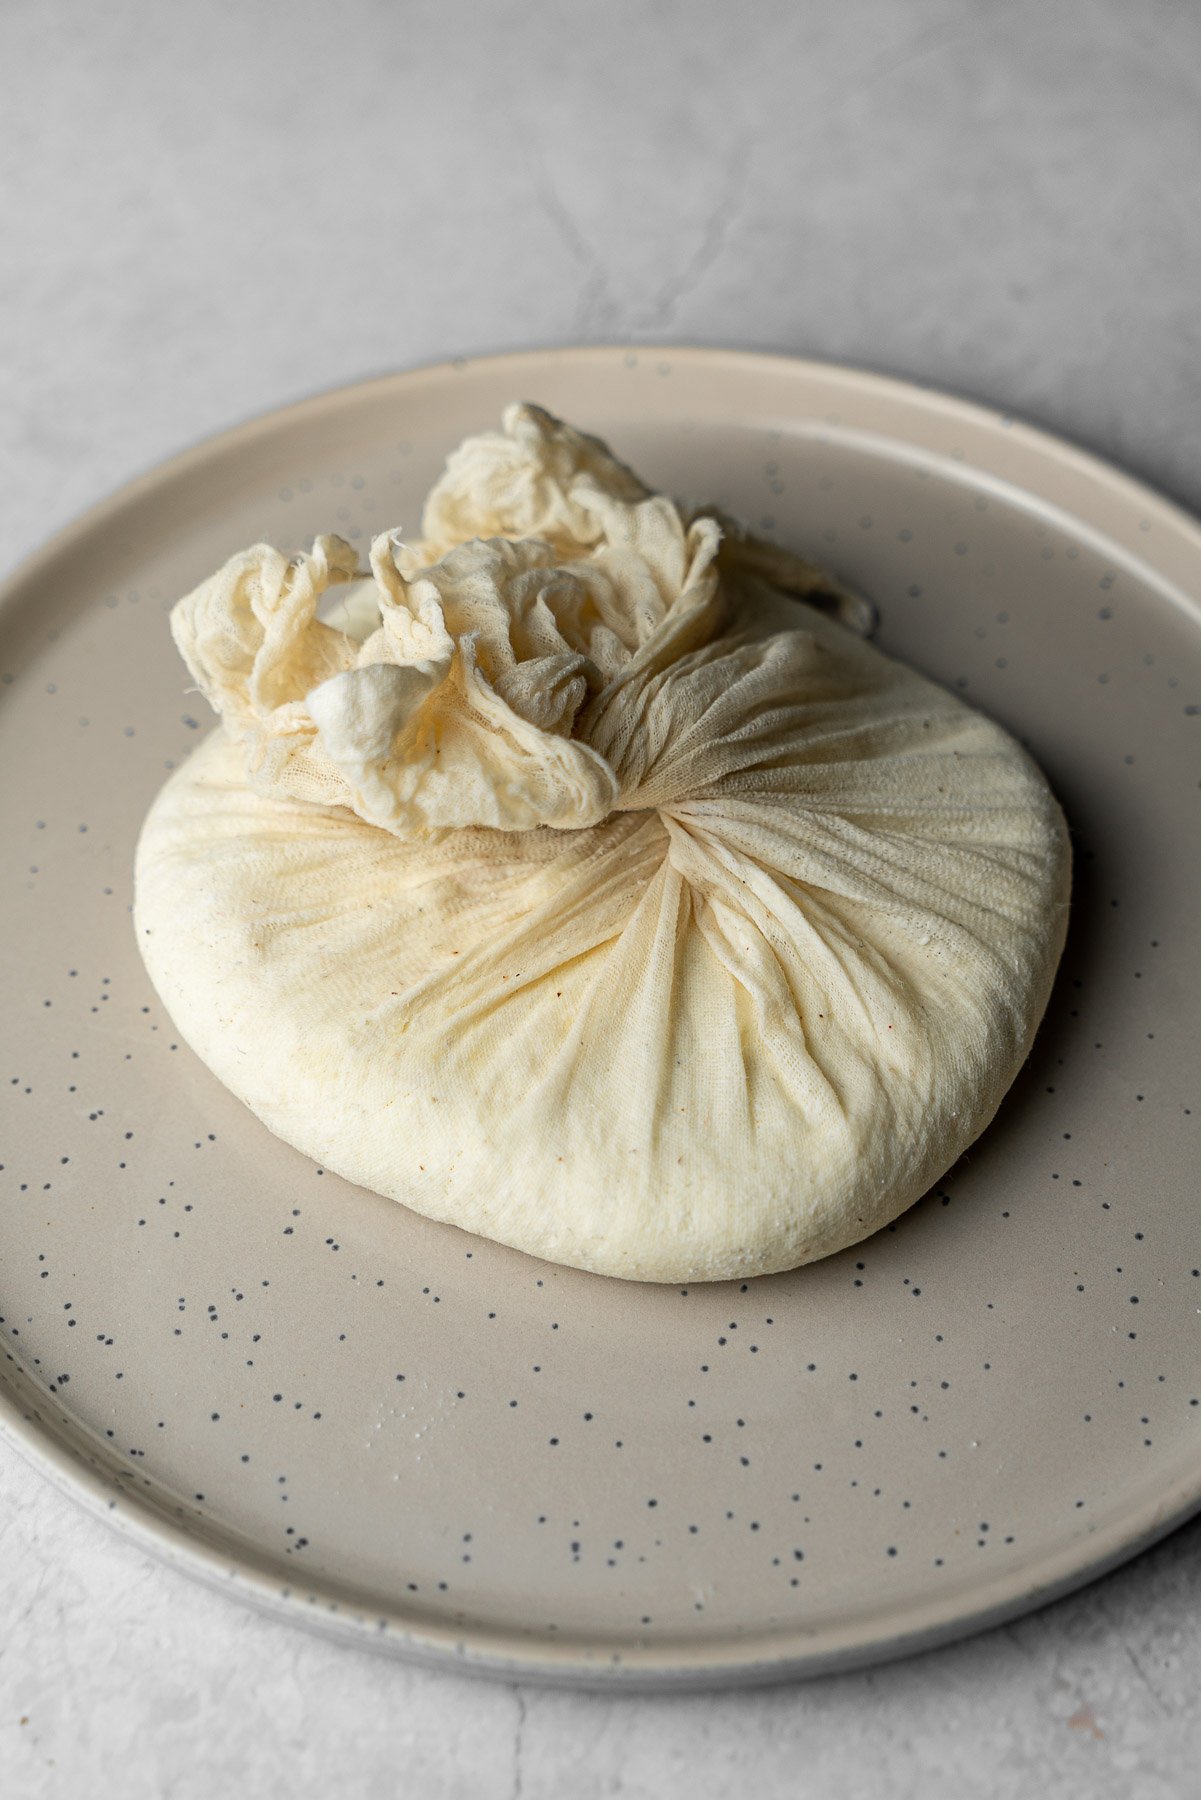
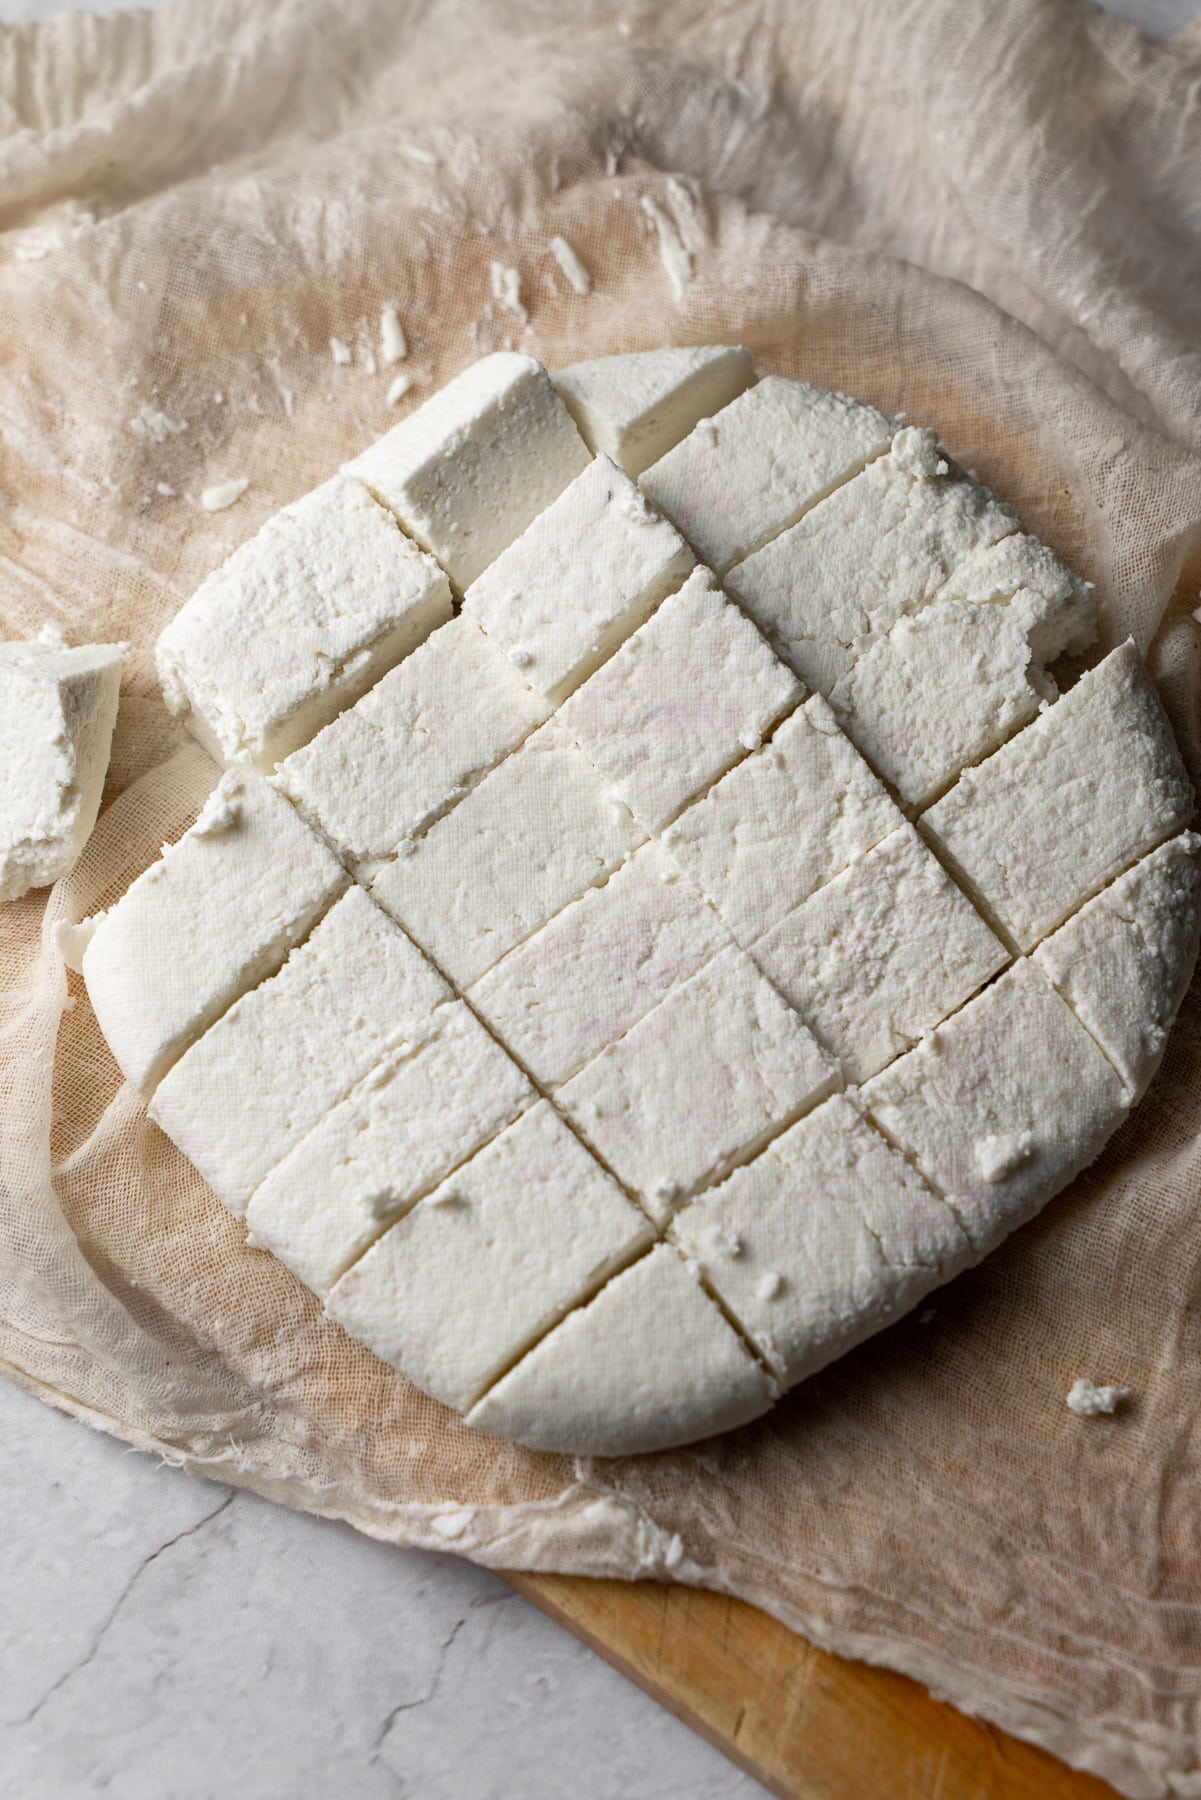
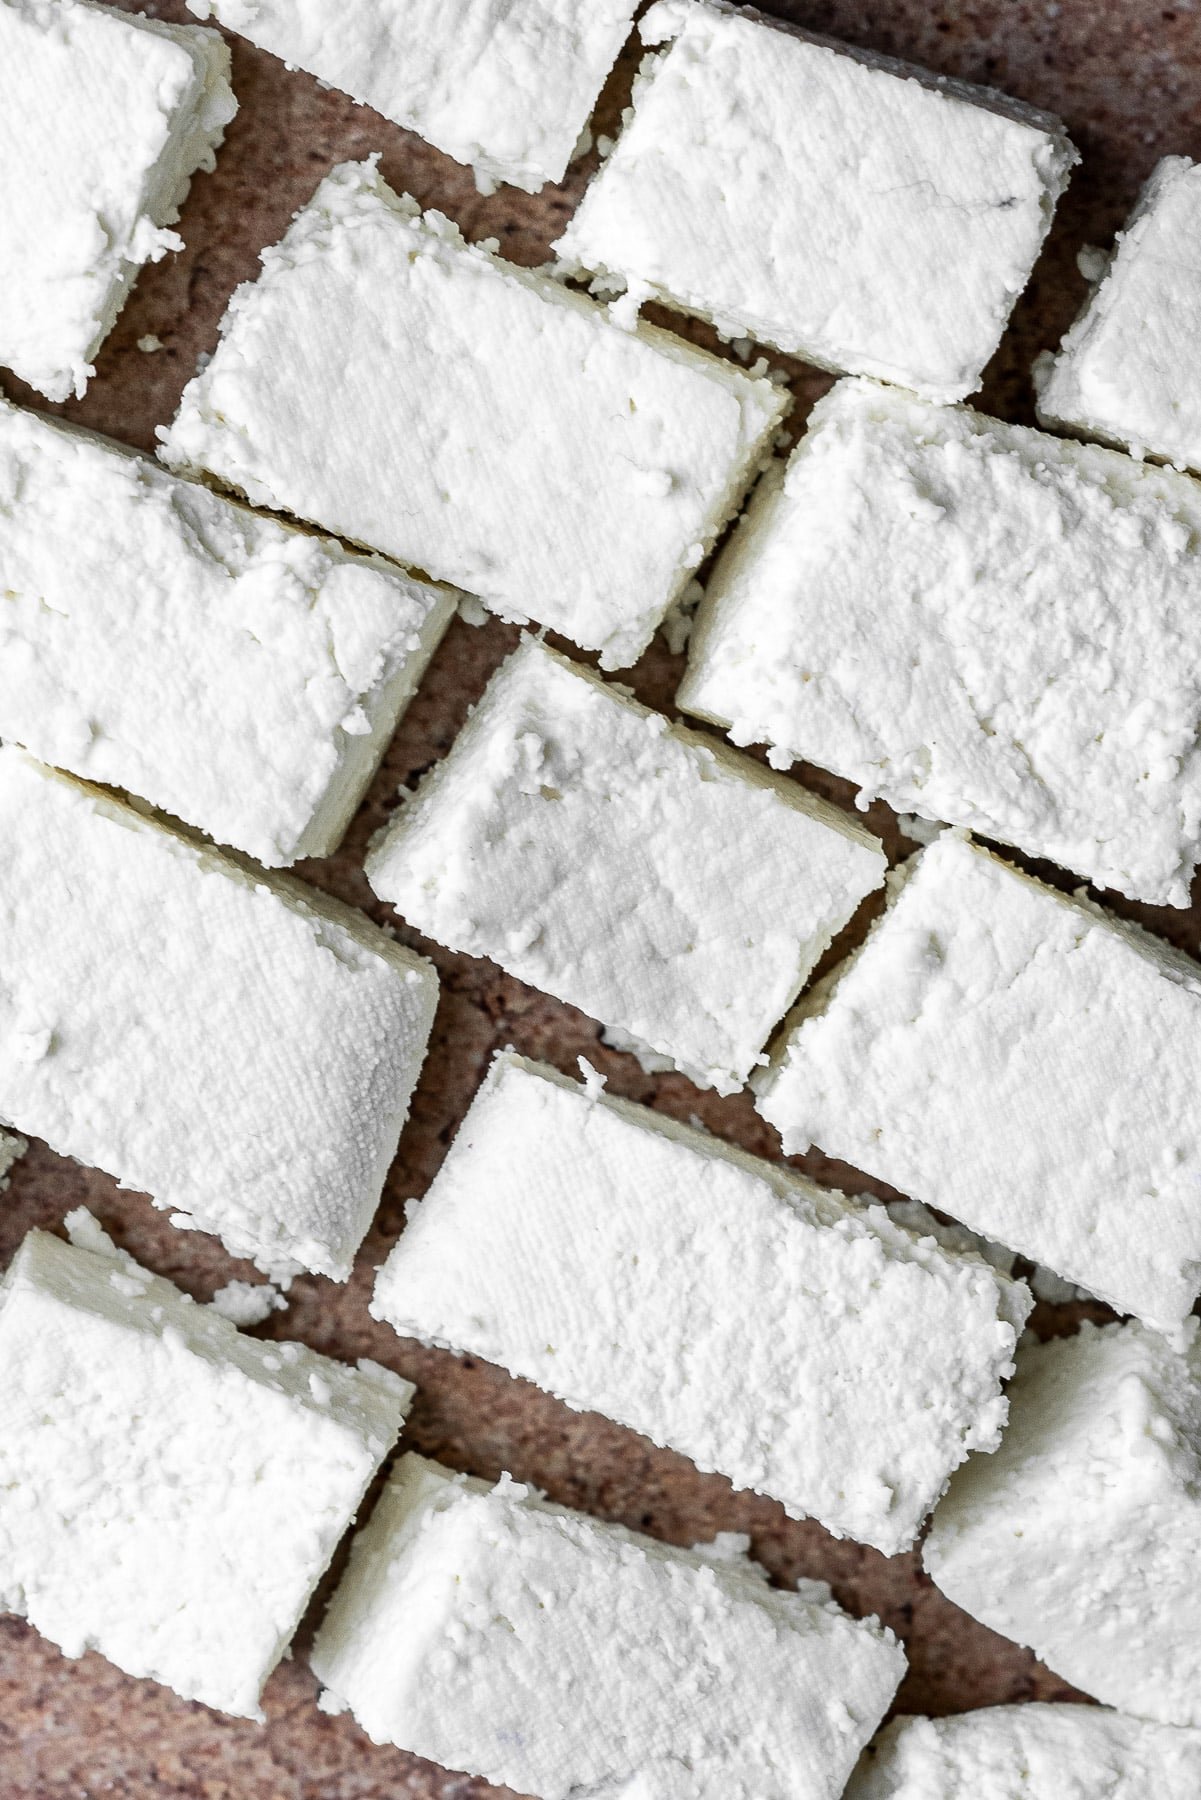
After pressing the paneer, you will get your chance to shape it a bit into a square or a perfect circle if you'd like to. Remove any excess whey that may have been pressed out, and chill the paneer for at least an hour.
Pro Tip: If you cut the paneer immediately, you'll end up with crumbs everywhere. It's best to allow some chill time.
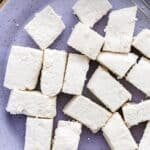
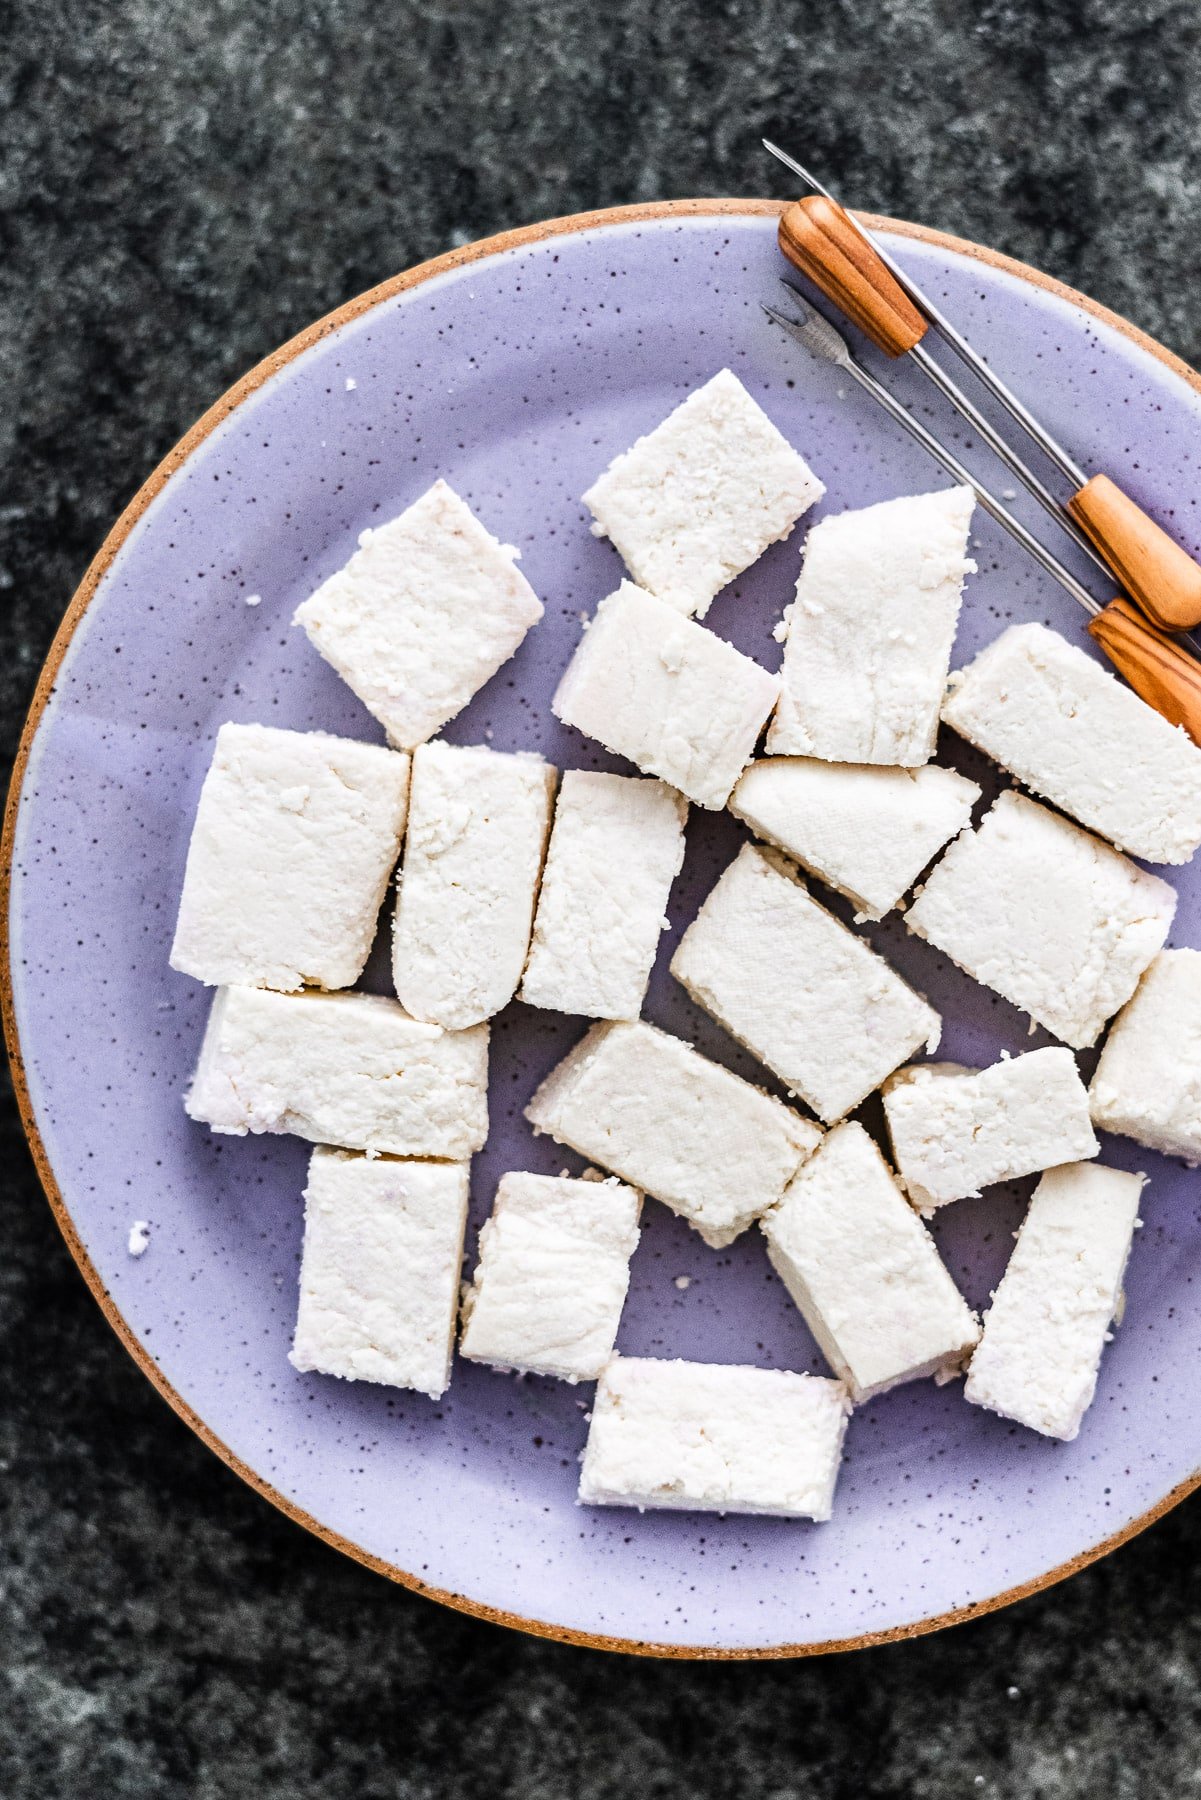
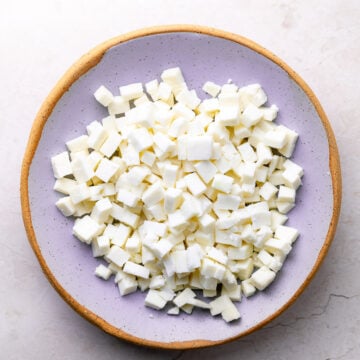
After it's chilled, cut the block of cheese into the desired shape and it's ready for use!
The Difference between Store-bought and Homemade
Store-bought paneer tends to be a lot smoother and tightly compressed. Because of this, you may also feel and hear small squeaks when you bite into a piece of paneer (this is also my hack to find out if an Indian restaurant most likely makes their paneer fresh).
Some people find it satisfying, some people find it incredibly irritating. It can also last much longer in the fridge. This makes it ideal for grilling or searing.
Homemade paneer is a bit crumblier (really not THAT crumbly if you chill). You can definitely see a difference in texture when comparing to a store-bought paneer.
Because it's fresh, I also find that it's a bit softer and creamier but the con to that is the shelf-life is very short. You should plan to use it within a couple of days of making it.
Recipes Using Paneer
Paneer can be used to make sandwiches, curries, desserts, etc. It can be eaten "raw' or you can give it a quick sear and use it as a protein in most dishes. I almost think of it as an unsalty halloumi.

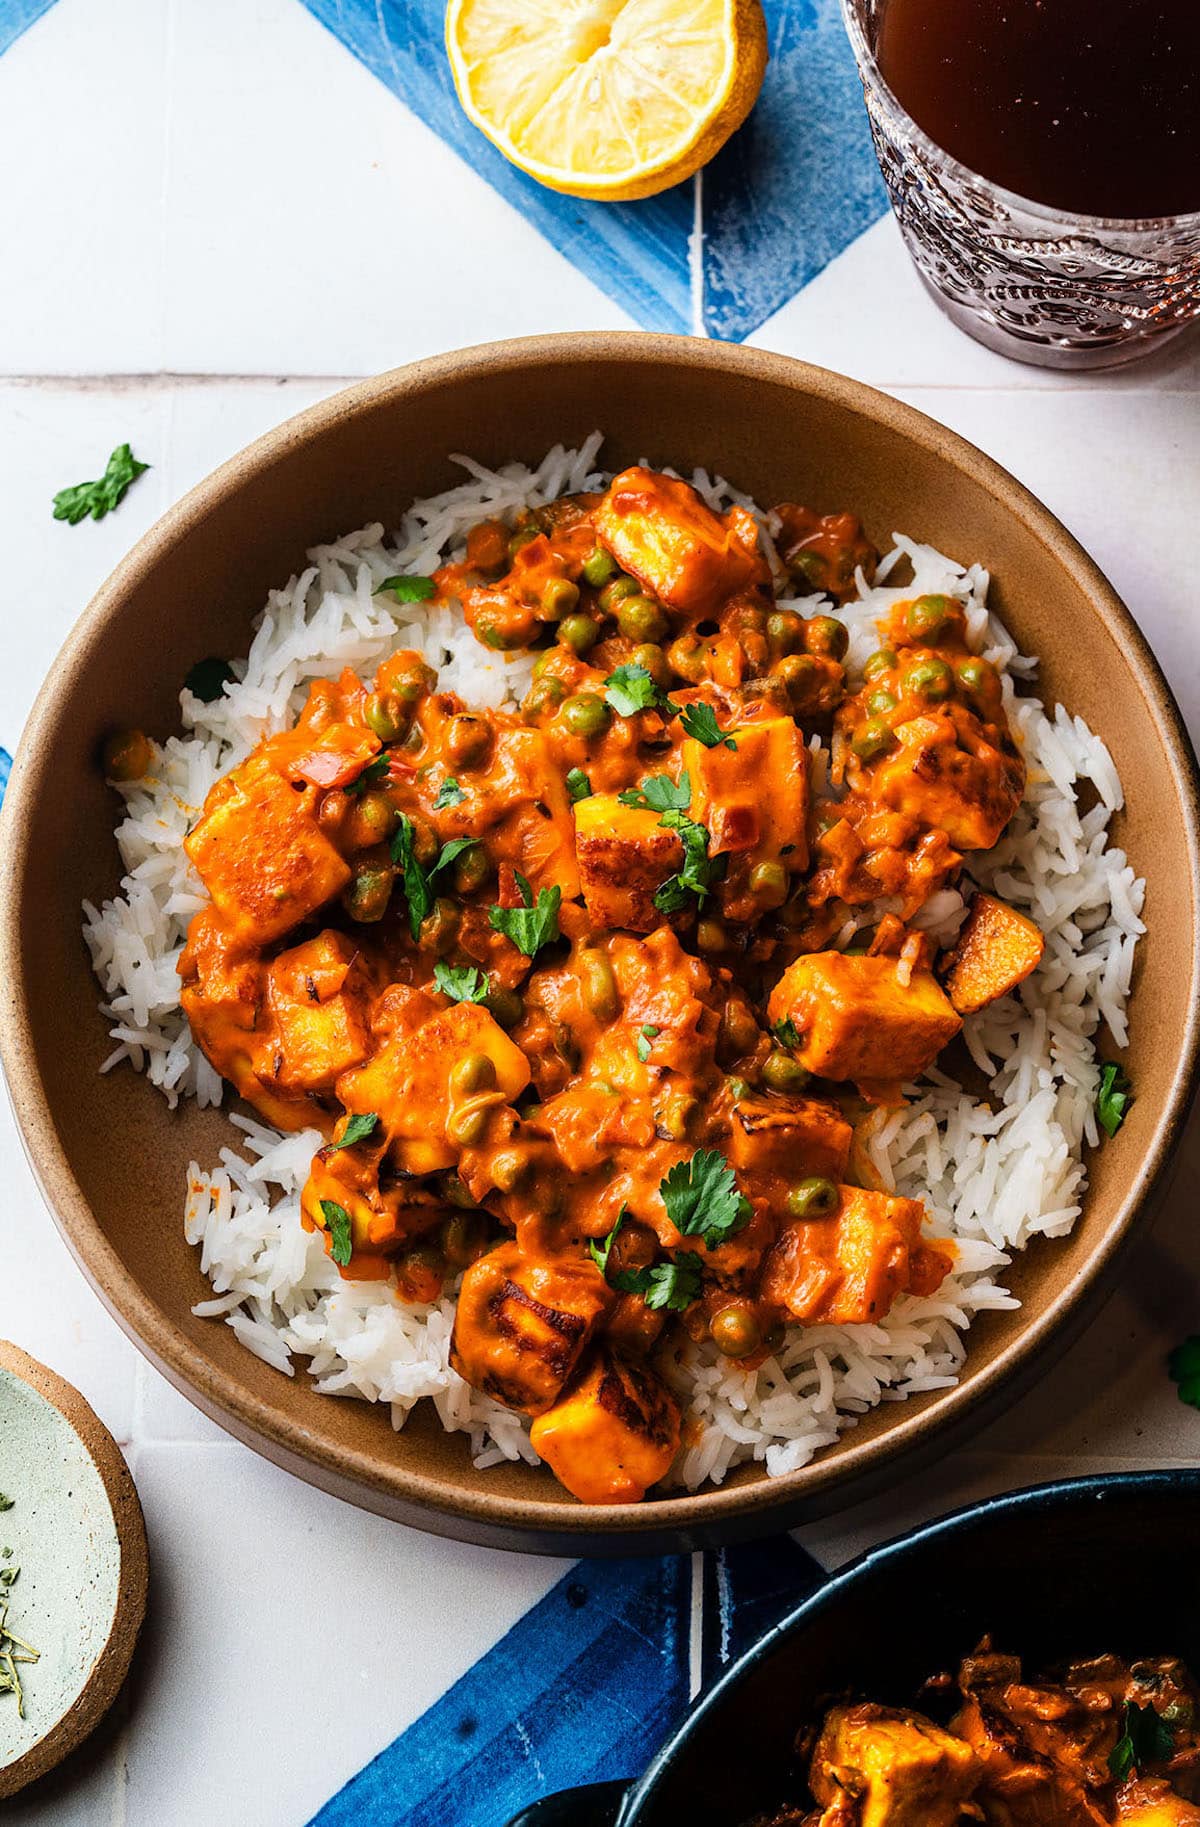
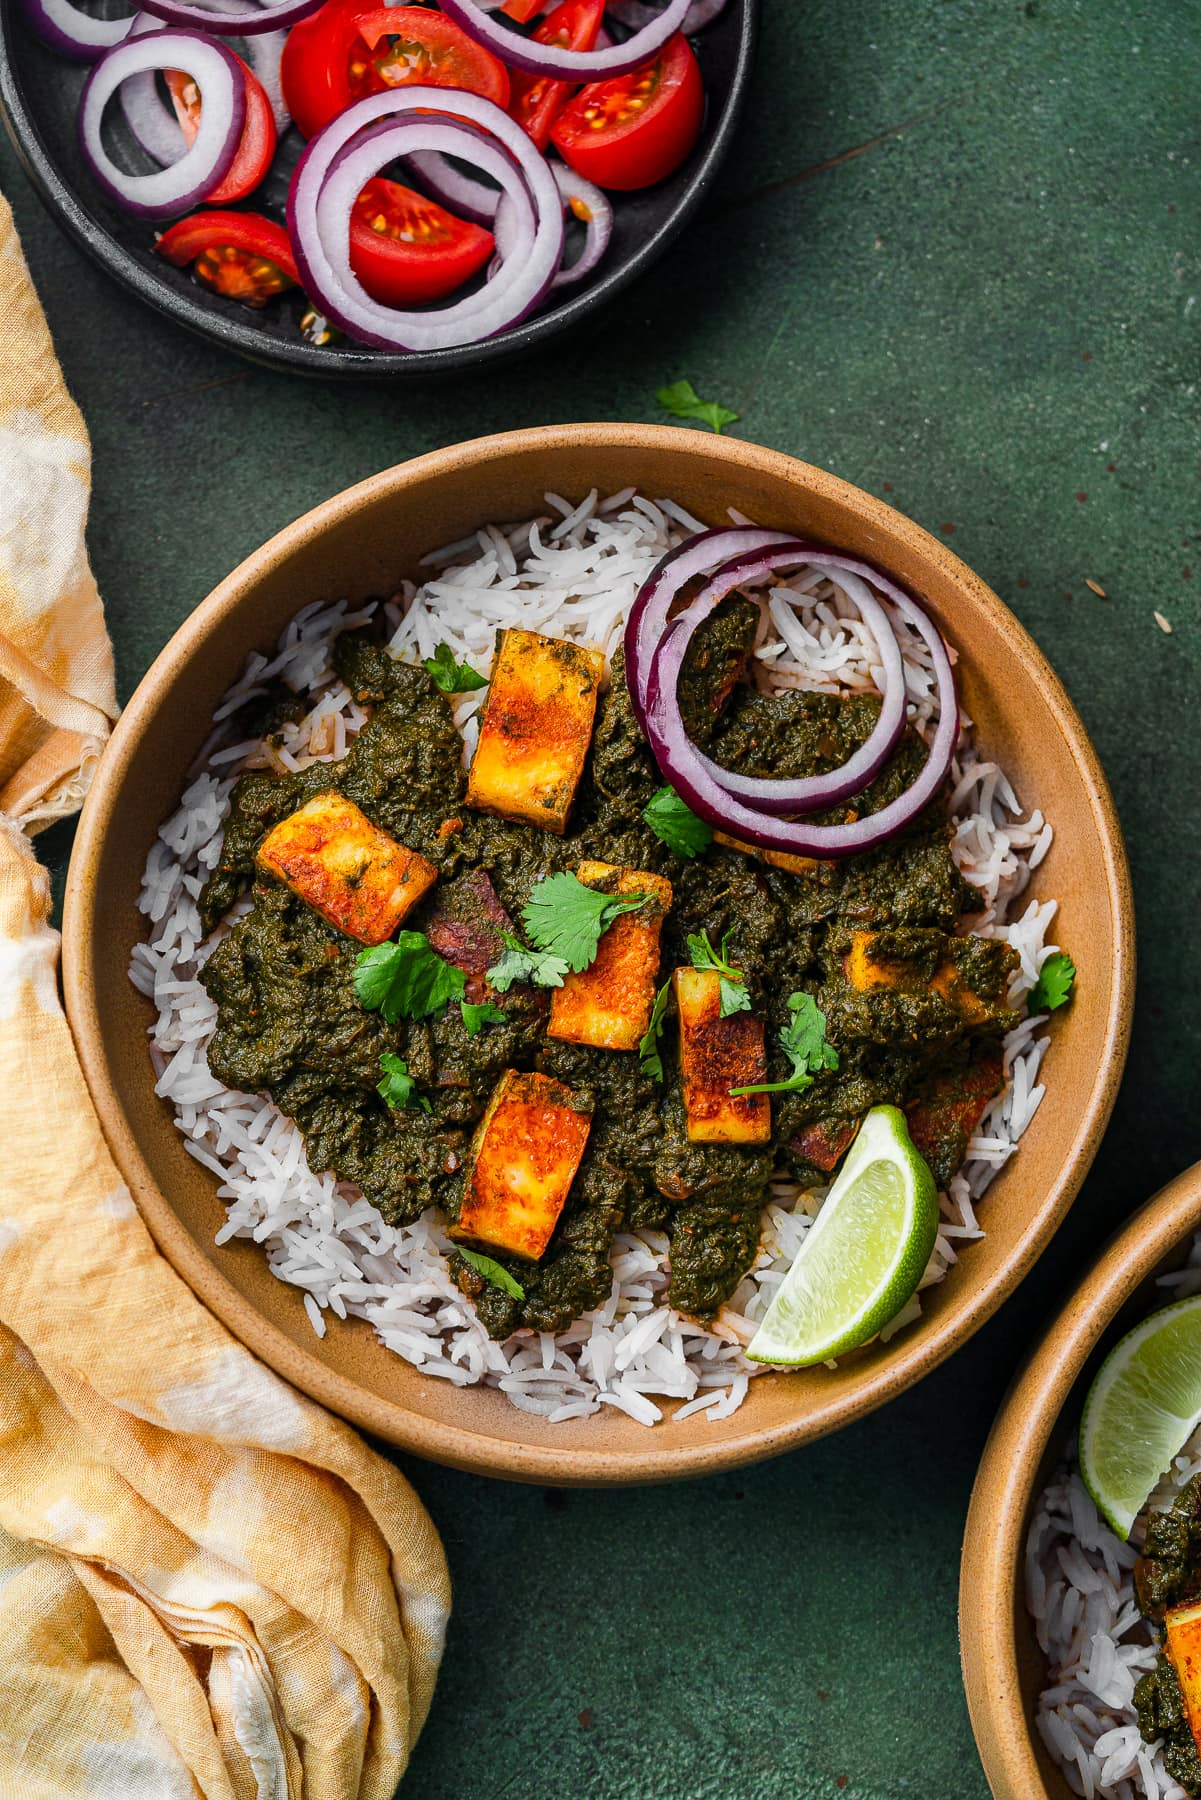
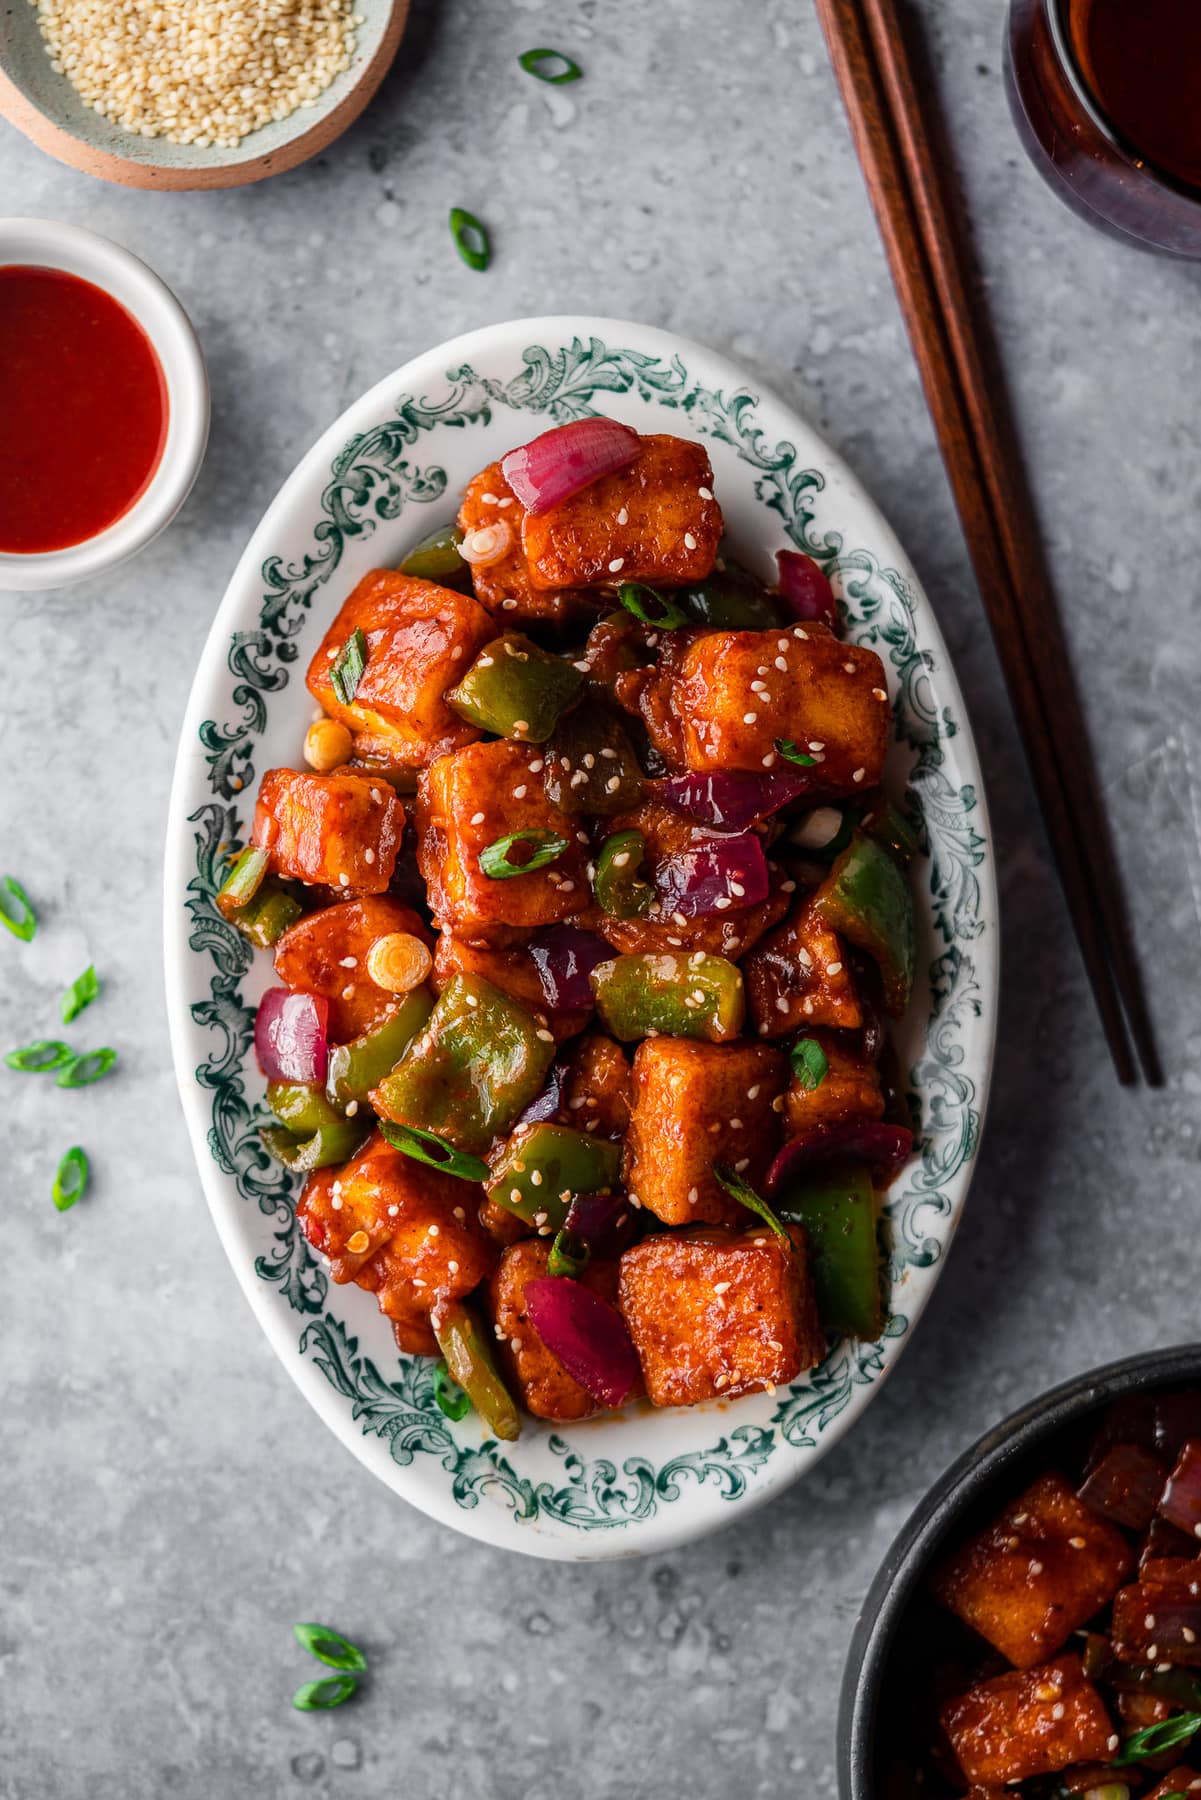
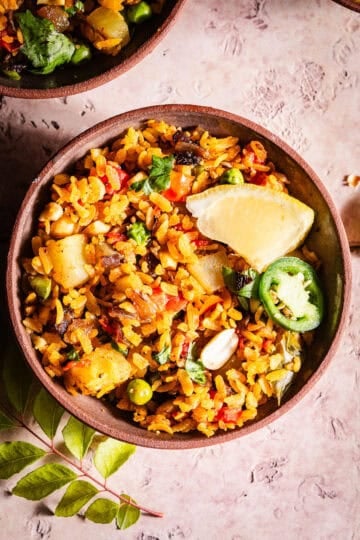
You can make Paneer Masala Cheesesteaks, Paneer Makhani Pizza, Saag Paneer, or Indian-Style Tea Sandwiches.
One of the simplest ways to eat paneer is slicing it thinly, frying it in butter until golden brown, and then hitting it with a sprinkle of salt and chaat masala. You can also put those thin slices into a sandwich with tomatoes and cucumber for a quick lunch!
You can also use fresh paneer to make Indian desserts like Ras Malai.
Storage Instructions
Store paneer in an airtight container in the fridge for up to a week. Because paneer has a higher water content and is a soft cheese, it is more likely to go bad in under two weeks. Even faster outside.
You'll know when paneer has spoiled when it becomes yellow-ish, develops brown spots, becomes watery, or smells bad.
Do not freeze paneer. While it can be frozen, the texture will change significantly.
More Indian Recipes to try


Recipe
Want to Save This Recipe?
Thinking about making this recipe? Enter your email and I'll send it straight to your inbox to save for later. Plus, get new recipe inspiration from me every week!
By submitting this form, you consent to receive emails from Masala and Chai.
How to Make Homemade Paneer
Recipe Video
Ingredients
- ½ gallon whole milk
- 3 tablespoon lemon juice
Instructions
- In a large heavy bottom pot, pour in all the milk. Turn the heat on low to medium. Turn on the thermometer and rest it in the milk. Bring the milk to a boil (~203°F), stirring occasionally. Once it's at a boil, pour in the lemon juice and stir with a slotted spoon. Turn off the heat and allow the milk to sit for 10 minutes as the milk curdles. After 10 minutes, gently stir the milk with a slotted spoon to separate the curds from the whey.
- Place a strainer over a large bowl, and line the strainer with a cheesecloth. Carefully pour the curdled milk over the cheesecloth. Gather the cheesecloth to the middle, and twist the cloth to strain out as much whey as possible.
- Transfer the block of paneer (still in the cheesecloth) on a plate. Fold the cheesecloth over the paneer so that it's flat. Place a heavy object on the paneer to flatten it out to about 2-inches thick and remove excess whey.
- After a minimum of 20 minutes, remove the heavy object and refrigerate for a minimum of an hour. Carefully remove the cheesecloth and flip the paneer over on the smooth side. Cut into desired shape.
Notes
- Use whole milk that has not been through UHT (ultra high temperature pasteurization). Non-fat or skim milk will not result in enough milk fat.
Allison Clayton says
I've been looking for an easy cheese to make a long time, and I am happy that you put up incredibly easy steps to make paneer, Shweta. This was not an intimidating recipe, and each step was clearly laid out. I had no troubles at all making it, and I love how fresh this is compared to the paneer I usually eat from my local restaurants...no squeak! I look forward to making this again, maybe with a gallon of milk so I can have more paneer to eat. 😉