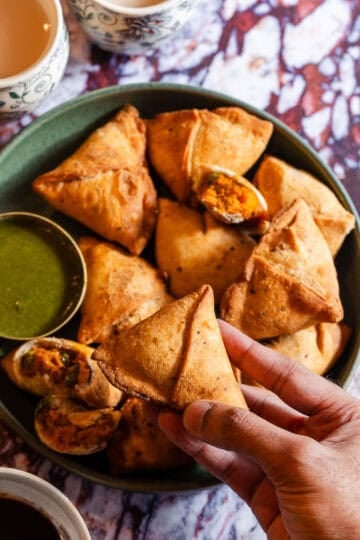
Impress your guests with a platter of freshly-made restaurant quality Paneer Aloo Samosas! The buttery samosa dough is kneaded and shaped by hand, filled with shredded Indian cheese - paneer - which soaks up a ton of flavor with the spiced potatoes, and then deep-fried to crispy perfection. This vegetarian Indian appetizer is a classic snack served with chutneys at restaurants or gatherings.
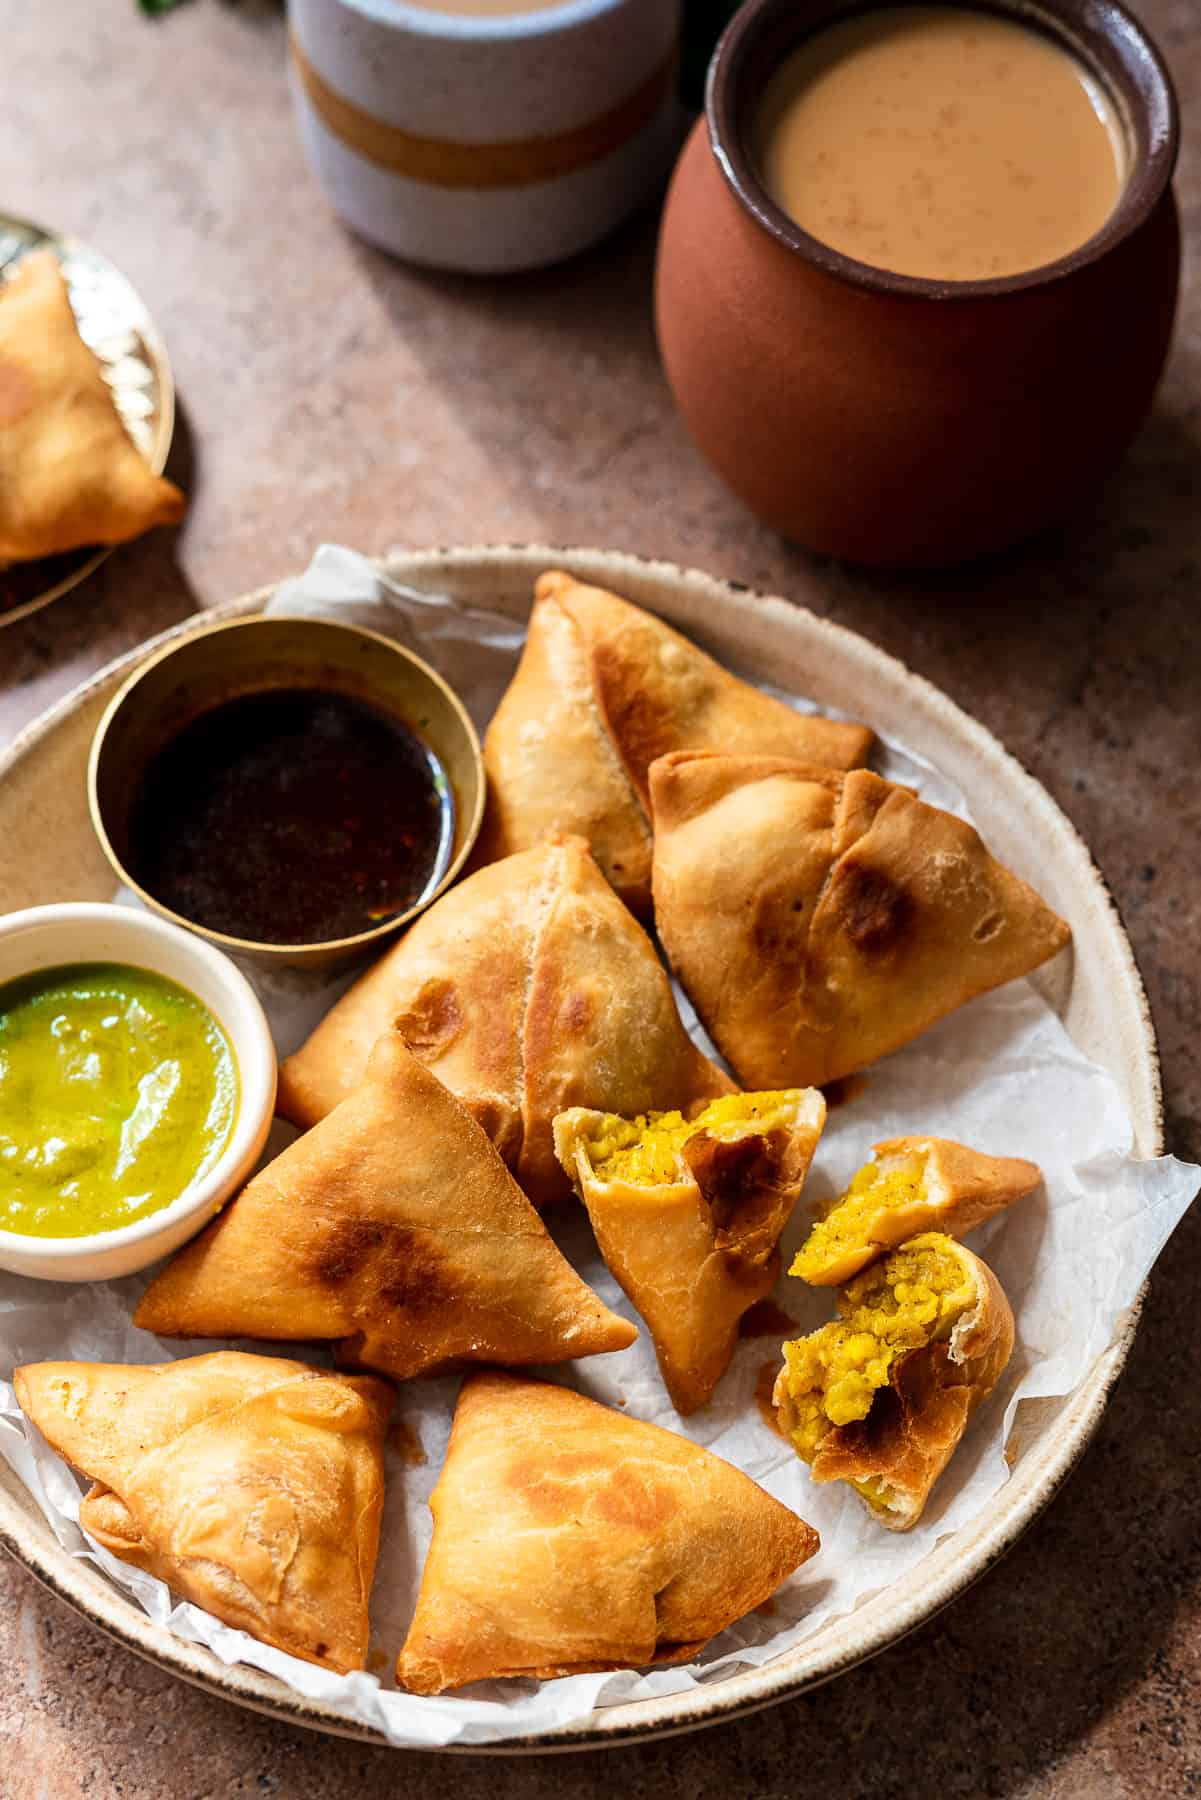
I don't even have to spend time here convincing you why samosas are good, right? You've probably already had the traditional potato (aloo) with peas filled samosa!
When it comes to samosas there are two types of people: the first type of person doesn't enjoy samosas... they just quietly eat the filling because it's a crime to say you don't like them. The second type of person will eat at least three - mostly by accident - because they're so good. Whichever one you are, you're bound to love this Paneer Aloo Samosa recipe, which was passed down to me by my mother.
These Paneer Aloo Samosas have a buttery crispy flaky crust that's deep fried and filled with a well-balanced, flavorful paneer and potato filling which soaks in all of the spices. They are perfect for special occasions - because there's truly nothing more impressive than sharing freshly-made, homemade samosas at a dinner party.
Jump to:
- Why You'll Love this Recipe
- What is a Samosa?
- The Ingredients to make Samosas
- Recommended Kitchen Equipment
- How to make Samosas
- Part 1: How to make the Paneer Aloo Filling
- Part 2: How to make the dough, shape the samosa, and fill it
- Part 3: Deep Frying Samosas - The Trick to the Crispiest Samosas
- How to Serve Paneer Aloo Samosas
- Expert Tips and Tricks
- Frequently Asked Questions
- More Indian Appetizer Recipes to try
- Recipe
Why You'll Love this Recipe
This post has detailed instructions and photos so that if you're a first-timer you'll have absolutely no issue making them successfully. I promise it'll feel like you have desi auntie on the other side of the computer holding your hand through the entire process. By the end, you'll be surprised at how quickly you're able to fold, fill, and fry the samosas.
What is a Samosa?
If you've ever had the pleasure of going to a South Asian wedding, Indian restaurant, or really any event with your desi friends, you've most likely tried a samosa.
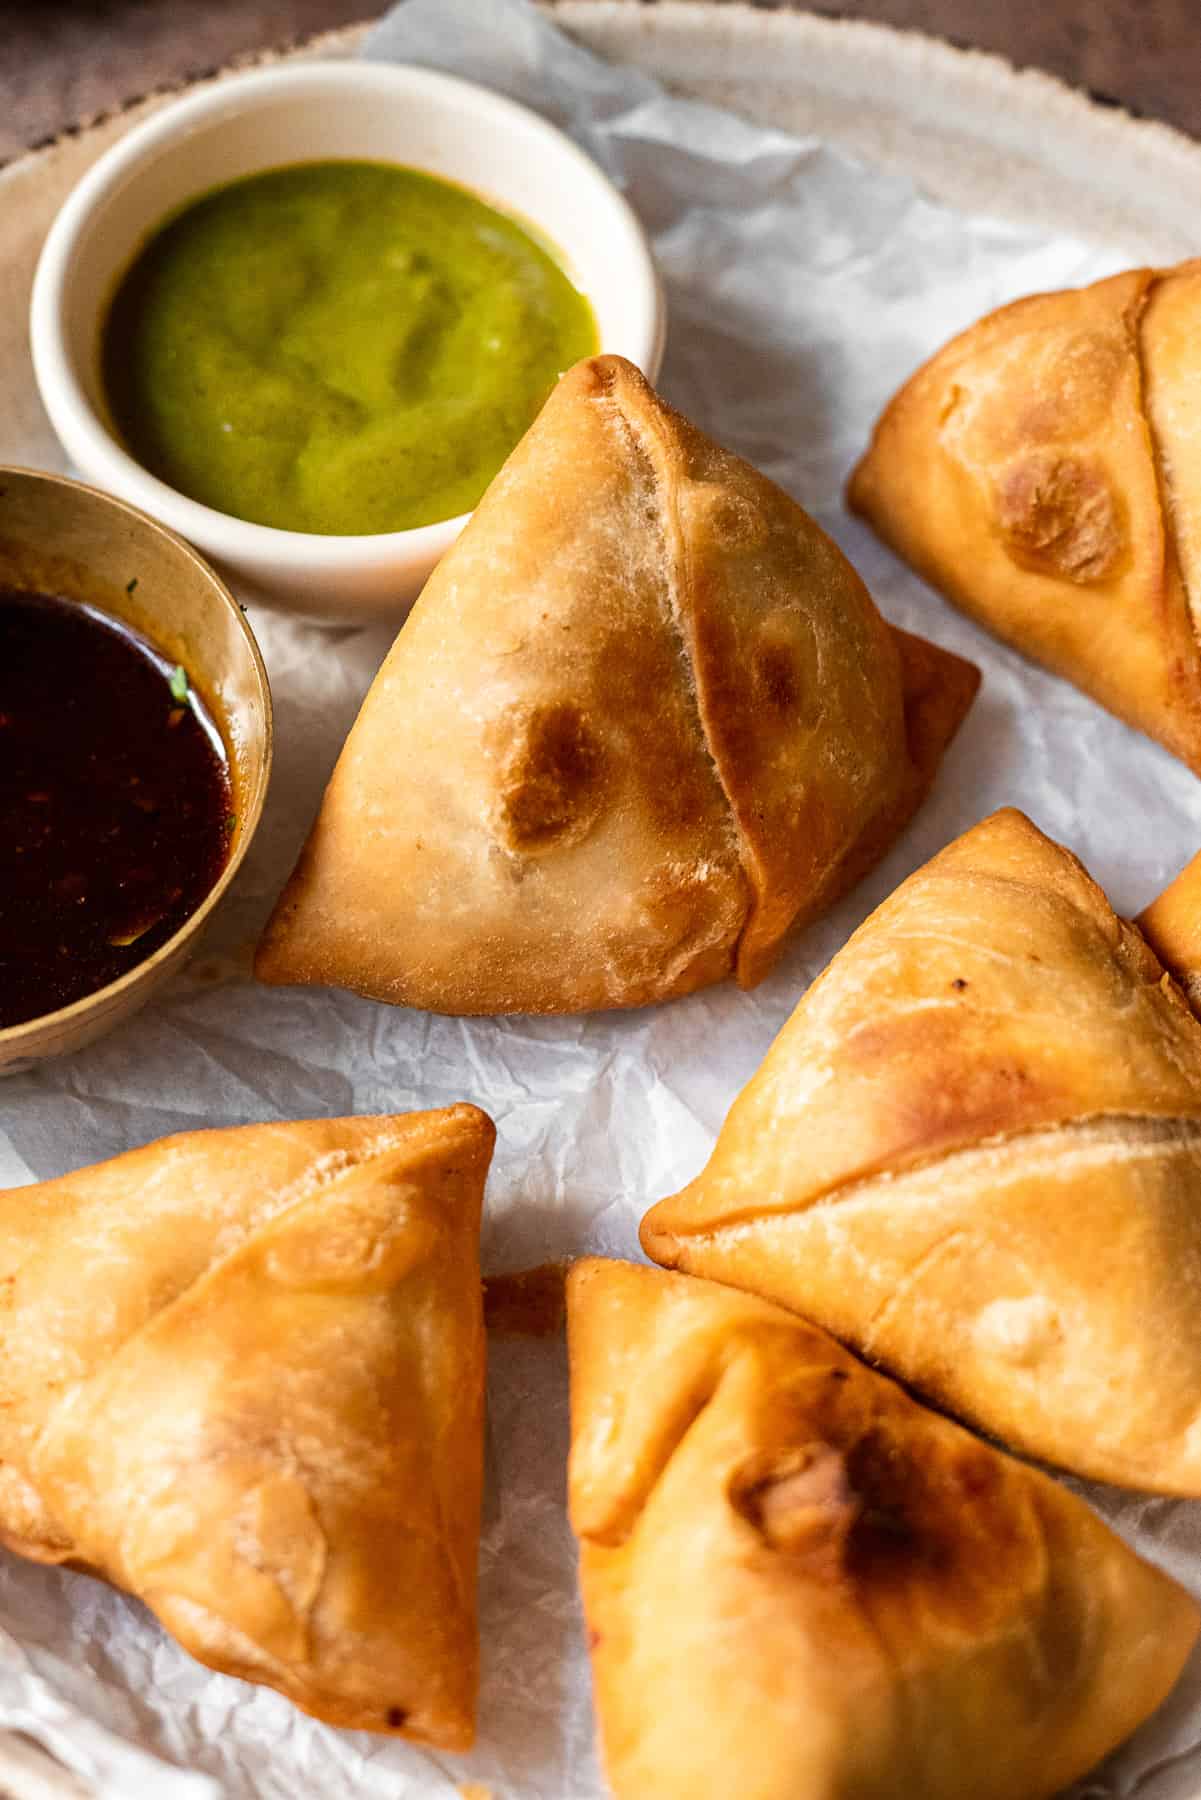
A samosa is a deep-fried South Asian snack and appetizer that's traditionally filled with spiced potatoes and peas. Other variations include pumpkin or meat fillings like chicken keema (spiced ground chicken).
It's typically folded into a triangular cone which is then deep-fried, giving it a crispy flaky outer shell with a savory filling. It's served with a cilantro-mint chutney and tamarind chutney when starting a meal along with other snacks and chaats.
Another delicious way to eat samosas is to smash them and eat them in sandwiches with cheese and chutney, or as Samosa Chaat with chutneys, dahi (yogurt), and sev (crispy chickpea noodles).
The Ingredients to make Samosas
Making samosas was really intimidating to me - until it wasn't. Now it feels like something I can easily crank out with a trip to Whole Foods for some paneer and potatoes and maybe a refresh on ghee.
You may also need a trip to the Indian grocery store for a few specialty blends and spices. Once you have the spices, they'll last you quite a while.
The Spices
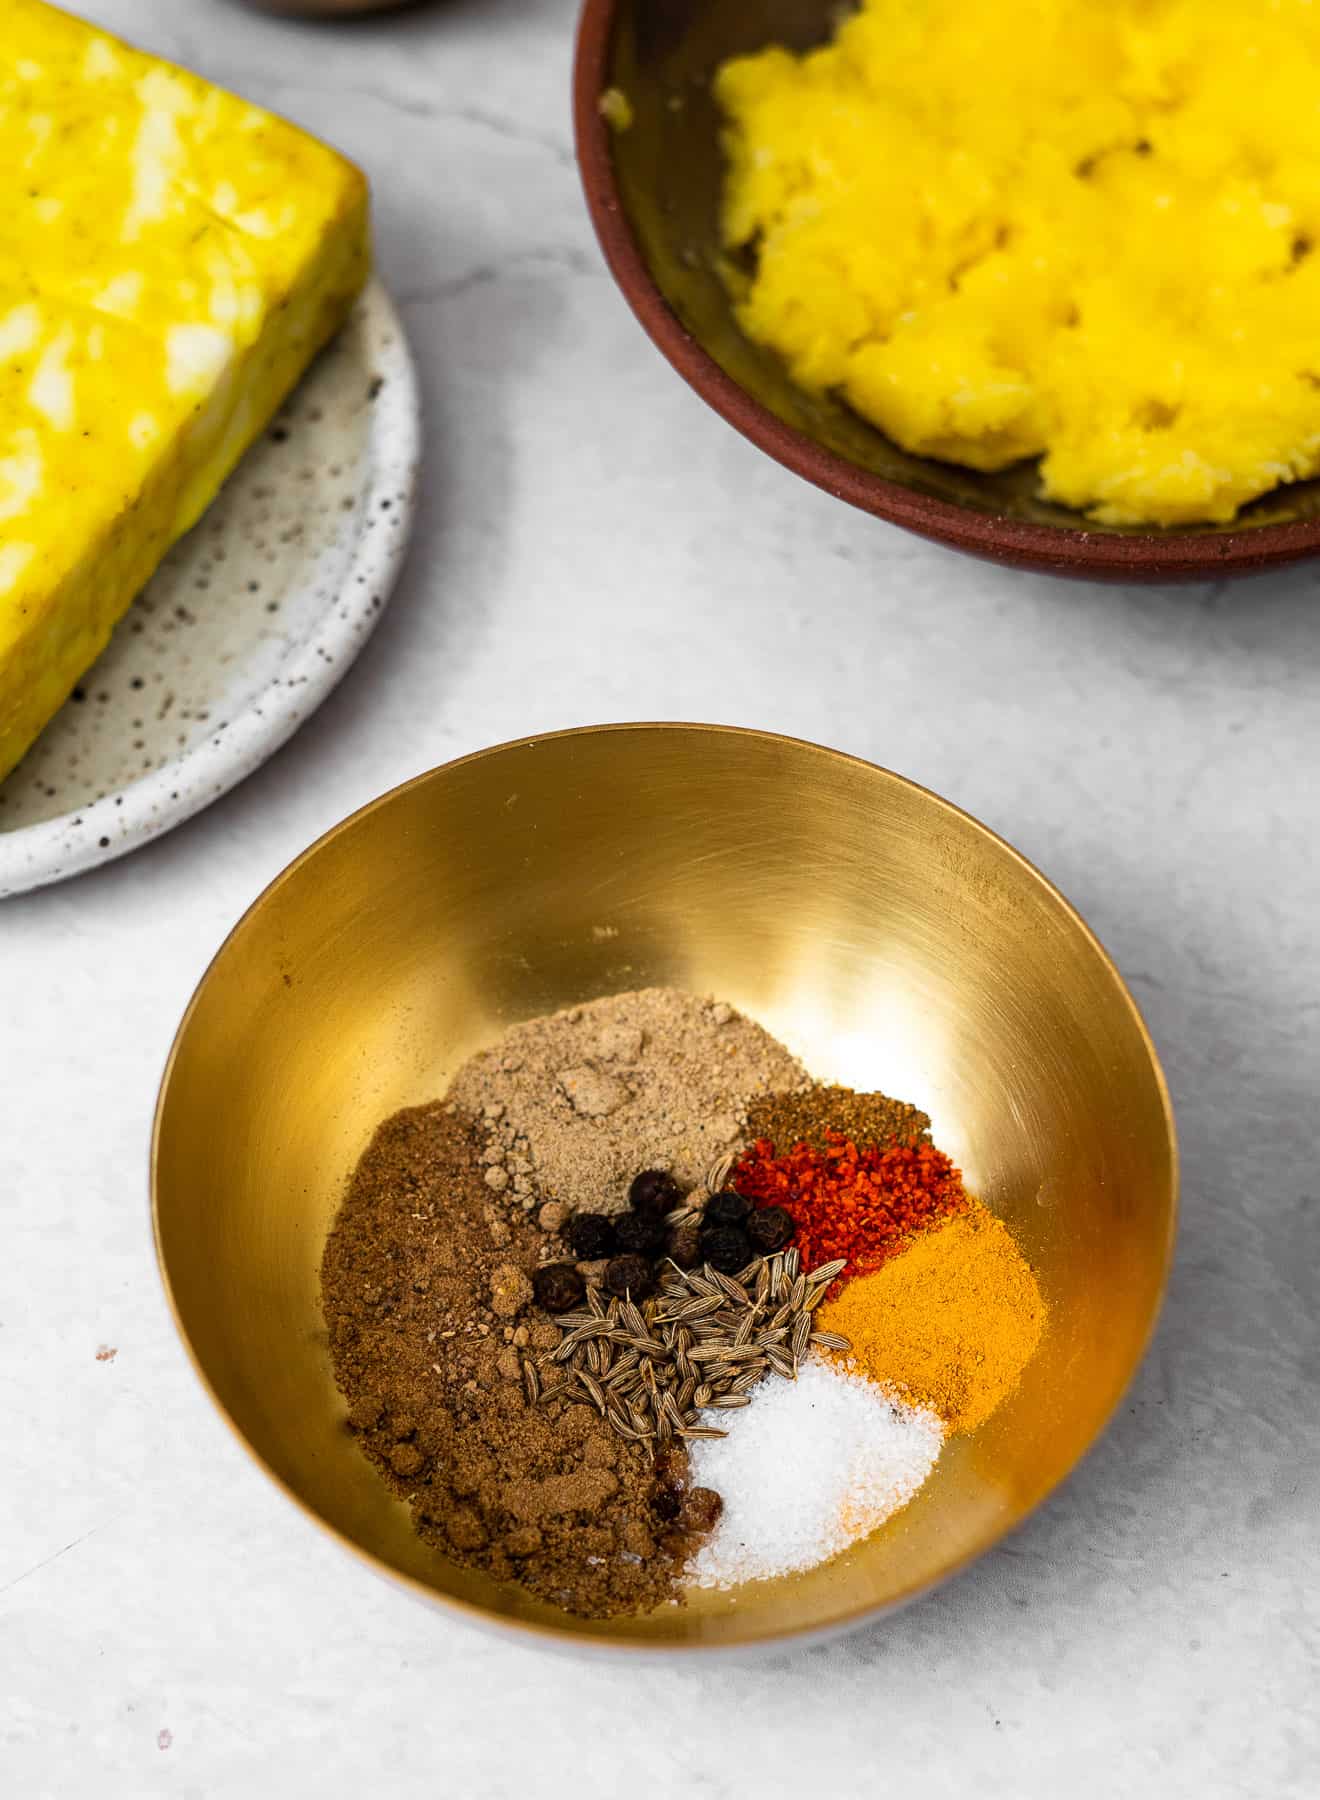
To get an entire cohesive list on Indian spices and groceries, check out my newsletter freebie which preps you with ingredients to make just about every Indian dish ever.
I use pre-ground spices for all of this except for the cumin seeds. Feel free to toast your whole spices and freshly grind them. I've denoted the spices which may require a trip to the Indian grocer with an asterisk* and included substitutions if you can't find them.
- Coriander - Ground coriander has an earthy, sweet citrus flavor. It's made by grinding the seeds of a cilantro plant.
- Aamchur* - Also known as mango powder. It's made from dried mangoes and has a sour taste. Substitute with a ¼ teaspoon of lemon juice.
- Chaat Masala* - A blend of ground spices with a distinct tangy flavor that's used to make chaat, fruit salads, etc. Substitute with ¼ teaspoon of aamchur, kala namak (black salt), or pomegranate seed powder.
- Garam Masala - A warming blend of spices, translated to "warming spices", commonly used in Indian cooking.
- Cumin Seeds - Cumin is earthy and warm in flavor. The seeds are toasted in oil and mixed into the potatoes.
- Asafoetida* - Also known as hing; it is commonly used in Indian cooking to replace garlic and onion. It smells strongly of garlic and onion and only requires the tiniest pinch. Some people say Pure Indian Foods has the best hing they've ever tasted. Substitute with ⅛ teaspoon of garlic powder and ⅛ teaspoon of onion powder.
- Turmeric - Known for its striking yellow color, turmeric is earthy and has several health benefits.
Other Ingredients
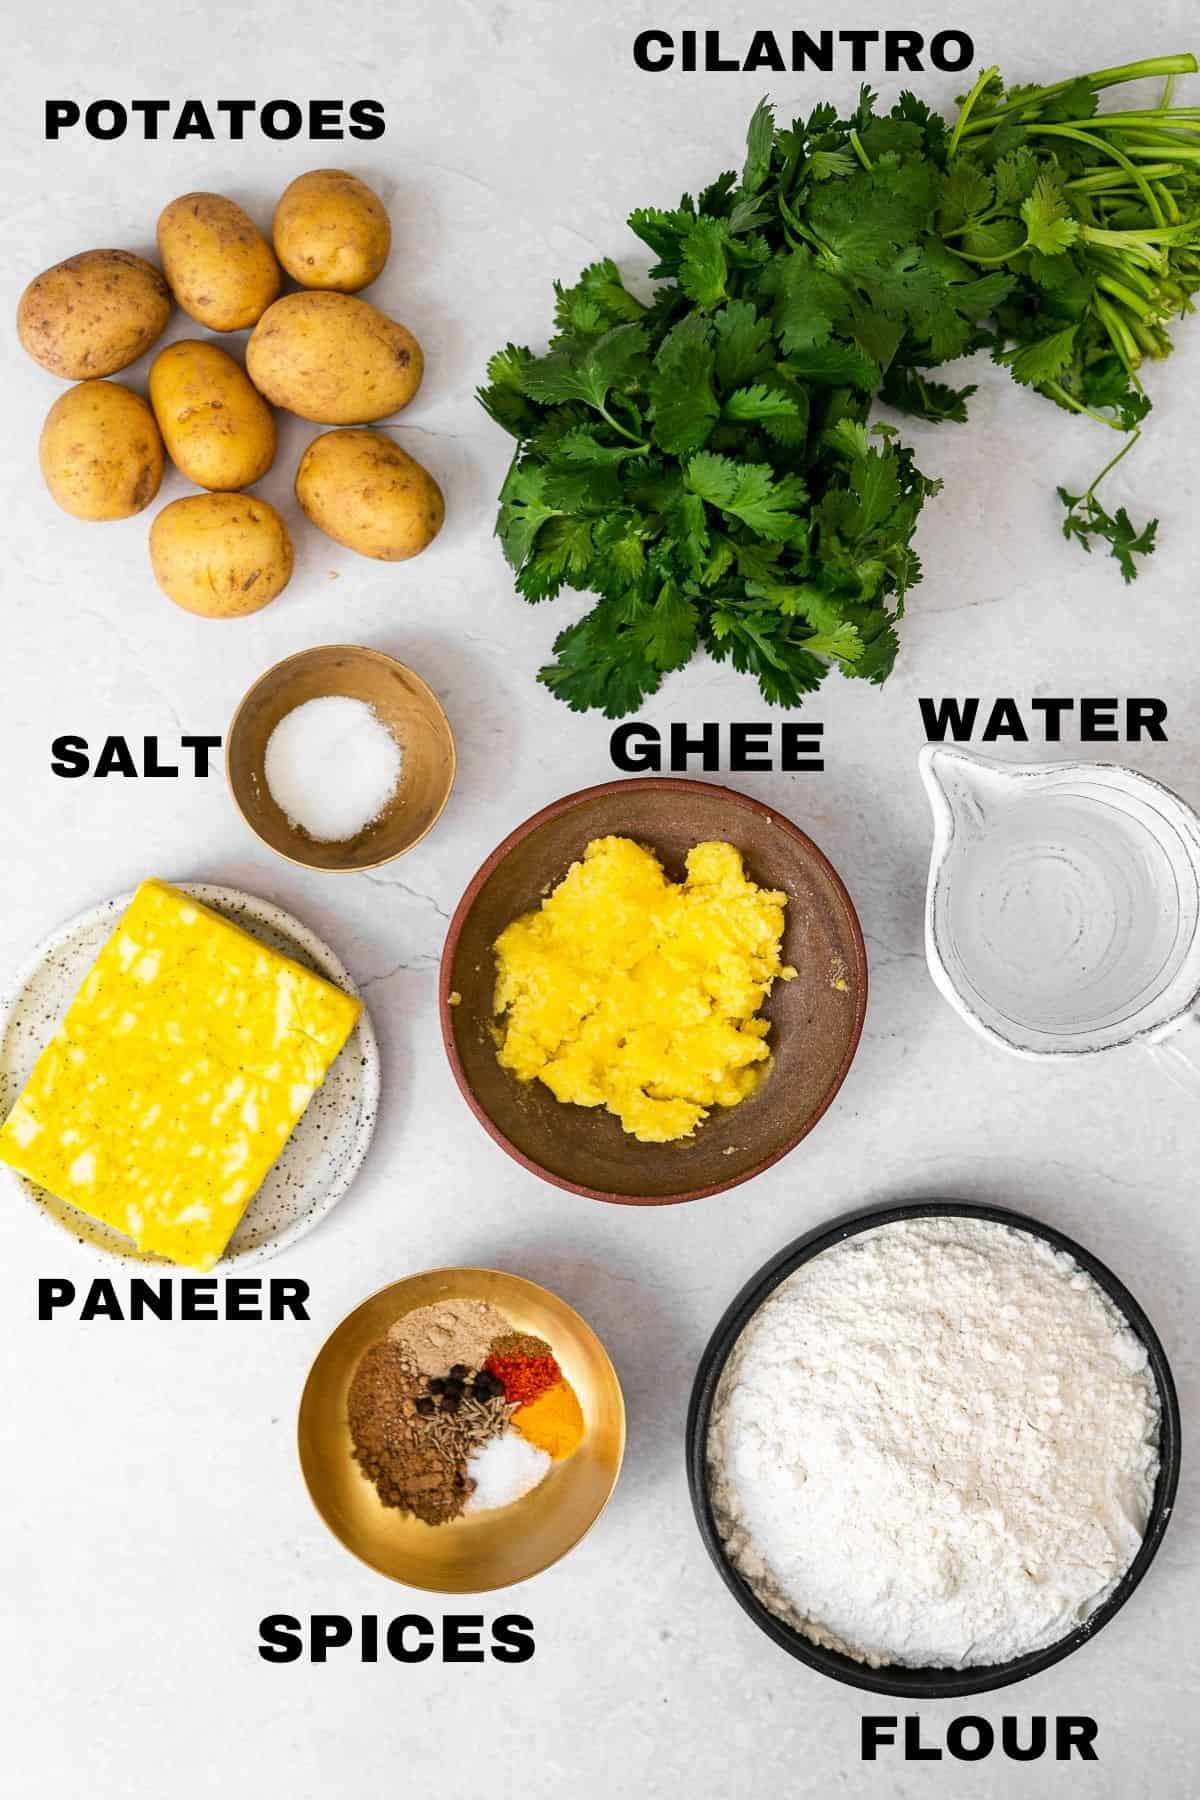
- Flour - Use plain, unbleached all-purpose flour
- Ghee - This is a traditional cooking fat in lieu to oils in Indian cooking. The milk solids and impurities are removed from regular butter to make clarified butter. Melted ghee hydrates the dough to give it an intense buttery flavor. Substitute ghee with vegetable oil.
- Potatoes - Use yellow potatoes, like russet, yukon, or Idaho. I use smaller sized potatoes to decrease the boiling time.
- Paneer - Paneer is a mild Indian cheese. Use a plain block of paneer that you can get at the grocery store or make at home with this homemade paneer recipe. Flavored paneer, like the turmeric paneer pictured above, is great, too!
- Cilantro - This is completely optional but it adds a pop of color to an otherwise very brown/yellow appetizer.
Note: My mother and I decisively use ghee in the samosa dough instead of oil. Ghee results in a softer, flaky samosa crust. In contrast, using vegetable oil in samosa dough results in a hard crust, just like the ones you typically get at restaurants.
Personally, we prefer our samosa crust to be crispy, flaky, and tasty from the richness of ghee. However, the tradeoff is that they're better served on the day of frying or kept un-fried in the freezer until you're ready to fry and enjoy.
Recommended Kitchen Equipment
 Buy Now →
  Buy Now →
  Buy Now →
 How to make Samosas
There are three main parts to making samosas which I'll outline in detail -
- Make the paneer aloo filling
- Make the dough, roll it out and shape into cones, fill them, and seal
- Frying samosas
Part 1: How to make the Paneer Aloo Filling
There are two main steps to making the filling. The first step is to prep the paneer and potatoes and the second step is to cook them with the spices to form a filling.
To prep the paneer, you want to start with about a 4 oz block of paneer. I used paneer that was mixed with turmeric but plain paneer will soak up a ton of flavor. You can purchase paneer from Indian grocery markets or even large grocers like Whole Foods. You can also make your own with only milk and lemon juice using this homemade paneer recipe.
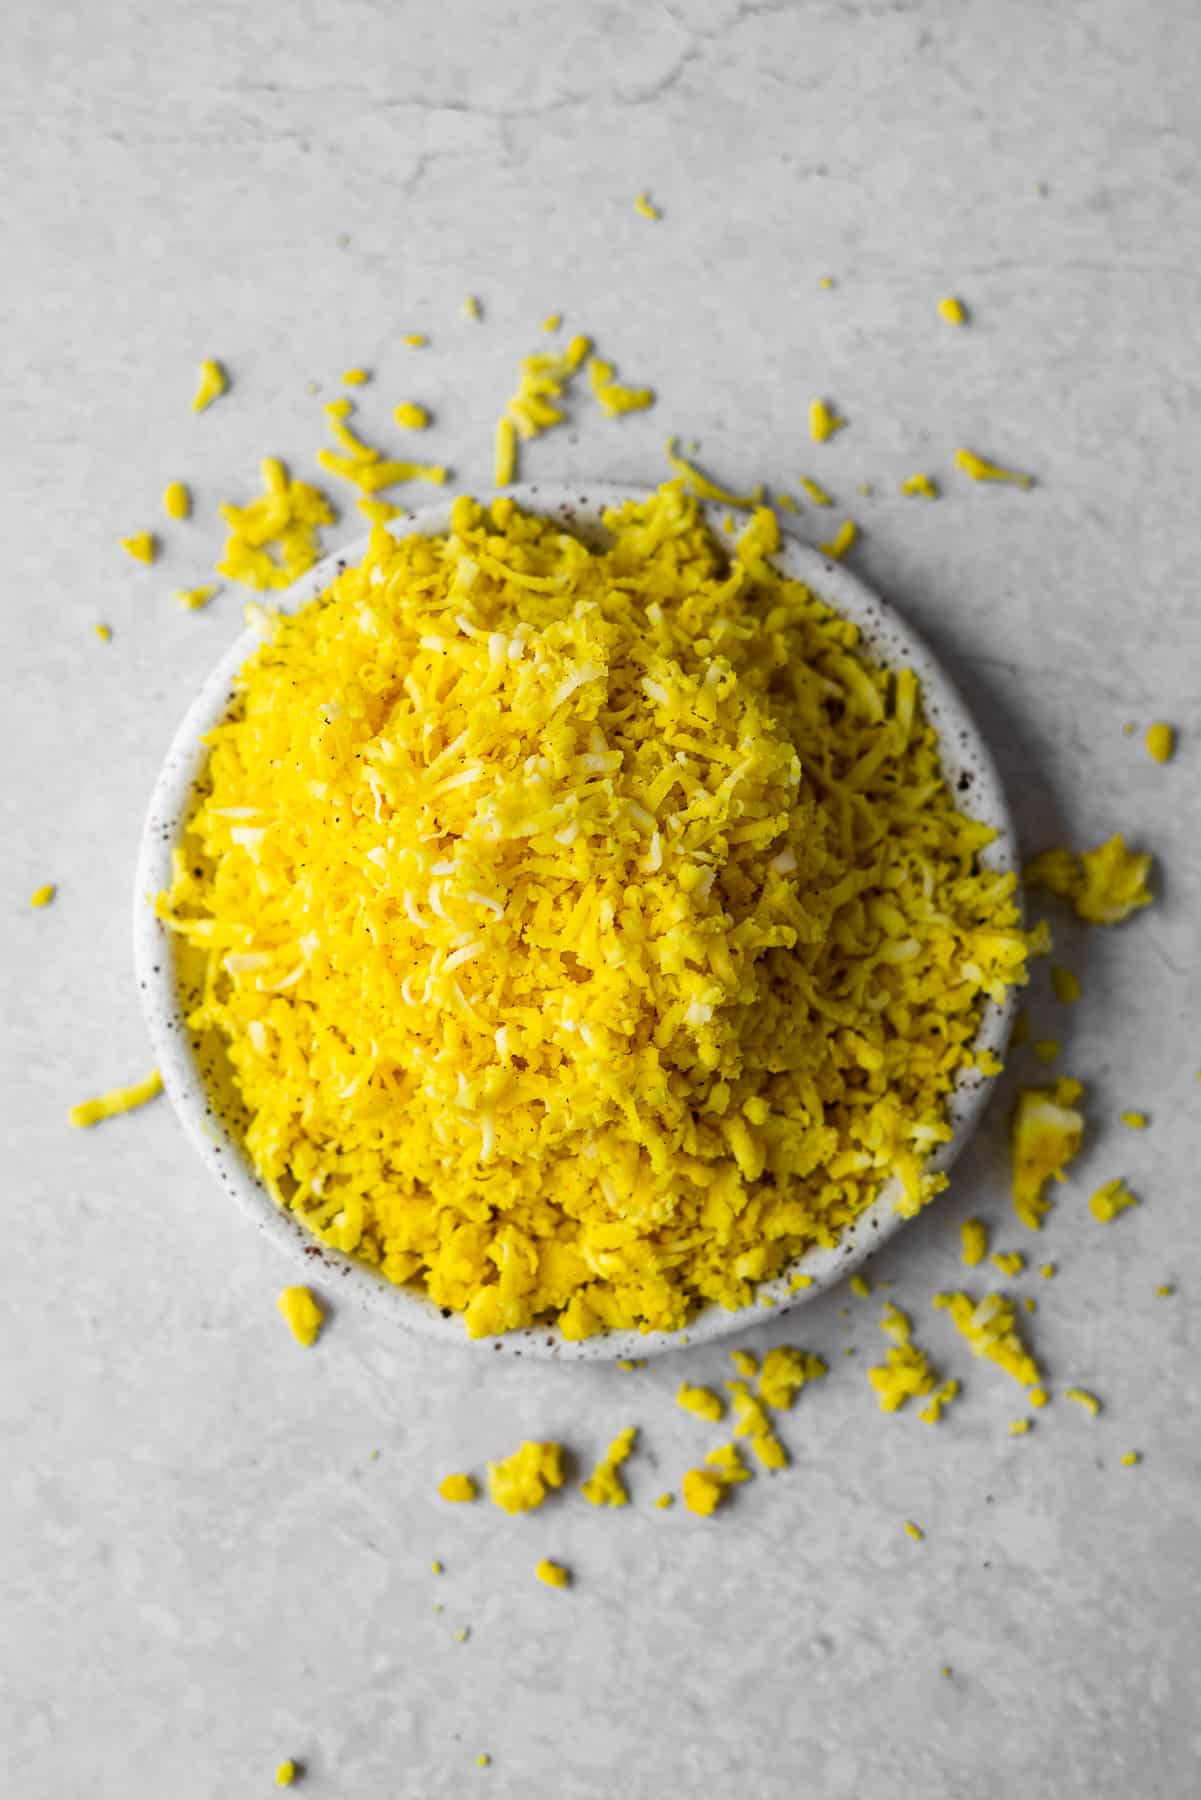
Step 1 - In a small bowl, shred the paneer on the small to medium-sized holes of a grater so that the paneer is finely grated into a consistency that is similar to mashed potatoes. Set the paneer aside.
Step 2 - Boil the potatoes in salty water for about 10 minutes. I used 8 small potatoes to decrease the boiling time. Dump out the hot water and rinse the potatoes in cold water. Peel and remove the skin. Mash the potatoes using a fork or potato masher.
Check the tenderness of the potatoes by seeing if it pierces easily with a fork. The skin may start cracking as well - which indicates the potatoes are ready.
Step 3 - Begin heating a pan on low to medium heat. Add about a tablespoon of neutral oil into the pan and add the cumin seeds. Roast them for about a minute or until you see them start to pop and dance in the oil.
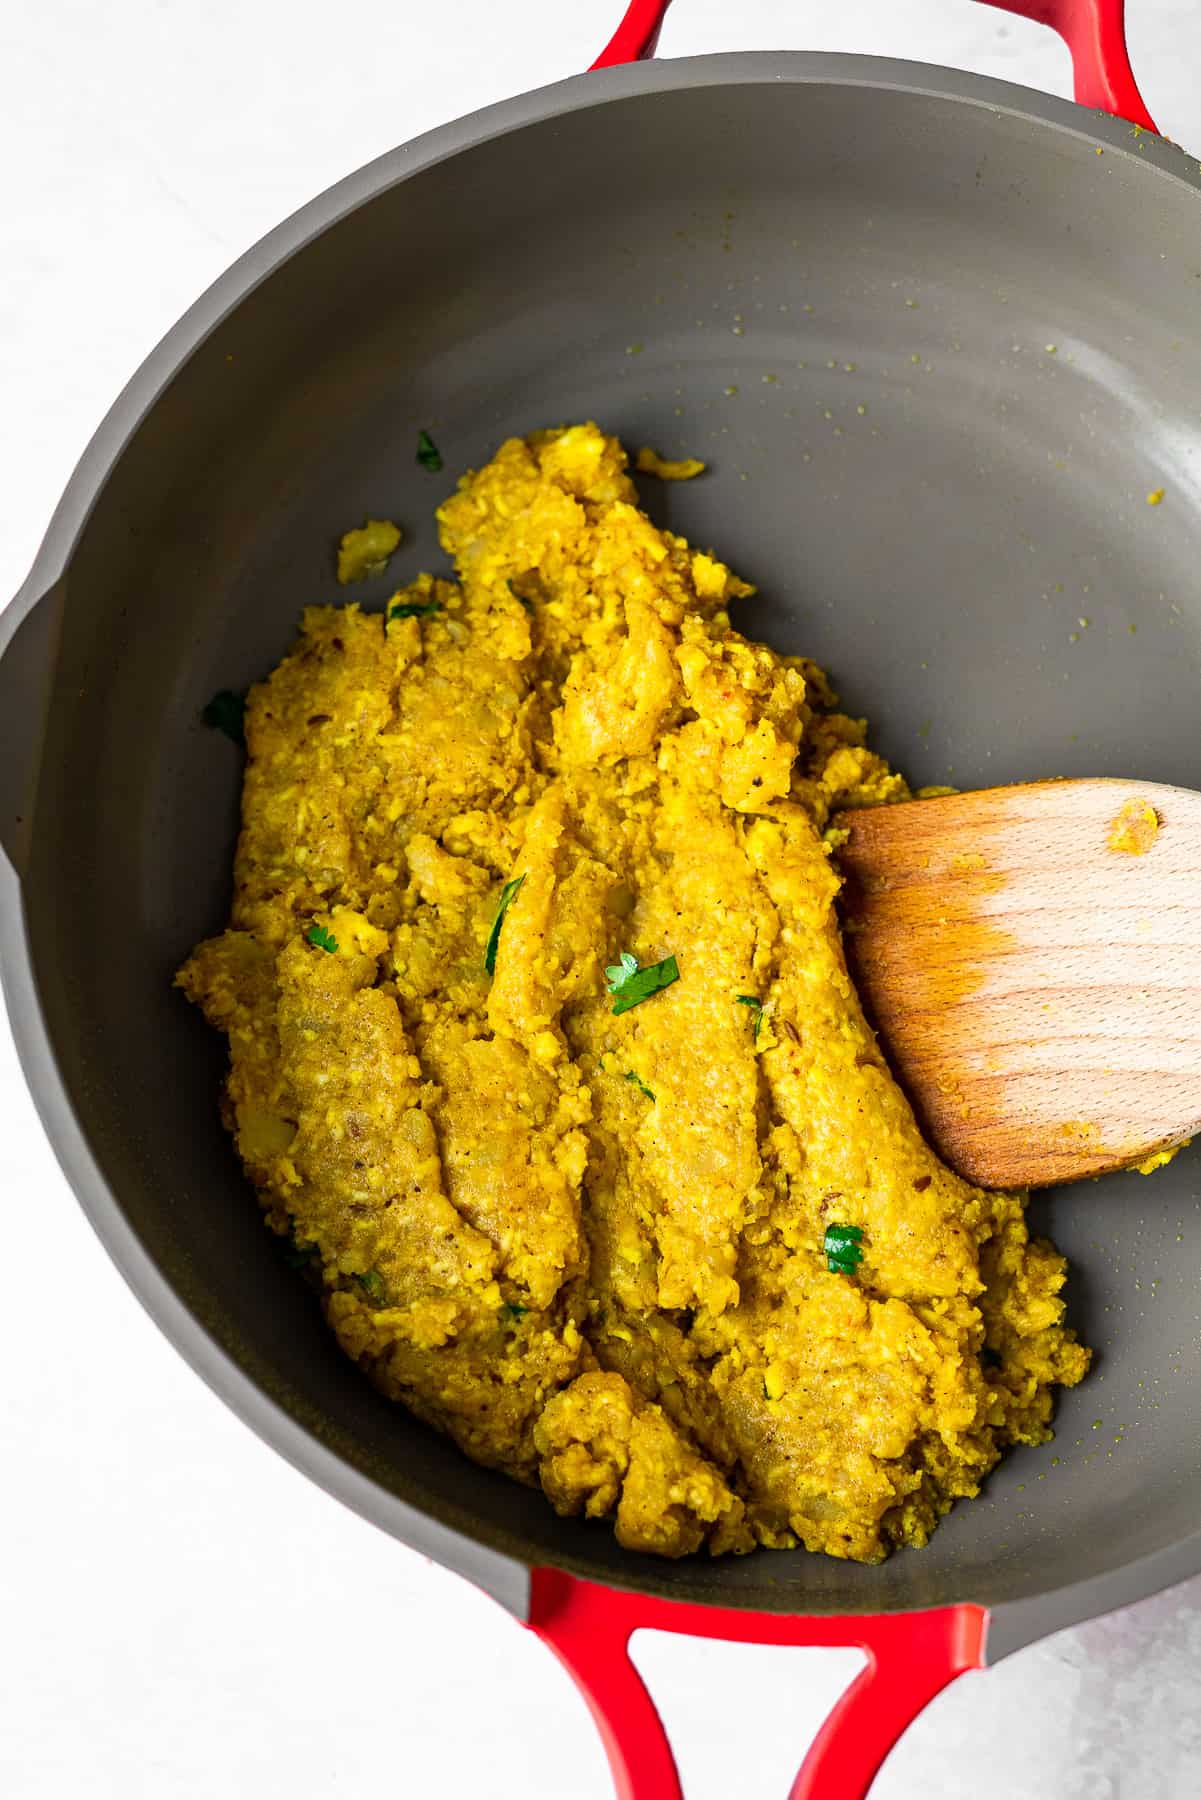
Step 4 - Transfer the mashed potatoes and cook them until they start to brown a little. At this point, add the rest of the spices and the shredded paneer. You can also add in peas or other veggies here. Mix it really well until everything is fully combined and the spices are evenly distributed.
Step 5 - Most of the water content should have evaporated by now, leaving a uniform texture. Remove the pan from heat, add in some chopped cilantro, and allow the mixture to fully cool so the potatoes release all of its steam. Be careful not to overcook the potato filling so that it isn't bone dry.
The filling is now done and we can get started on shaping and filling the samosas.
Part 2: How to make the dough, shape the samosa, and fill it
There are six total steps for making, filling, and sealing the samosa.
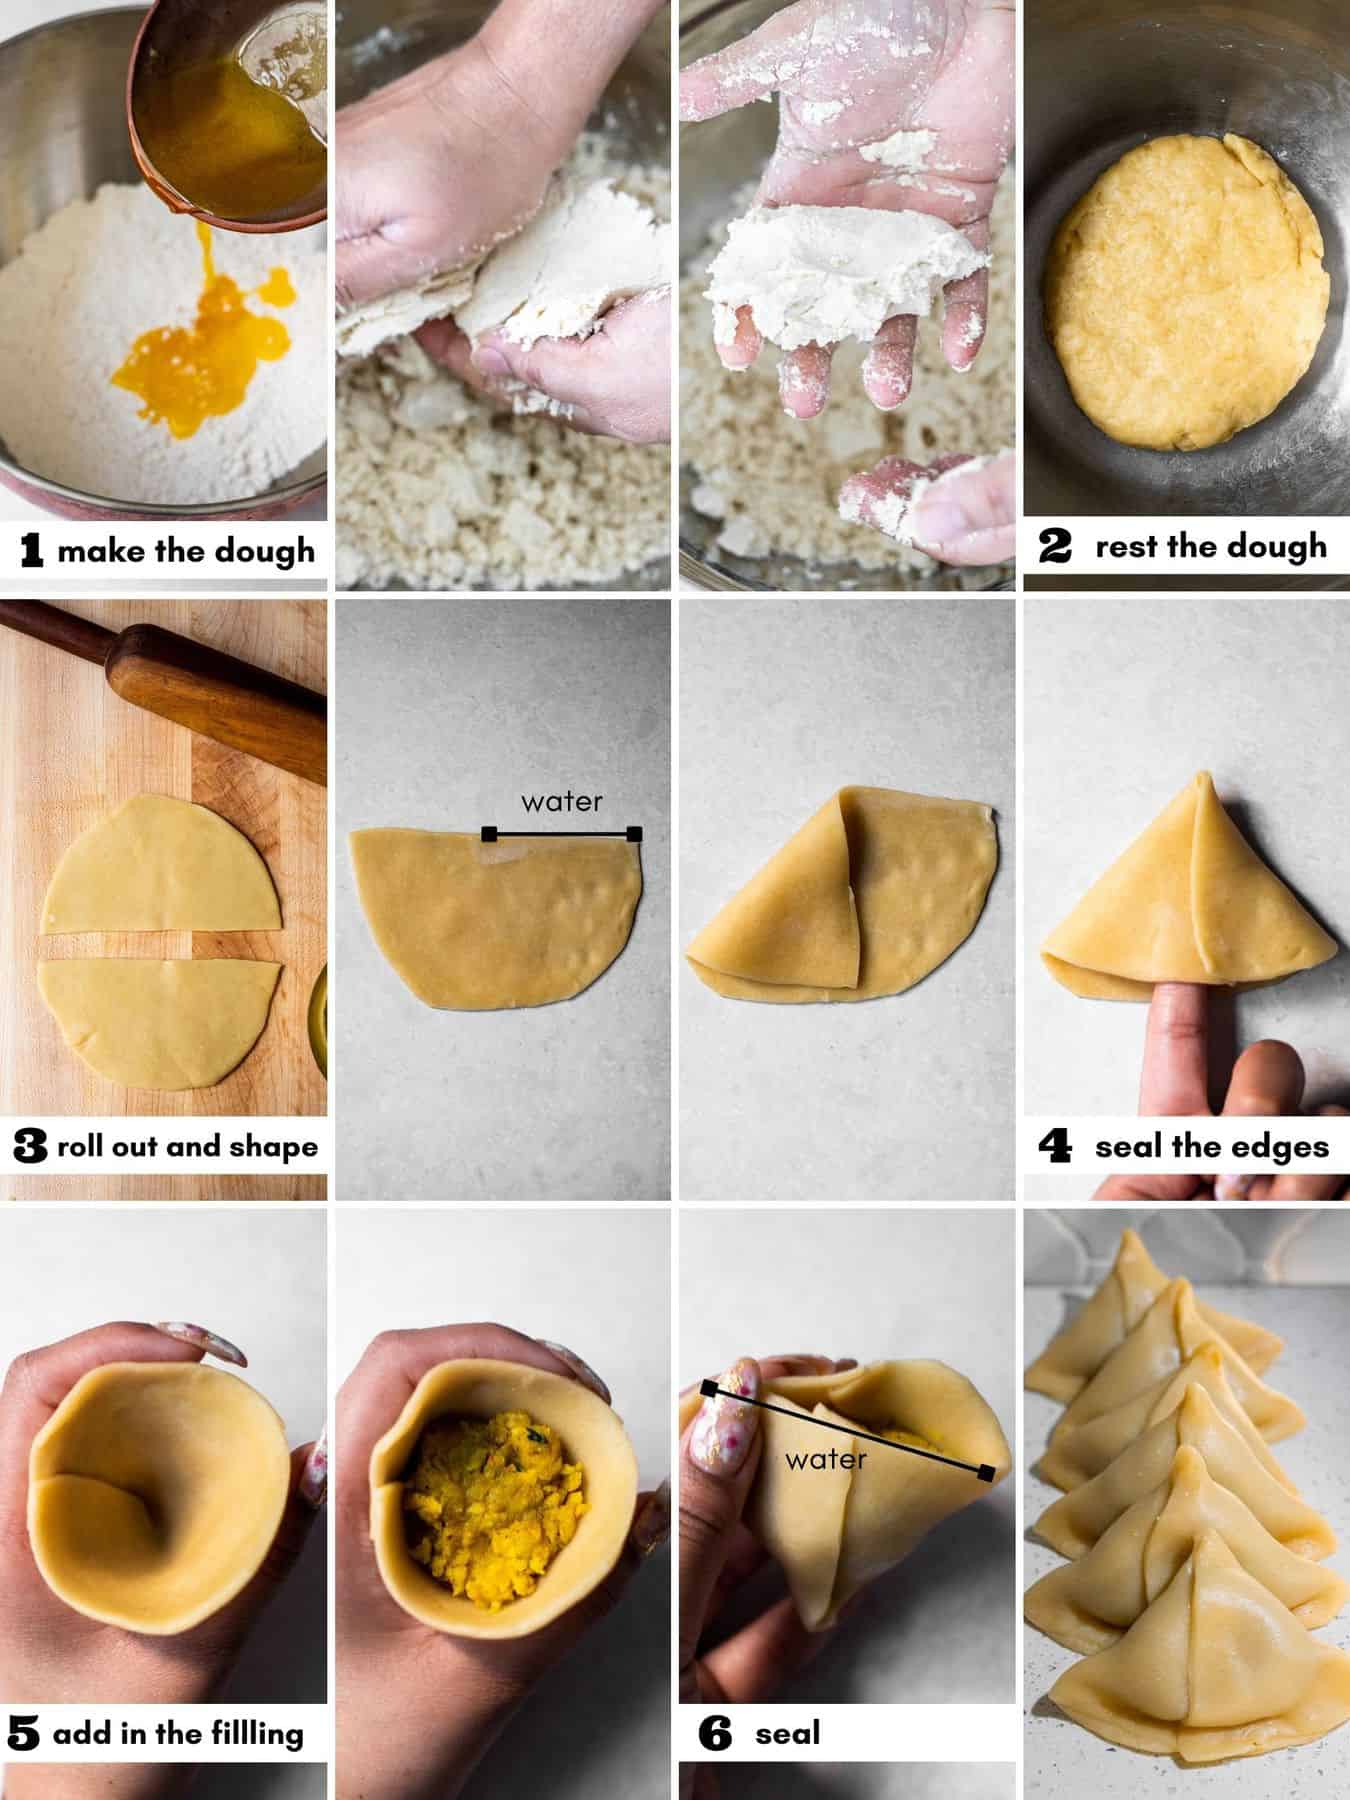
- Make the dough. Whisk together the flour and salt. I like to make a well in the middle of the flour and add the melted ghee all at once. Get dirty with your hands! Rub the ghee into the flour with your hands until you get coarse crumbs. The texture will be sandy and clump in your hand when you squeeze your fist. Slowly pour in the water and knead the dough for 5 minutes until it comes together.
- Rest the dough and portion. Cover and rest it for at least a minimum of 20 minutes. This is a good time to prep the filling. Once the dough has rested, knead the dough again for 5 minutes. The ghee hydrates the dough and it'll completely smooth out. It should leave indents if you press your finger to it. Separate the dough into 8 equal pieces, and work with one piece at a time while keeping the others covered to prevent drying.
- Roll out and shape. Roll the dough out into an oval. You'll want it to be as thin as possible without it becoming translucent. Also, make sure the edges are even thickness. Cut the oval into half. Dip your finger into water and spread it on the top right edge of the half oval. Fold the other side of the straight edge down towards the semi-circle, and then the edge with the water over it with about half an inch of overlap.
- Seal the edges. Slip your finger under the seam and pinch the seam together with your pointer and thumb. Make sure to pinch together the bottom of the cone as well. When frying, the dough will expand a bit and you want to ensure that none of the oil seeps into the filling.
- Add in the filling. Hold the cone in your hand like an ice cream cone. Add about a tablespoon of filling, gently pressing it down into the cone and smoothing the top of it. Leave about an inch at the top to seal it.
- Seal. Dip your finger into water and run it on the outside edge, directly across from the first seal. Create a pleat to fold in excess dough and prevent floppy dough on the outer corners. Then, brush the top edge of the semi-circle where the first seam is. Pinch together both sides to form another seal.
Repeat steps 3-6 with each piece of dough to form 16 samosas!
If you have leftover dough, you should definitely check out these dessert Pumpkin Pie Samosas!
Part 3: Deep Frying Samosas - The Trick to the Crispiest Samosas
Deep fried samosas are the BEST. Please deep fry them! Baking them or air frying is simply not the same.
My mother uses woks or kadhais to deep fry all of her Indian snacks and desserts. I use a dutch oven. Use whatever vessel makes sense for you, but make sure you use a neutral oil like vegetable or canola oil to fry the samosas.
If the oil is too hot, the samosas will expand and burst. You'll need to remove it, drain the oil from the samosa, and bake the samosas instead to prevent the filling from soaking up all the oil. If it's not hot enough, the samosa won't begin frying and soak up a ton of oil. You'll have greasy and soggy samosas.
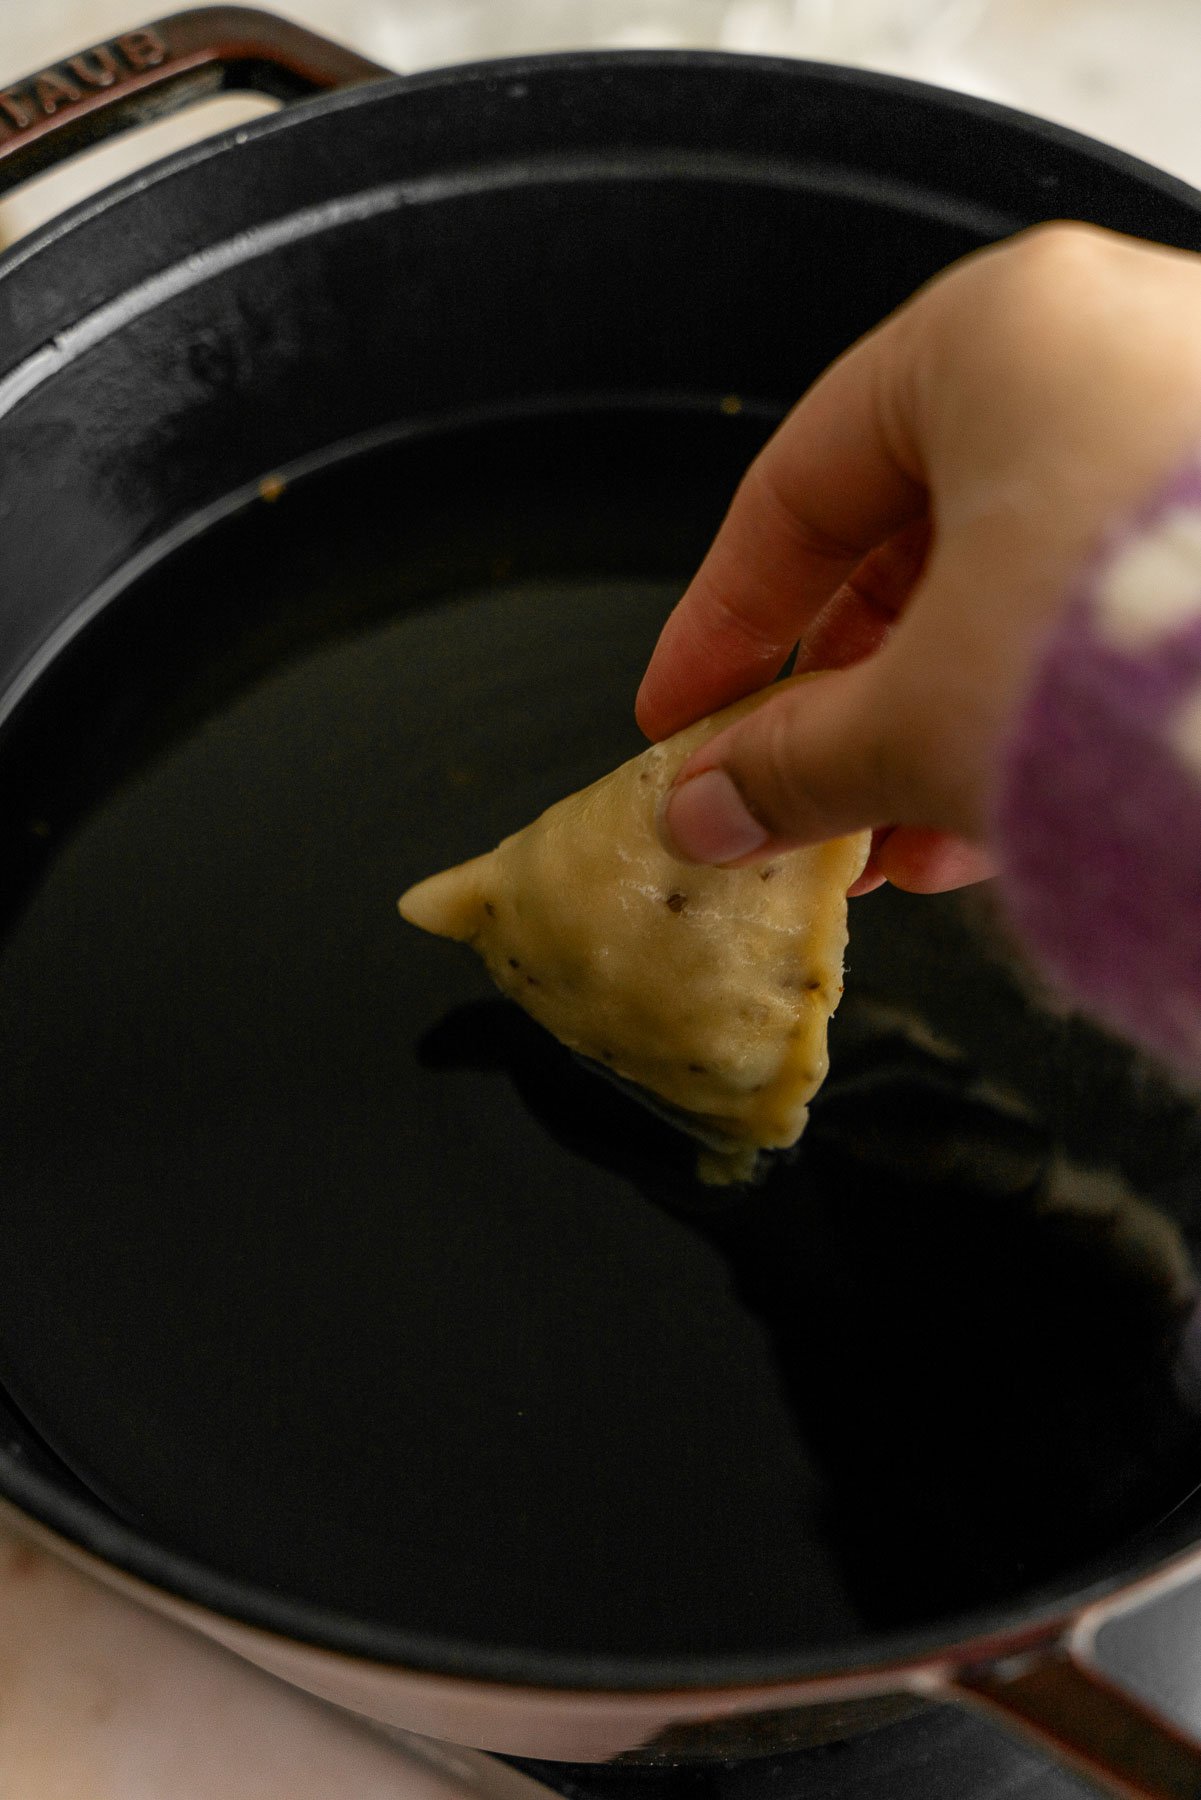
- Use a food temperature thermometer. The oil temperature should be around 320 - 330°F when the oil starts glimmering. If you don't have one, heat the oil on low to medium heat and test a piece of dough to see if it floats and bubbles vigorously. That's when you know it's hot enough.
- Fry 4-5 samosas at a time. Carefully drop the samosas into the hot oil, seam side down. There should be enough oil so that the samosas don't hit the bottom of the pot. Give them enough space.
- Flip several times. You'll begin to see the top of the samosa dough start to whiten. That's when they're ready to flip for the first time. The bottom side should be a pale golden color which seals the seams. After about 30 seconds to a minute, the other side will be a pale golden brown. Bring the heat up to medium, about 360°F. Flip the samosas again, and again and again until you get a golden brown color. They should be incredibly crispy at this point!
- Drain. I like to set a cooling rack over a baking sheet instead of using paper towels. This allows the oil to completely drain so the bottom doesn't suffocate and soak up any of the oil from the paper towel. It maintains the crispy-ness this way.
- Repeat with batches. Drop the temperature back down to a low to medium setting and fry another batch of samosas.
How to Serve Paneer Aloo Samosas
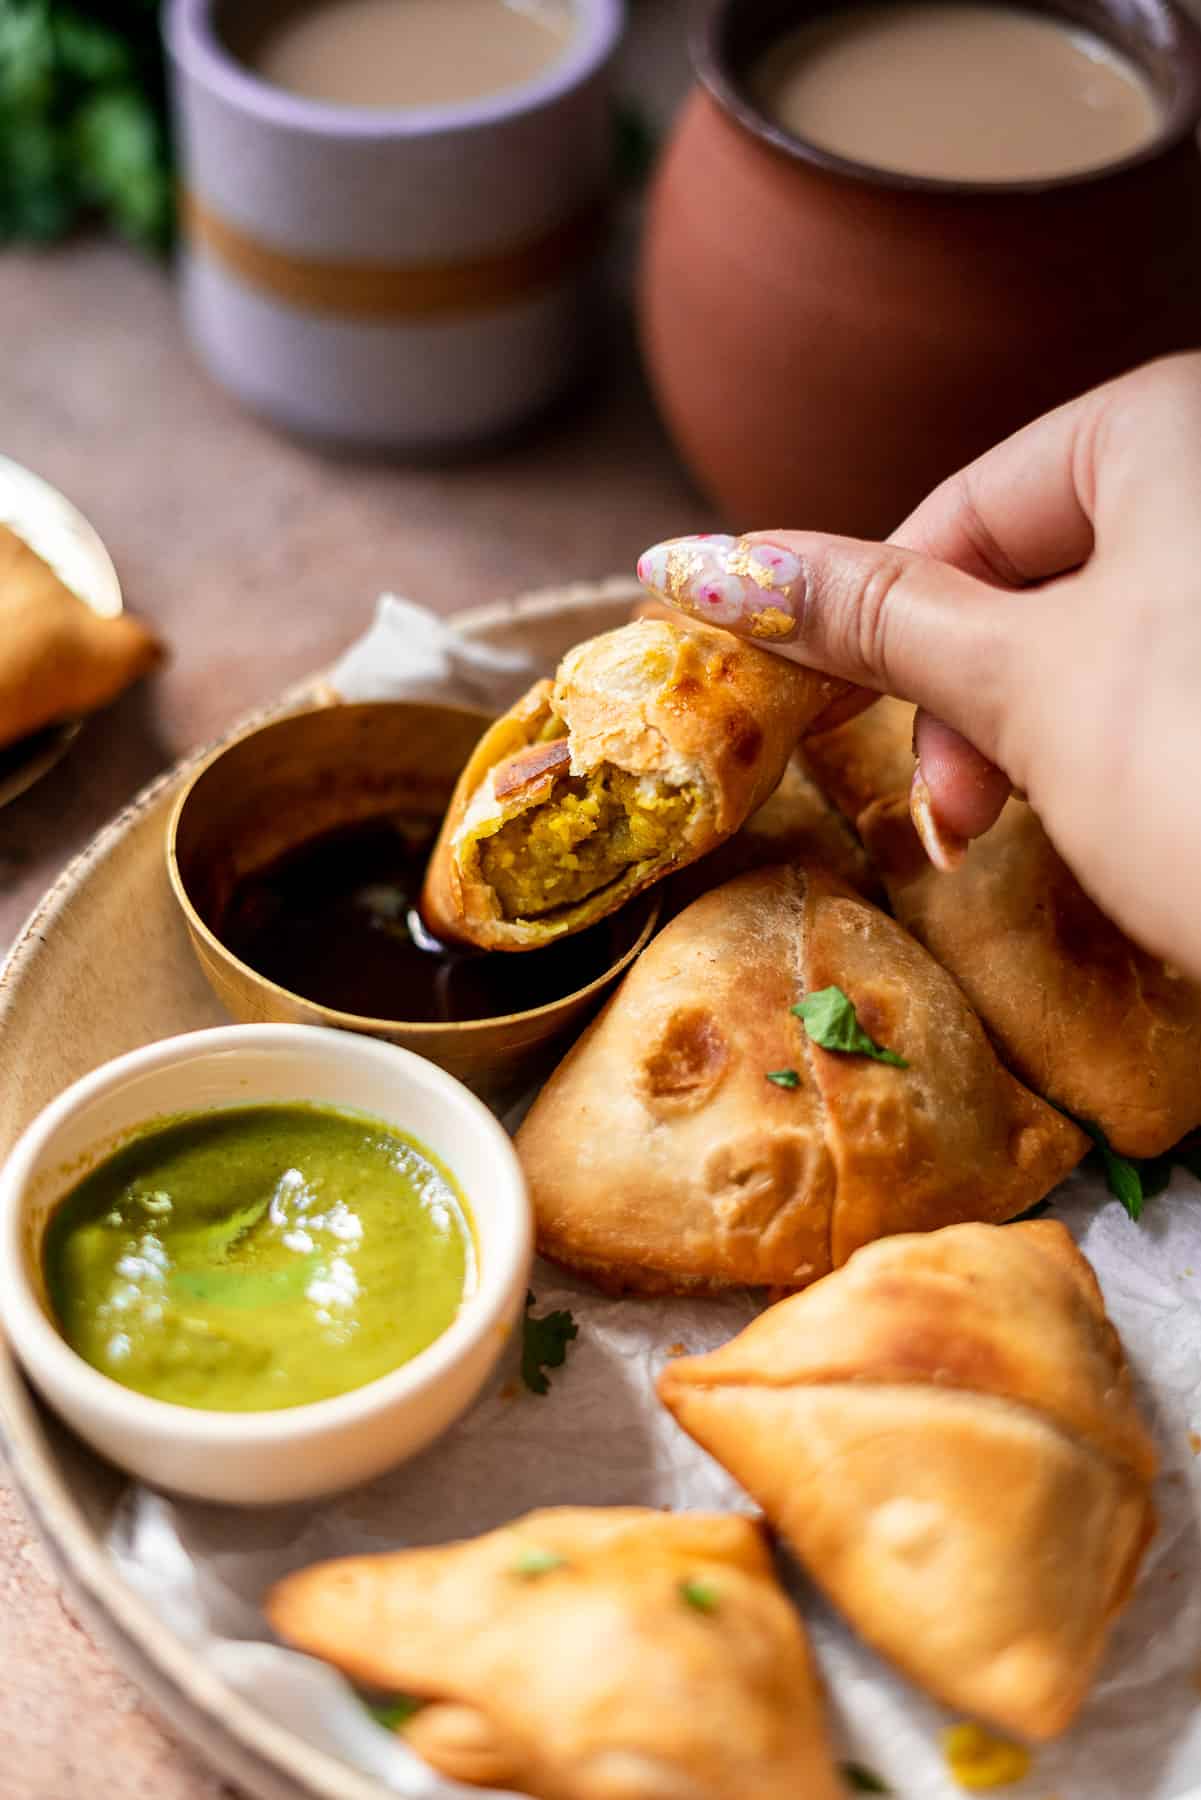
Samosas are addicting at pretty much any temperature. They're delicious when they're freshly fried while they're piping hot or served warm. You can even pull them out of the fridge for a little guilty pleasure midnight snack. I personally recommend letting them cool just a little bit and serving them with this Cilantro-Mint Chutney recipe and imli (tamarind) chutney with a sprinkle of chopped cilantro.
These perfect little hand-held vegetarian appetizers are typically served at weddings, events, and restaurants as a starter snack. It's usually served along with other snacks like chaats as well as a hot cup of chai. You can try it with this Peanut Chaat and a Mango Lassi.
If we have samosas that have been sitting around for a few days and are starting to get a little bit dry, we will smash them and add a little bit of dahi (yogurt), tamarind chutney, cilantro mint chutney, sev, pomegranate seeds, cilantro, and chaat masala to make Samosa Chaat.
Expert Tips and Tricks
Oh my goodness, there is nothing like having a desi mom yell at you while learning to make samosas. I've got all the tips and tricks for you that I've learned over time:
- Don't overcook the filling. The potatoes will continue to release a lot of steam as it cools down, so keep that in mind as you're sautéing.
- Take the time to rub the dough and ghee together. Really rub the ghee and flour together into each other with your hands!
- Don't overwork the dough. Only knead the dough until it comes together. You don't need a stand mixer with a dough hook.
- Rest the dough. If it doesn't have the time to rest, the dough will be tough to roll out.
- Roll out the dough evenly. Oh, you think it's a thin oval? It's not. Roll it out more. You don't want to the dough to be translucent and easy to rip, but it should be thin enough to see a bit of light through it. Roll it out evenly! The edges should be a thin as the middle is, otherwise you'll end up with edges that are plain thick fried dough.
- Don't use extra flour when rolling. This dough is hydrated just perfectly. It shouldn't require oil or flour to prevent sticking.
- Pleat the samosa before sealing. Directly across the middle seam, create a pleat to get the perfect shape.
- Redistribute the filling before frying. Sometimes the filling will make the samosa a wonky shape. Redistribute the filling so the samosa is a perfect cone with your fingers, but do it very carefully so the dough doesn't rip anywhere.
- Use enough oil. The samosas should float to the top of the oil and avoid hitting the bottom of the pot. If it hits the bottom, the crust will get super dark in that area.
- Fry on a low heat. The heat can't be so low that the samosa doesn't fry, otherwise it'll get soggy. If the heat is too high, the samosa will burst and the filling will fall out. The samosa dough will also bubble if it's too hot. Cook it low and slow for the first few minutes until it's a pale golden brown, then increase the heat.
- Make them with friends and family. Have one person rolling out the dough, another person folding, another filling and sealing, and another frying! It'll make the process go much faster.
Frequently Asked Questions
Samosas can be prepped in advance. There are two stages at which you can have them prepped - 1. Assemble the samosas but fry them later or 2. Fry them, refrigerate, and reheat in oven.
My preference is to assemble the samosas and freeze them until they're ready to fry. See the below instructions on freezing samosas for reference. If pre-fried, store them in an airtight container in the refrigerator for up to a week. When ready to consume, bake them in the oven for 10 minutes at 250°F. They will not be as crispy as freshly fried samosas.
Instead of using ghee in the dough, use vegetable oil. Instead of paneer, use peas or omit entirely and use double the potatoes and spices.
To bake samosas, brush oil all over the samosas. Heat the oven to 425°F and bake for 20-30 minutes, depending on the size of the samosas. They should be golden brown and crispy.
To air fry samosas, brush the samosas with oil. Put them in the air fryer at 350°F for 18-20 minutes until golden brown.
Yes, absolutely. Freeze the samosas in a single layer on a sheet tray first for at least two hours. Then move them into an airtight container and store for up to two months. Do not store them in a freezer bag. This makes them susceptible to cracking. If they're cracked, they cannot be fried. If you have cracked samosas, you can bake or air fry them. Once you're ready to consume them, fry them straight away in hot oil. No need to defrost. If you do leave them out, set them on a paper towel so that it can absorb the moisture.
You can add bell peppers, jalapeños, serrano peppers, peas, spinach, carrots, onions, or some curry leaves to these samosas!
No, you can't entirely substitute whole wheat flour instead of all-purpose flour for samosa dough. You can, however, use a small portion of whole wheat flour for the dough - 1 cup of all purpose flour and ½ cup of whole wheat flour. The whole wheat will retain too much moisture and oil and cause the crust to be soggy.
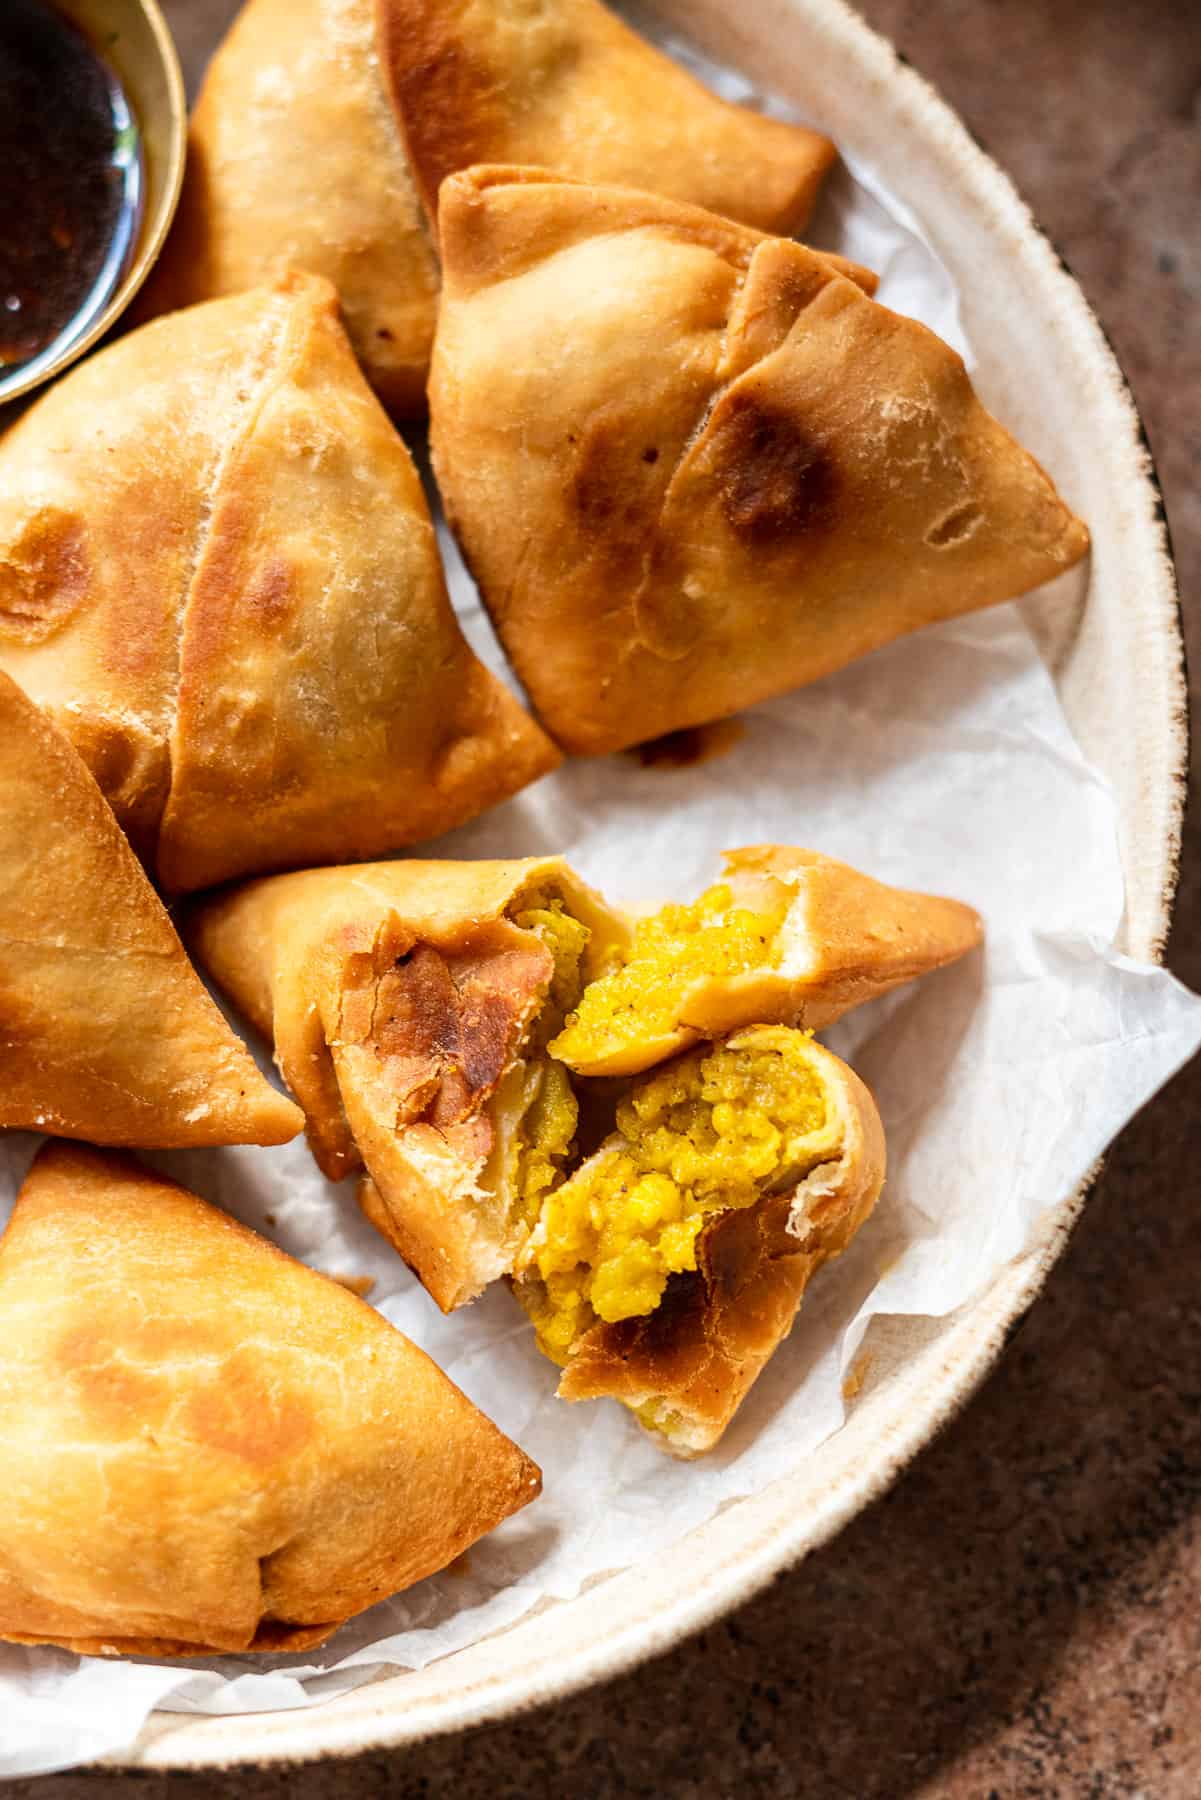
Okay, you've made it to the end. Your samosas are going to look so *chef's kiss*. I cannot wait to see them!
More Indian Appetizer Recipes to try
If you love paneer, try these Paneer Masala Cheesesteaks or Indian Afternoon Tea Sandwiches.
Recipe
Want to Save This Recipe?
Thinking about making this recipe? Enter your email and I'll send it straight to your inbox to save for later. Plus, get new recipe inspiration from me every week!
By submitting this form, you consent to receive emails from Masala and Chai.
Paneer Aloo Samosas
Equipment
Ingredients
- 11.5 oz yellow potatoes
- 4 oz paneer
- ¼ teaspoon cumin seeds
- ½ teaspoon salt
- ¼ teaspoon black pepper
- ¼ teaspoon ground coriander
- ⅓ teaspoon mango powder, (aamchur)
- ¼ teaspoon chaat masala
- ⅛ teaspoon garam masala
- ¼ teaspoon chili powder
- pinch of asafoetida
- ¼ teaspoon turmeric
Samosa Dough
- 1.5 cups all purpose flour
- ⅓ cup ghee, melted
- 1 teaspoon salt
- ⅓ cup water
Instructions
- Bring a pot full of water to a boil. Add in the potatoes and boil for 10-15 minutes, until the potatoes are tender. Drain the water out of the pot and peel the skin off of the potatoes. Mash the potatoes with a potato masher or a fork.
- While the potatoes are boiling, start putting the samosa dough together. In a medium sized mixing bowl, whisk together the all purpose flour and salt. Create a well in the middle and pour in the ghee. Slowly mix the flour into the ghee, and then use your hands to rub together the ghee with the flour. The texture should be sandy but the flour will clump if you squeeze your fist together.
- Add water while you knead the dough by hand. Continue to knead for 5-7 minutes until the dough comes together. Cover and rest the dough for a minimum of 20 minutes.
- Heat a frying pan on low to medium heat. Add a tablespoon of olive oil and add in the cumin seeds first. Roast them until they begin dancing in the pan, about a minute, and then add in the mashed potatoes. Cook the potatoes until they start to get golden. Add in the rest of the spices and the paneer and mix really well. Once the paneer and potato mixture have started to come together into a thick mixture, keeping in mind that it'll continue to release steam and dry out, remove it from heat. Allow the mixture to cool completely.
- Uncover the rested samosa dough and knead it for another five minutes until it's completely smooth. The dough will be very hydrated.
- Roll the dough out into a log and cut it into 8 equal sized pieces that are 45-50 grams each. Work with one piece at a time, and keep the other pieces covered in the bowl to prevent the dough from drying out.
- Roll the piece of dough in circular motions in your hand to form a little ball. Use a rolling pin to roll the dough out into an oval. The dough should be very thin, just before the point where it becomes translucent. Make sure the edges are equal thickness to the rest of the dough.
- Cut the oval in half. Brush water on to half of the length of the straight edge. Fold the edge without the water down towards the circular edge, and then the moistened edge over it to form a triangular shape. Seal the dough to form a cone. Place the cone in your hand and fill it with about a tablespoon of the paneer potato filling. Form a pleat directly on the top edge across from the first seam. Add more water into the inner semicircle on the side where the first seal is, and press the top edges together tightly to seal. Repeat with all the samosas.
- Heat a large pot with neutral oil on low to medium heat for frying. Once the temperature reaches 325°F, carefully drop in 4 samosas at a time. Fry on one side until the bottom is just starting to brown and the side facing you whitens, about 1 minute. Flip the samosa and fry again for 1 minute. Bring the heat up to a medium temperature. Continue to flip and fry on each side until the samosas are golden brown.
- Once the samosas are golden brown, set them on a cooling rack that's placed over a baking sheet to allow the excess oil to drip off. Lower the temperature in between batches. Serve the samosas in a platter with chutneys.
Notes
- Don't overcook the filling. The filling shouldn't be bone dry.
- Roll the dough out thin and evenly.
- Cook the samosa on a low heat at first until it's a pale golden brown on both sides, then turn up the heat to medium and flip the samosa a few times on each side until golden brown.
- To reheat: Set the oven to 250°F and bake them for 10-15 minutes.
- To freeze: Set the samosas in a single layer in a sheet tray and freeze for two hours. Transfer them to an airtight container and freeze for up to 2 months.


Crystal says
Samosas looked like too much work to make at home, but this step by step made it soooo much more approachable!
Shweta says
That was the goal! So glad!
Anish Thakkar says
Very intelligent.enjoyed preparing by above instructions.
Shweta says
Hi Anish! So glad you enjoyed them!